

Disk Image Evidence Acquisition
AIR can be used to acquire forensic evidence directly from full disk or volume images in the RAW (dd), EWF (E01/Ex01), VHD/X, or VMDK formats. Instead of manually mounting and parsing an image, AIR extracts the forensic artifacts and timeline events you select and makes them available for investigation in the console - the same evidence experience you get from a live asset.
Evidence is acquired using Plaso (log2timeline), the industry-standard forensic timeline engine. AIR runs Plaso against the disk image with the parsers, paths, and filters defined in your Acquisition Profile, reading the image without modifying it, and packages the extracted events as a case file that is imported into the console.
Two acquisition methods are available, so you can choose the best fit for where your disk image lives:
- Over the Network: AIR runs acquisition over the network and imports the result automatically. Best for disk images already added to AIR from an evidence repository.
- Off-Network: Fastest option for local disk images. Run acquisition locally on the machine that can access the disk image, then upload the result to AIR.
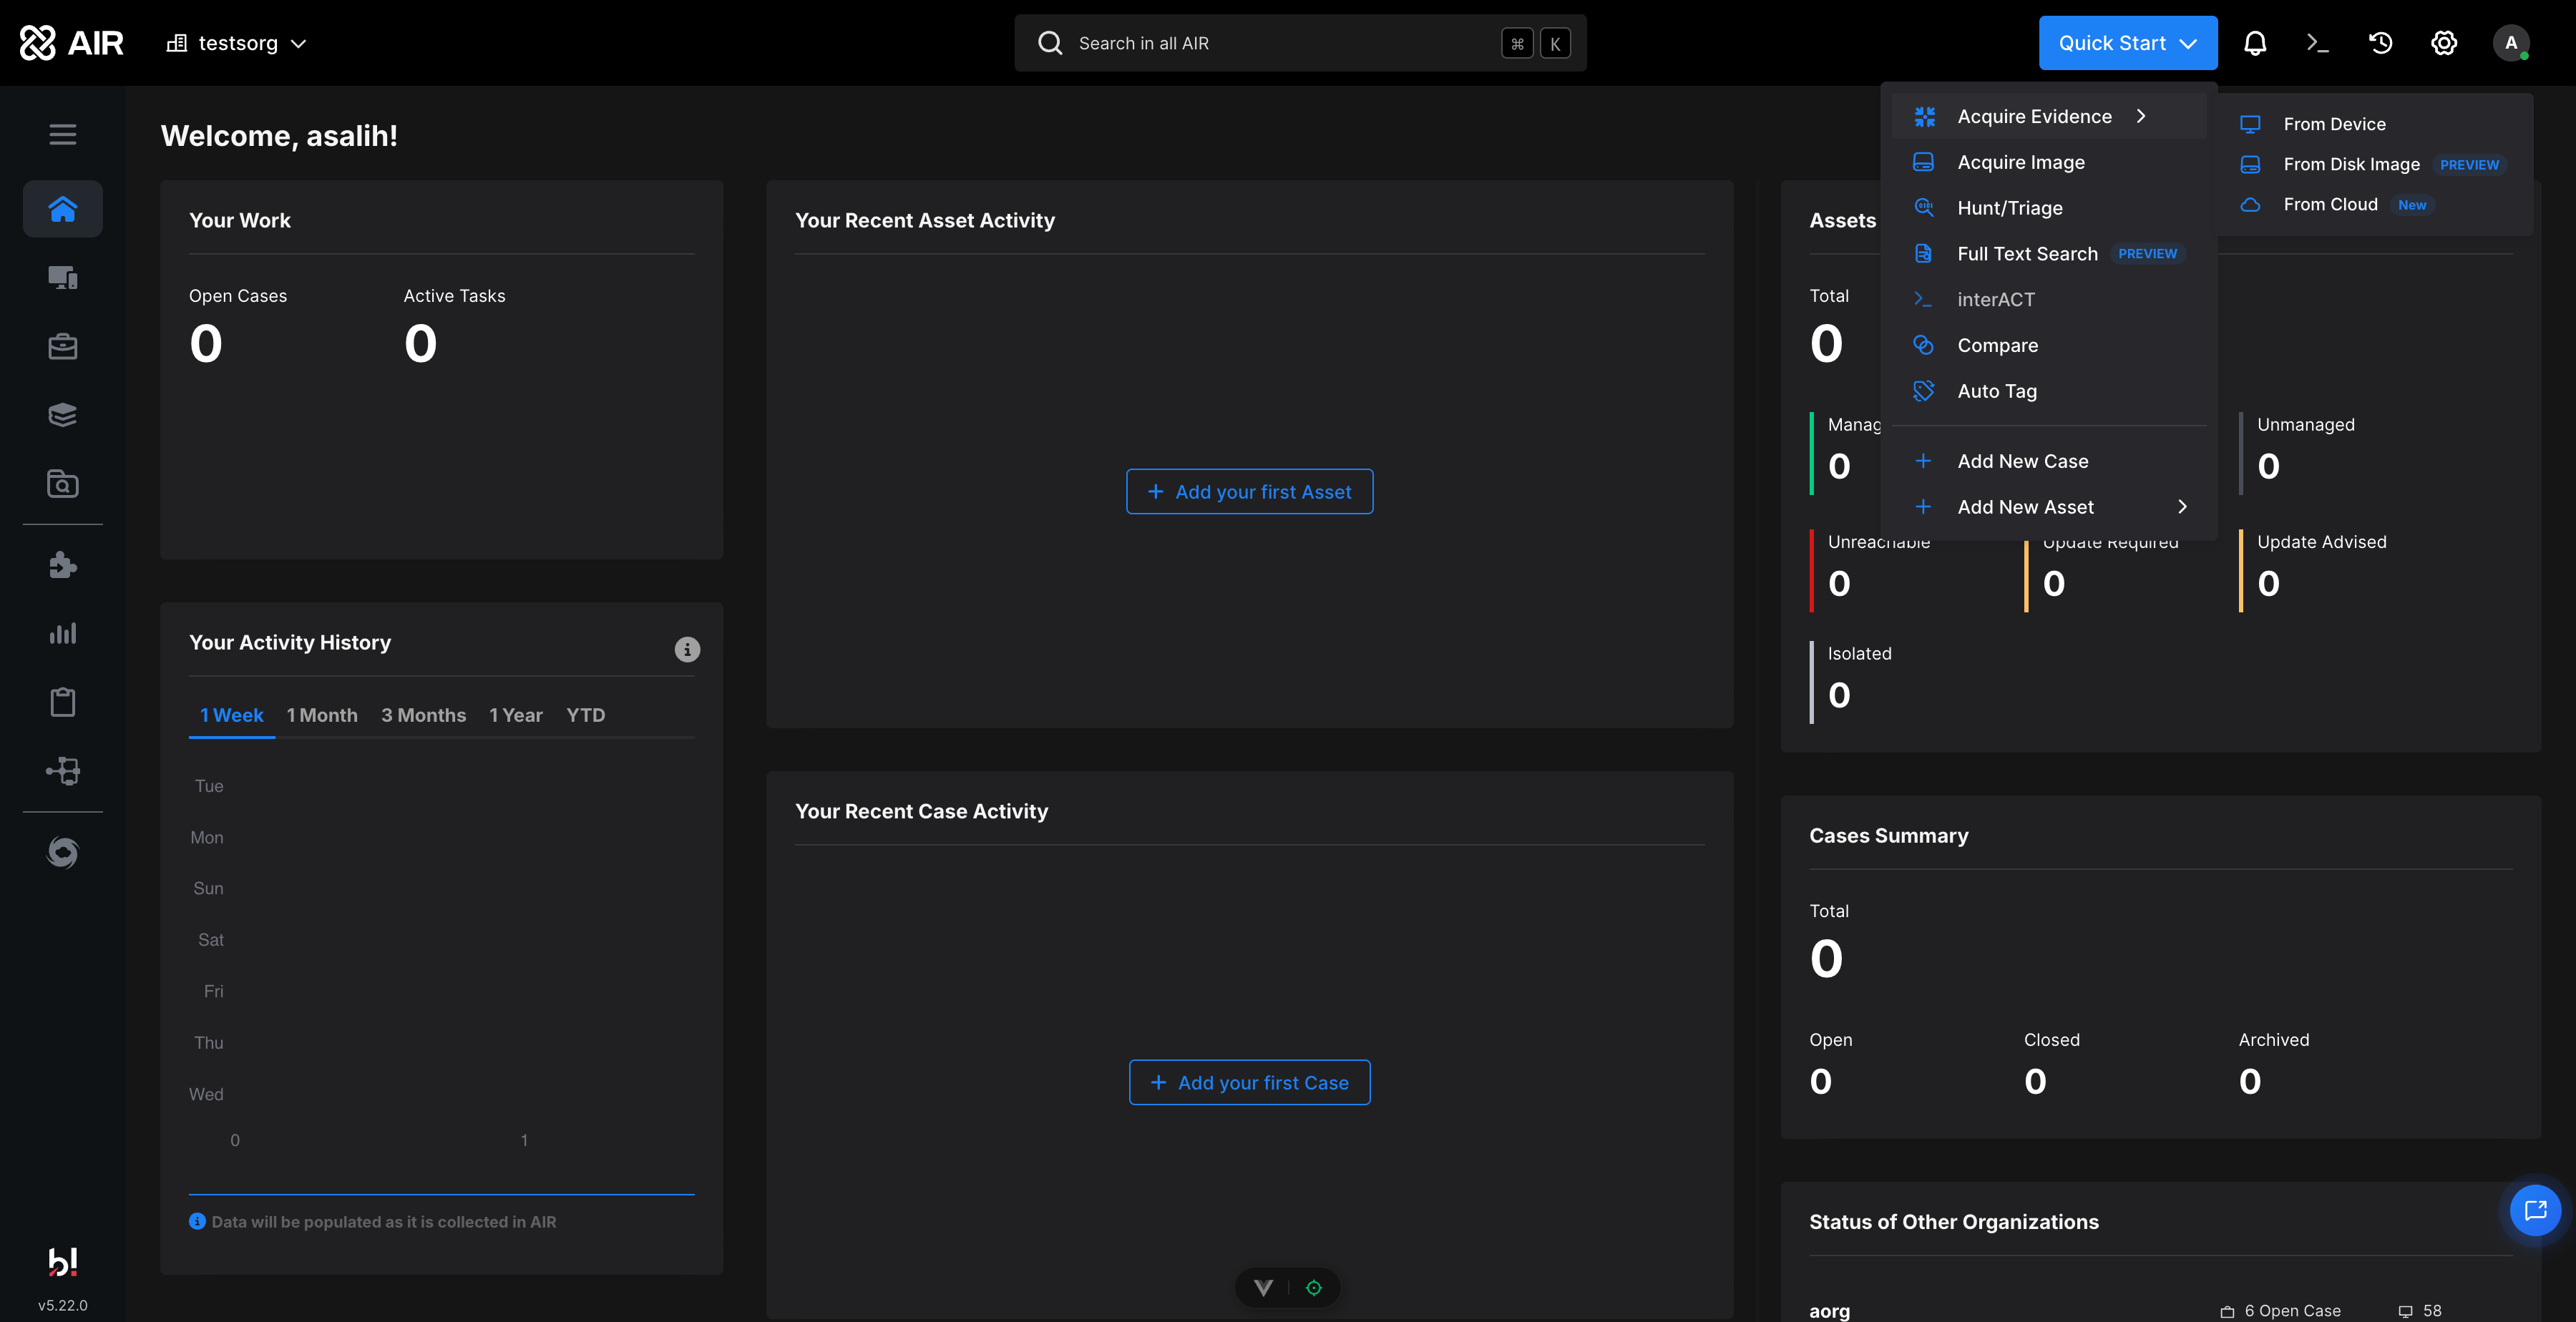
Disk Image Evidence Acquisition: Quick Start - Acquire Evidence - From Disk Image
Prerequisites
Section titled “Prerequisites”- For Over the Network acquisition, the disk image must first be added to AIR as a Disk Image asset from your SMB, SFTP, Amazon S3 bucket, Azure Blob storage, or Google Cloud Storage evidence repository; segmented files are supported - select the first segment of the image. See the File Explorer documentation for the three-step ‘Add New’ asset process.
- For Off-Network acquisition, no evidence repository is needed - you only need a machine (currently Windows 64-bit) that can access the disk image file locally.
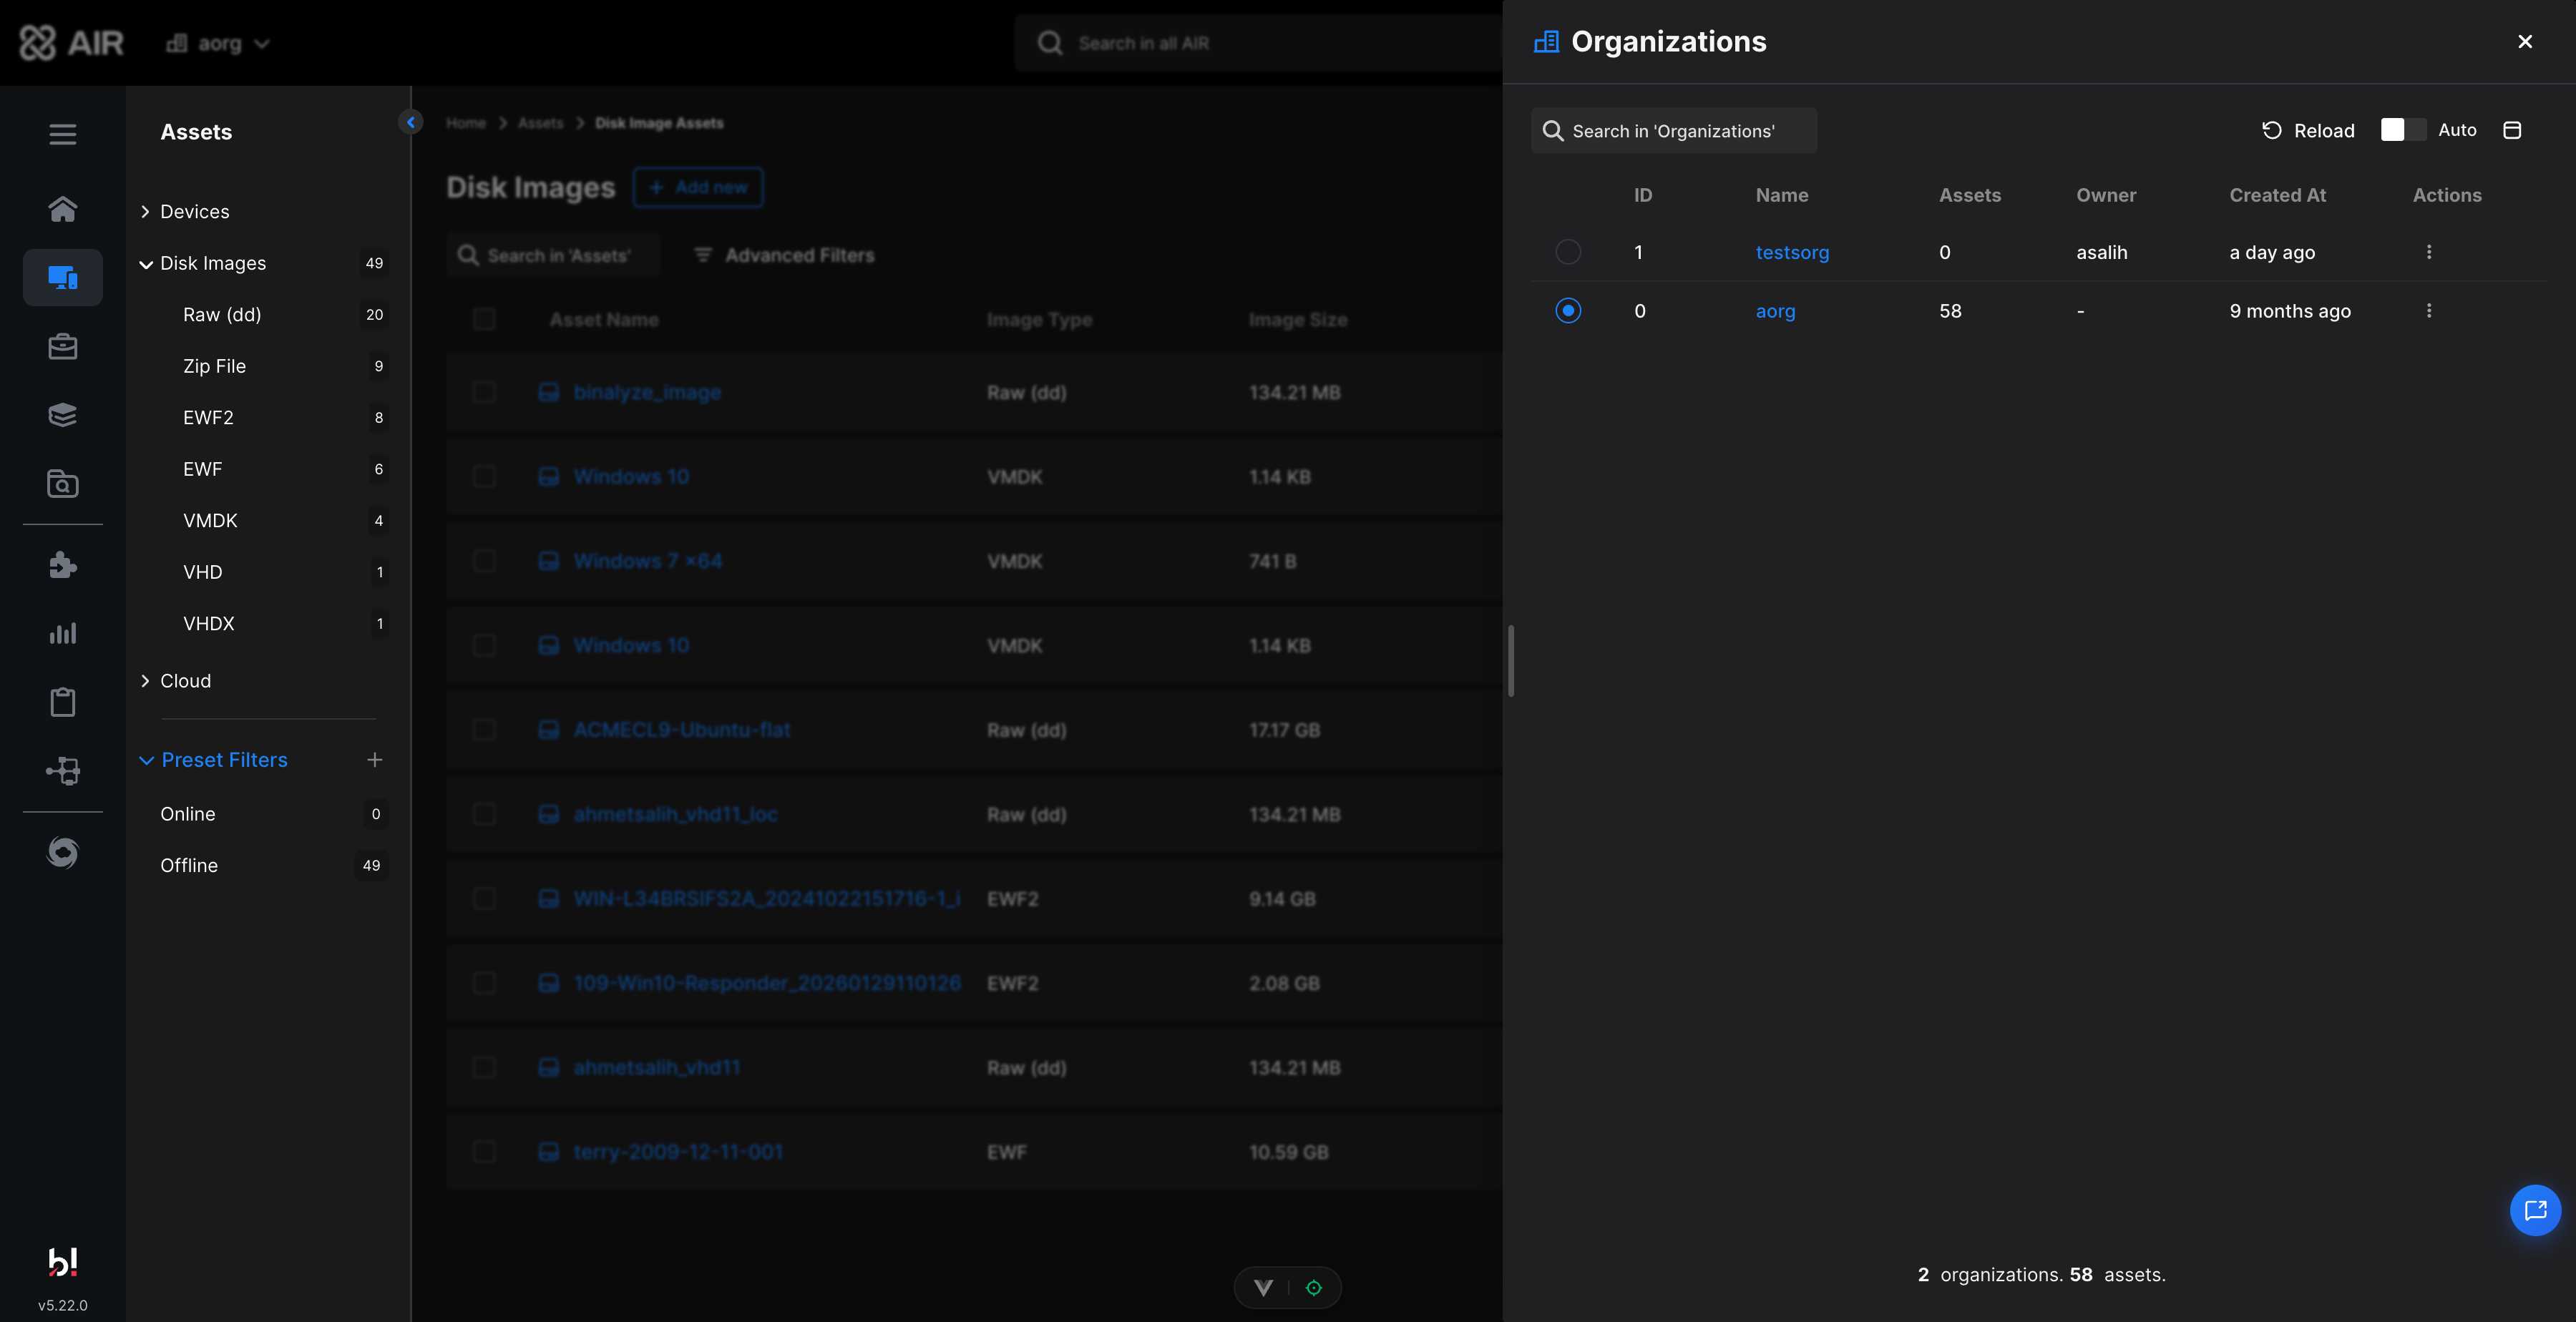
Disk Image Evidence Acquisition: Disk Image assets
Disk Image Acquisition Profiles
Section titled “Disk Image Acquisition Profiles”An Acquisition Profile defines what evidence is extracted from the disk image. AIR ships with two system profiles:
- Full: Parses all files on the image.
- Smart: A curated selection of forensically valuable paths and evidence types (over 1,900 paths and 219 evidence types), offering the best balance of speed and coverage.
You can also create your own profiles. From the Main Menu, select Libraries, then select Disk Image Acquisition Profiles from the Secondary Menu and click ’+ Add New’:
- Parse All Files: Process every file on the image instead of a filtered selection.
- Path or pattern: Enter a path or pattern to select files or folders you want to include. You can use wildcards to match multiple files or locations at once.
- Image Evidence Collection (Plaso): Select the evidence types (parsers) to run against the matched files.
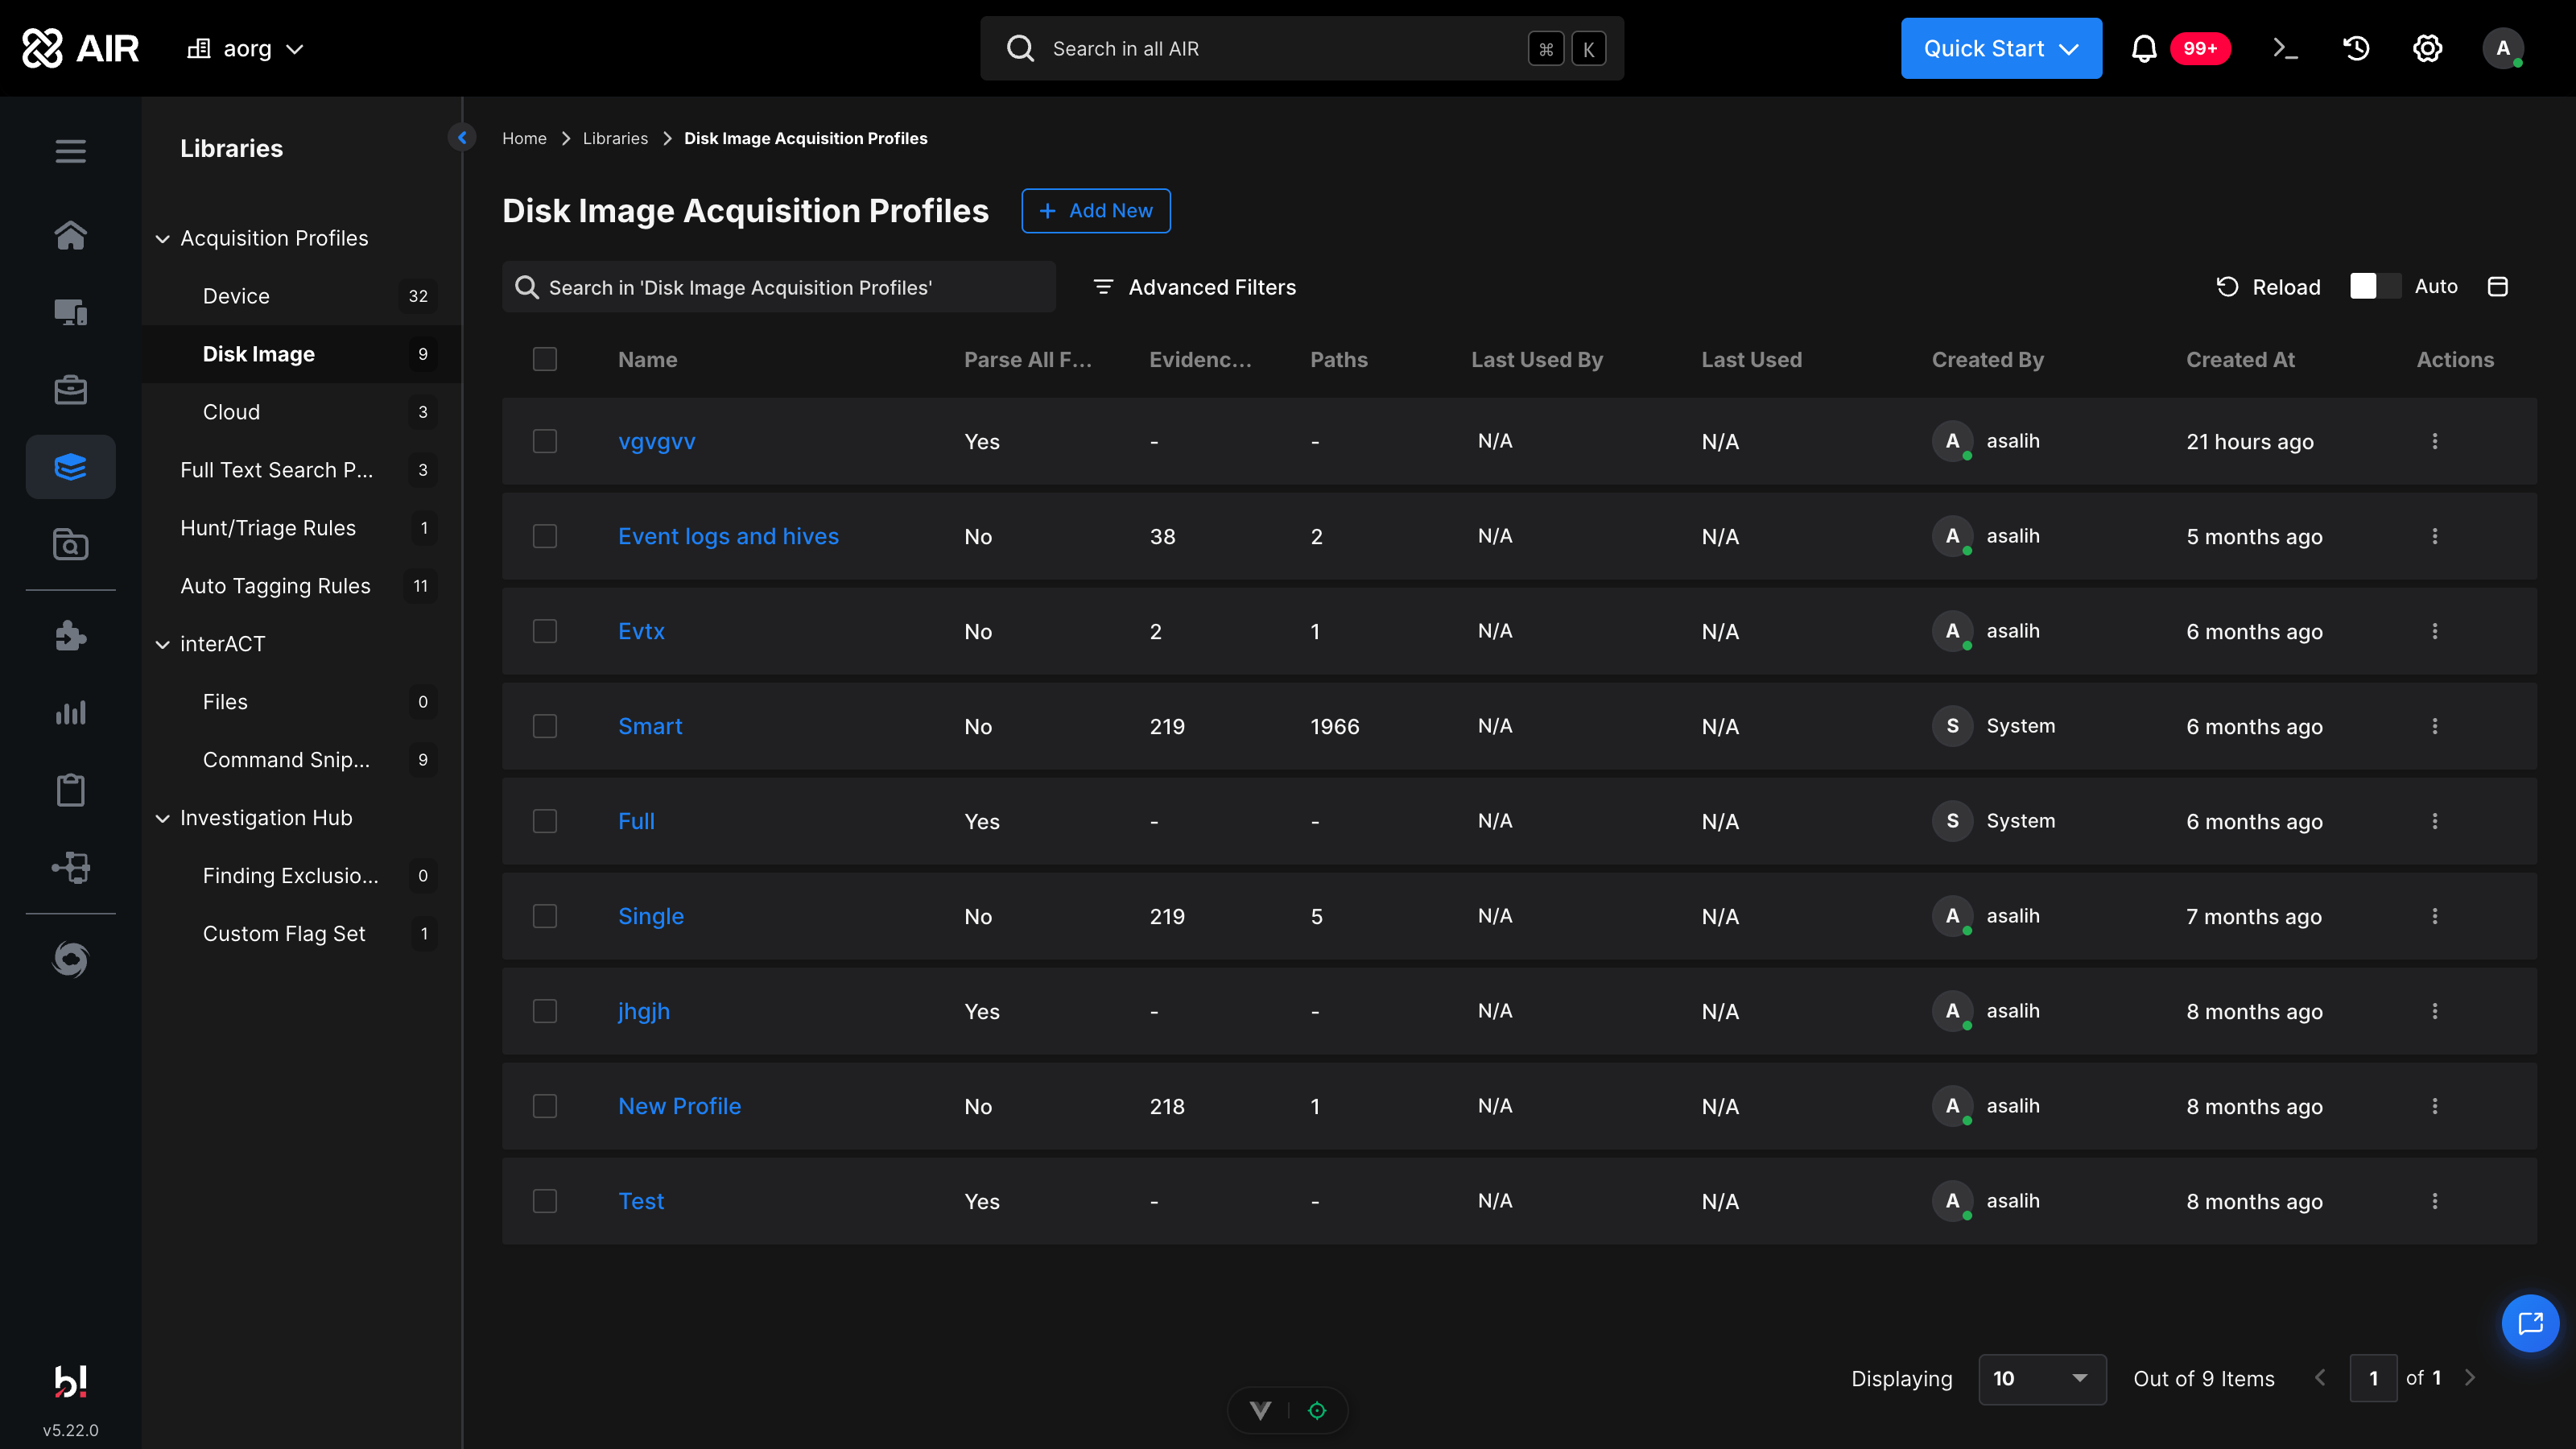
Disk Image Evidence Acquisition: Disk Image Acquisition Profiles library
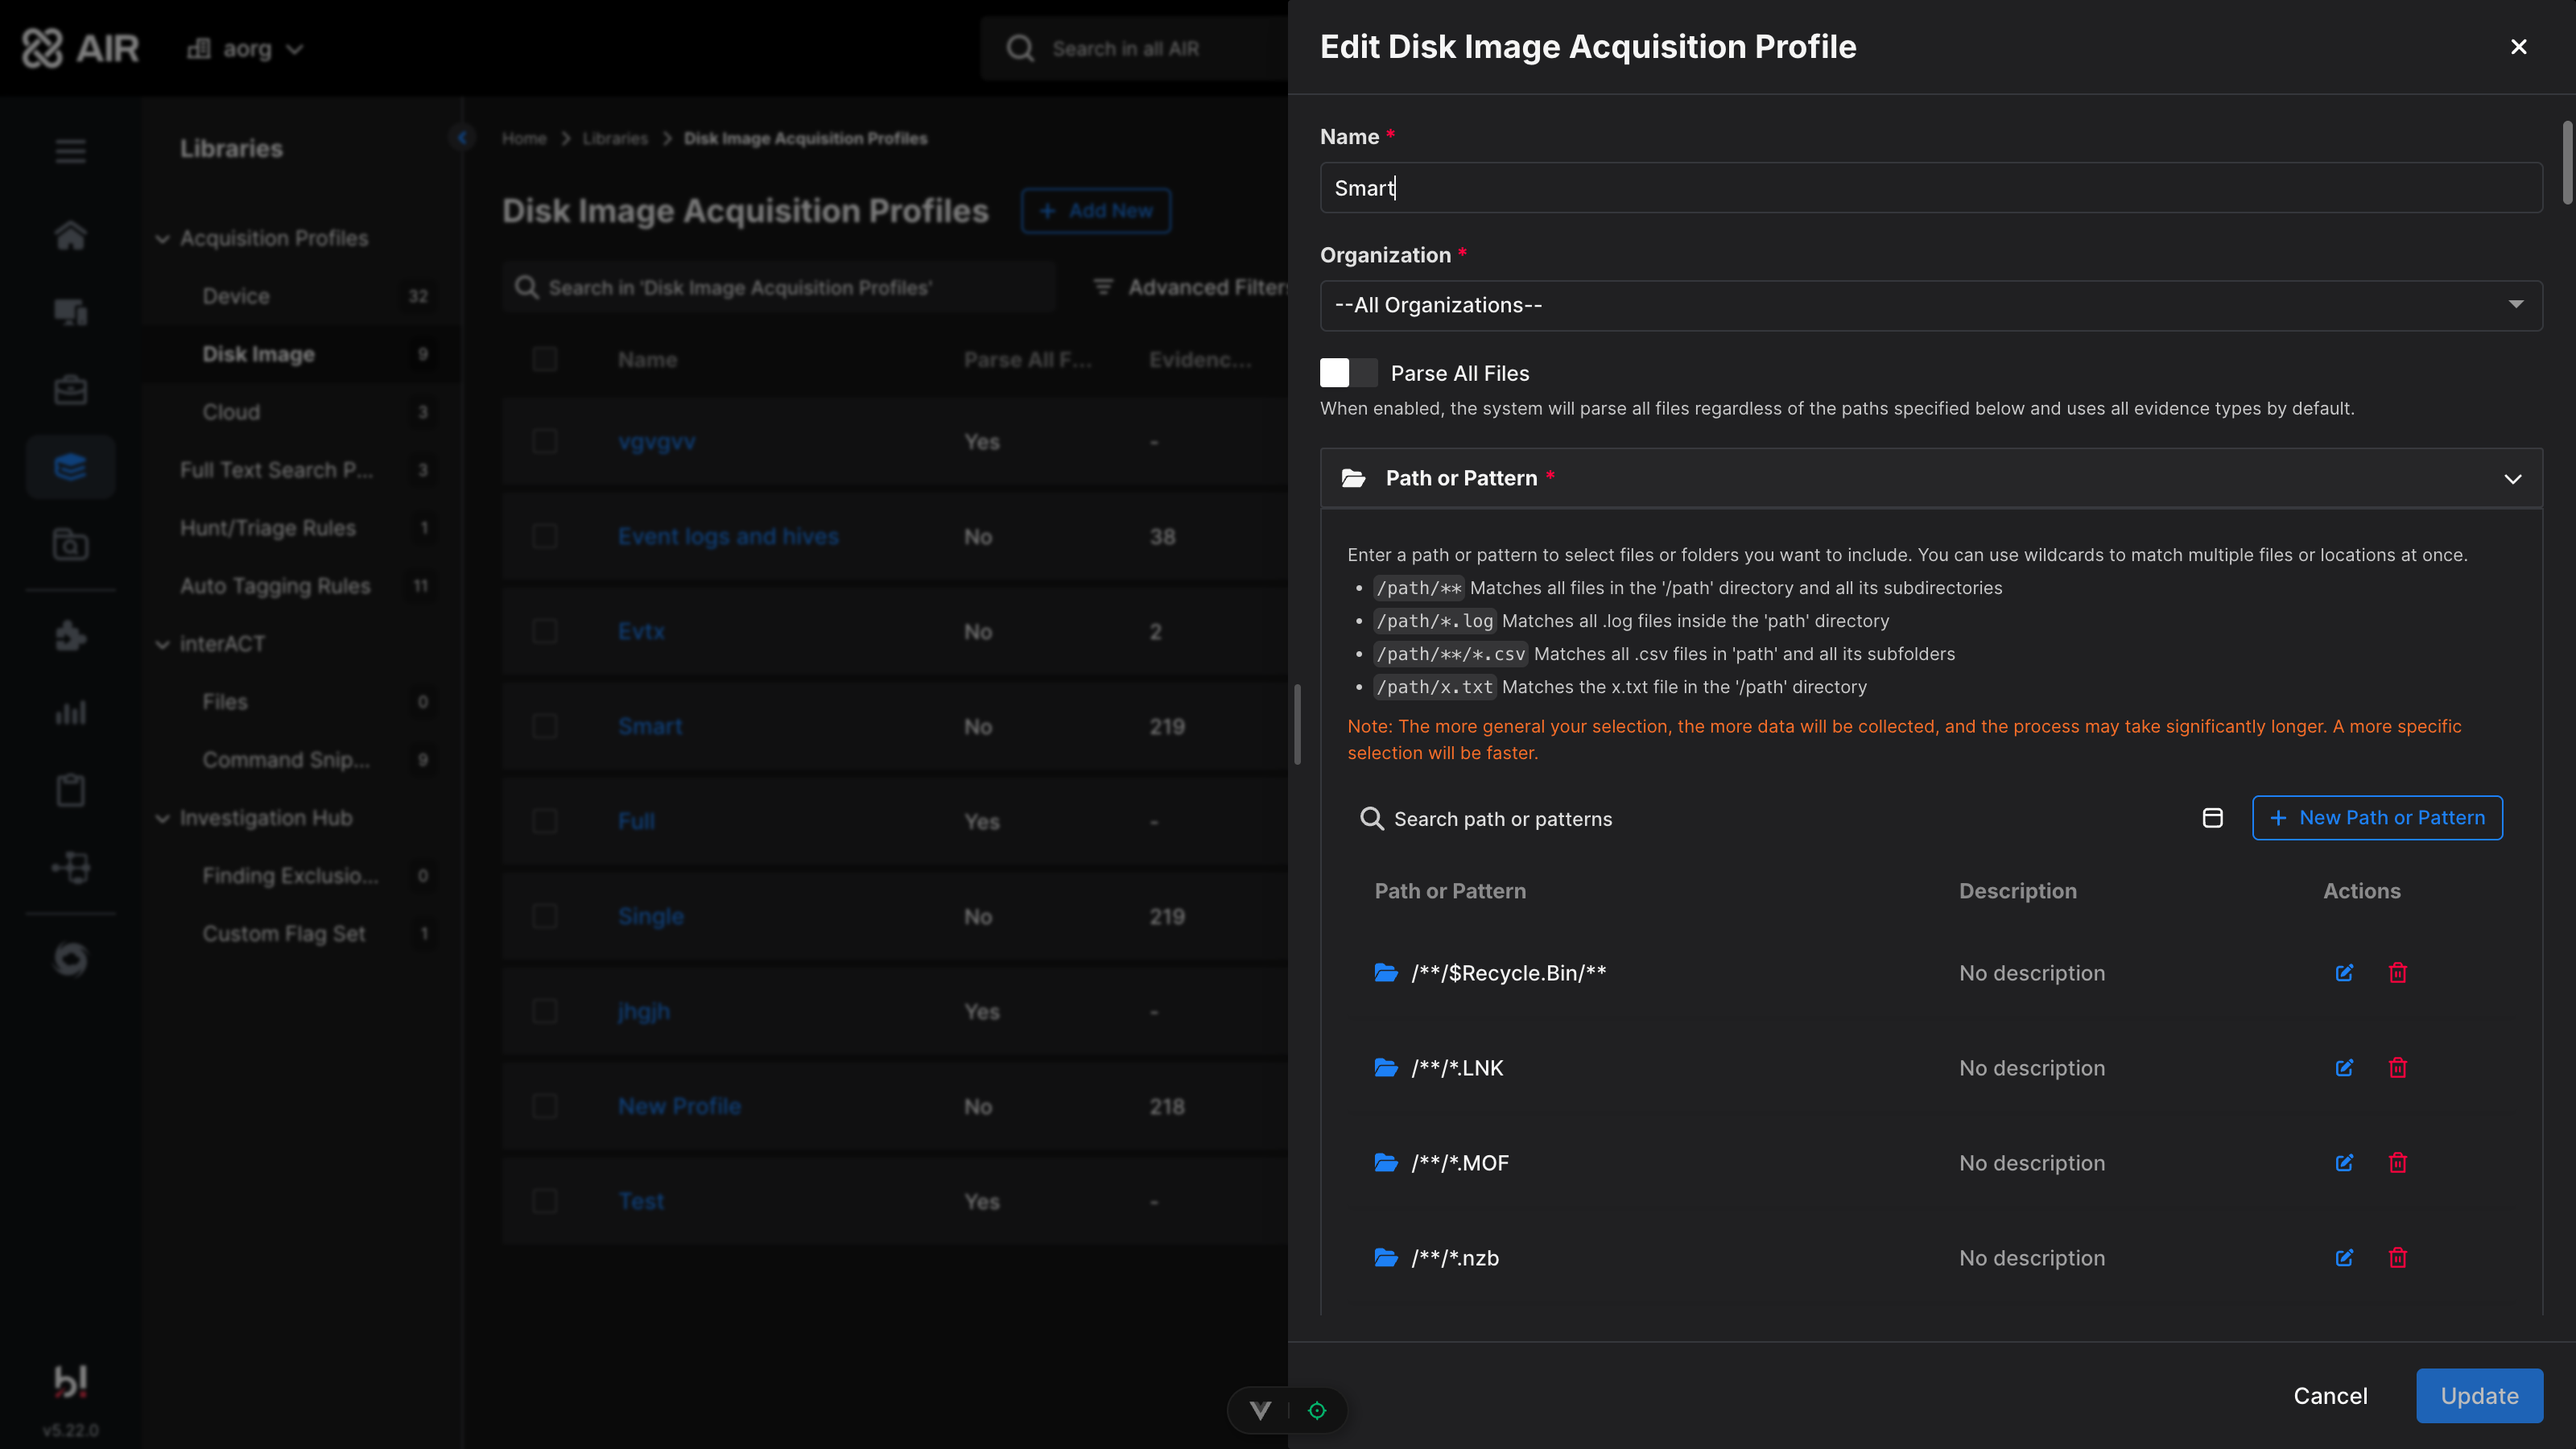
Disk Image Evidence Acquisition: Editing an Acquisition Profile
Acquiring Evidence Over the Network
Section titled “Acquiring Evidence Over the Network”With over-the-network acquisition, AIR connects to the evidence repository holding your disk image, runs the acquisition, and imports the result automatically - no manual steps after starting the task.
-
From the Quick Start menu, select Acquire Evidence, then From Disk Image. Alternatively, open a Disk Image asset and select More Actions > Acquire Evidence > Over the Network, or select multiple images from the Disk Images table and use the bulk Acquire Evidence action:
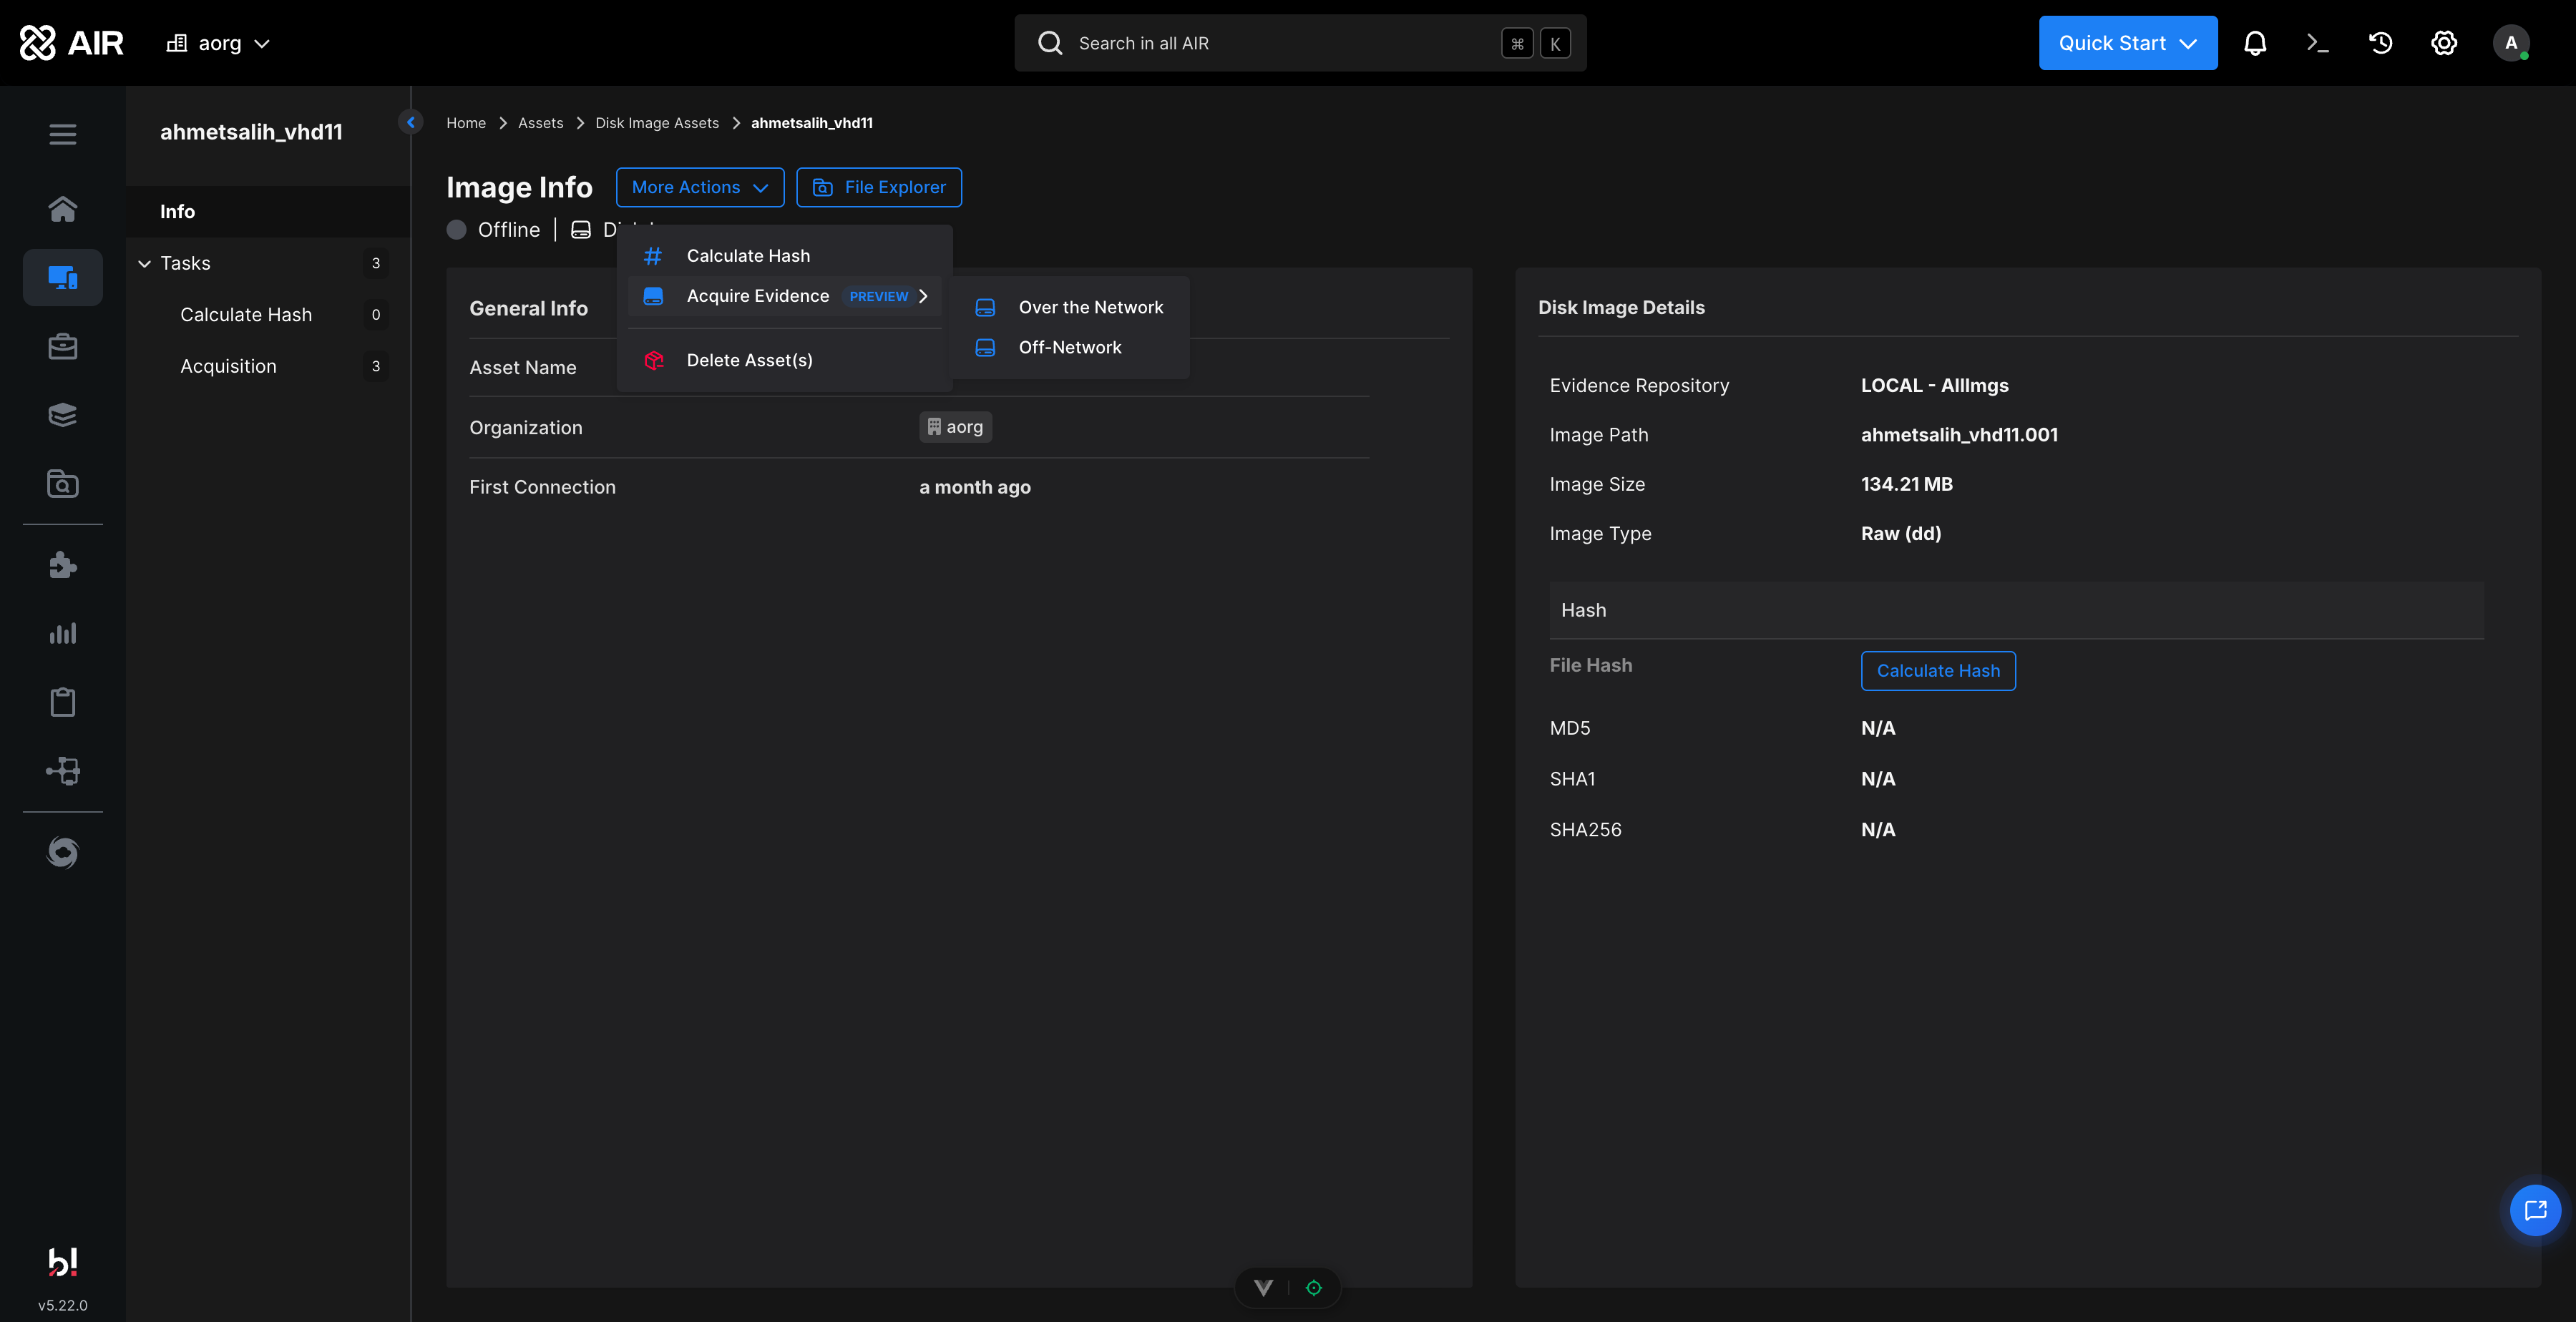
Disk Image Evidence Acquisition: Acquire Evidence from a Disk Image asset
-
In the Acquisition Method step, select Over the Network and choose one or more Disk Image assets from the Asset Selection table, then click Next:
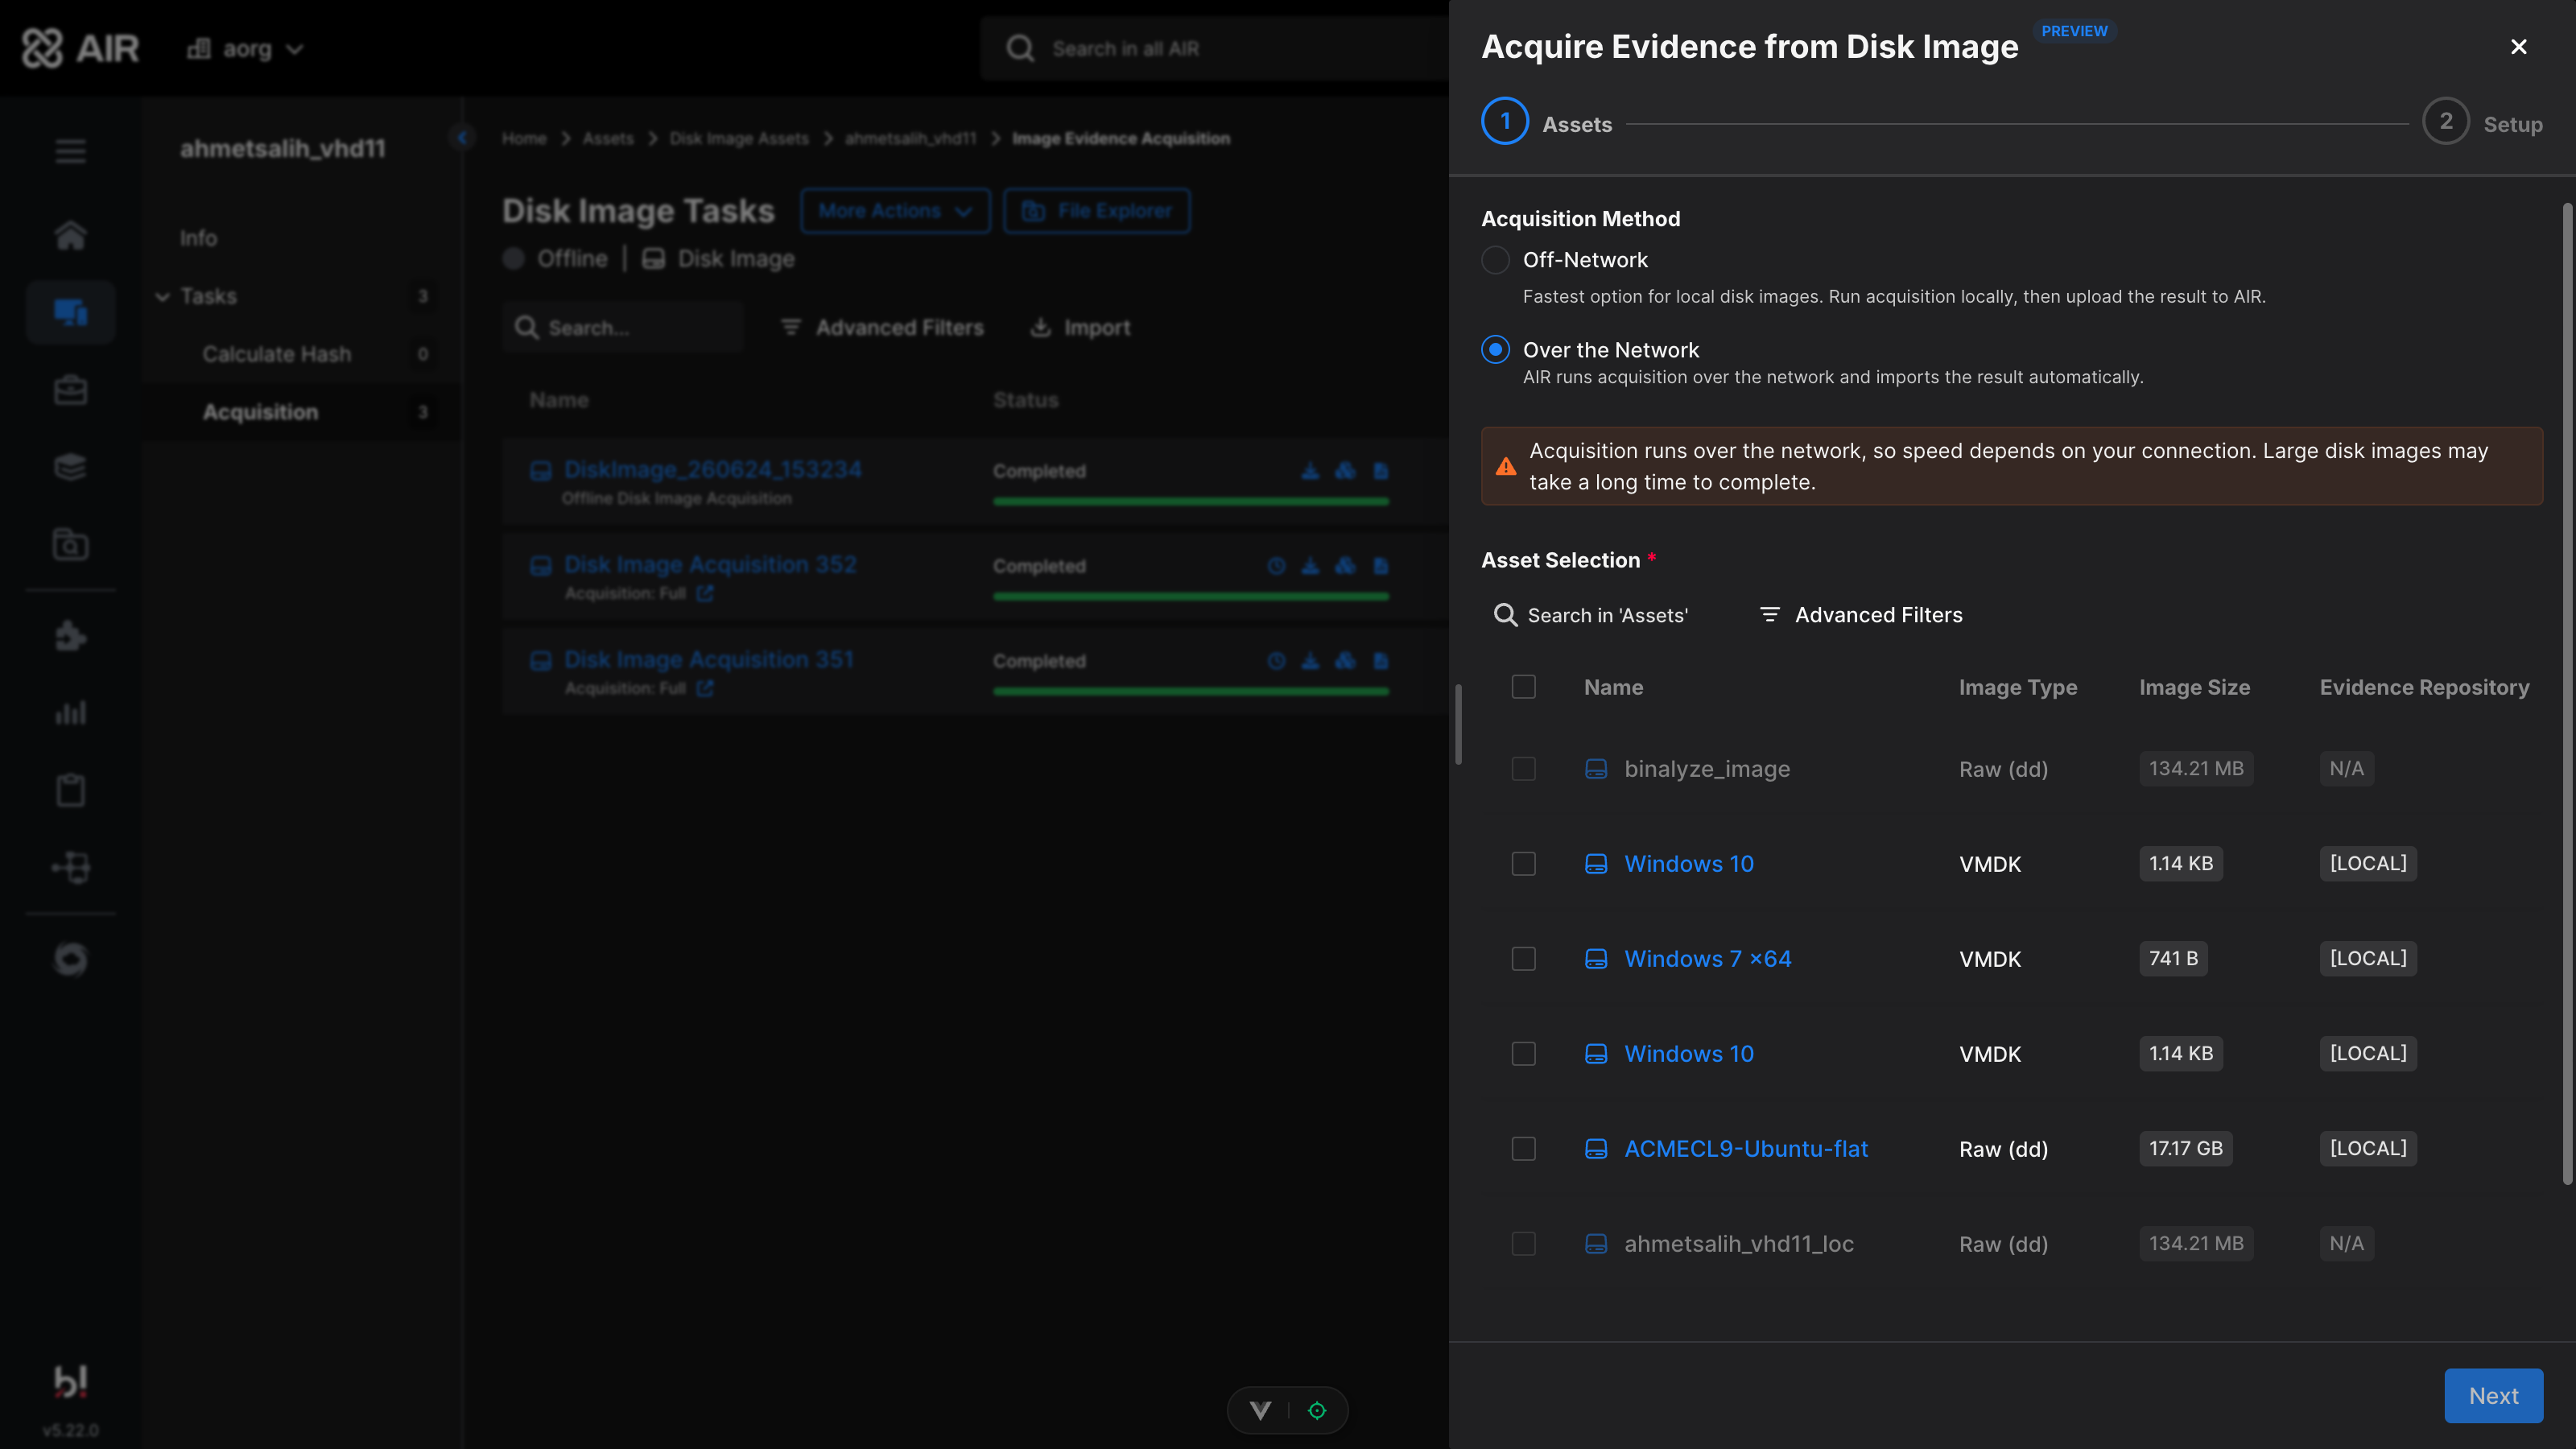
Disk Image Evidence Acquisition: Select assets for over-the-network acquisition
-
In the Setup step, configure the task and click Start:
- Task Name: Leave empty to auto-generate.
- Case: Optionally associate the acquisition with a case.
- Acquisition Profile: Select Full, Smart, or one of your custom profiles.
- Evidence Collection Period: Select the time range for evidence collected from the disk image.
- File Limits: Select which files to include by Created, Accessed, or Modified date (File Dates Range), and skip files larger than the Max File Size (250 MiB by default).
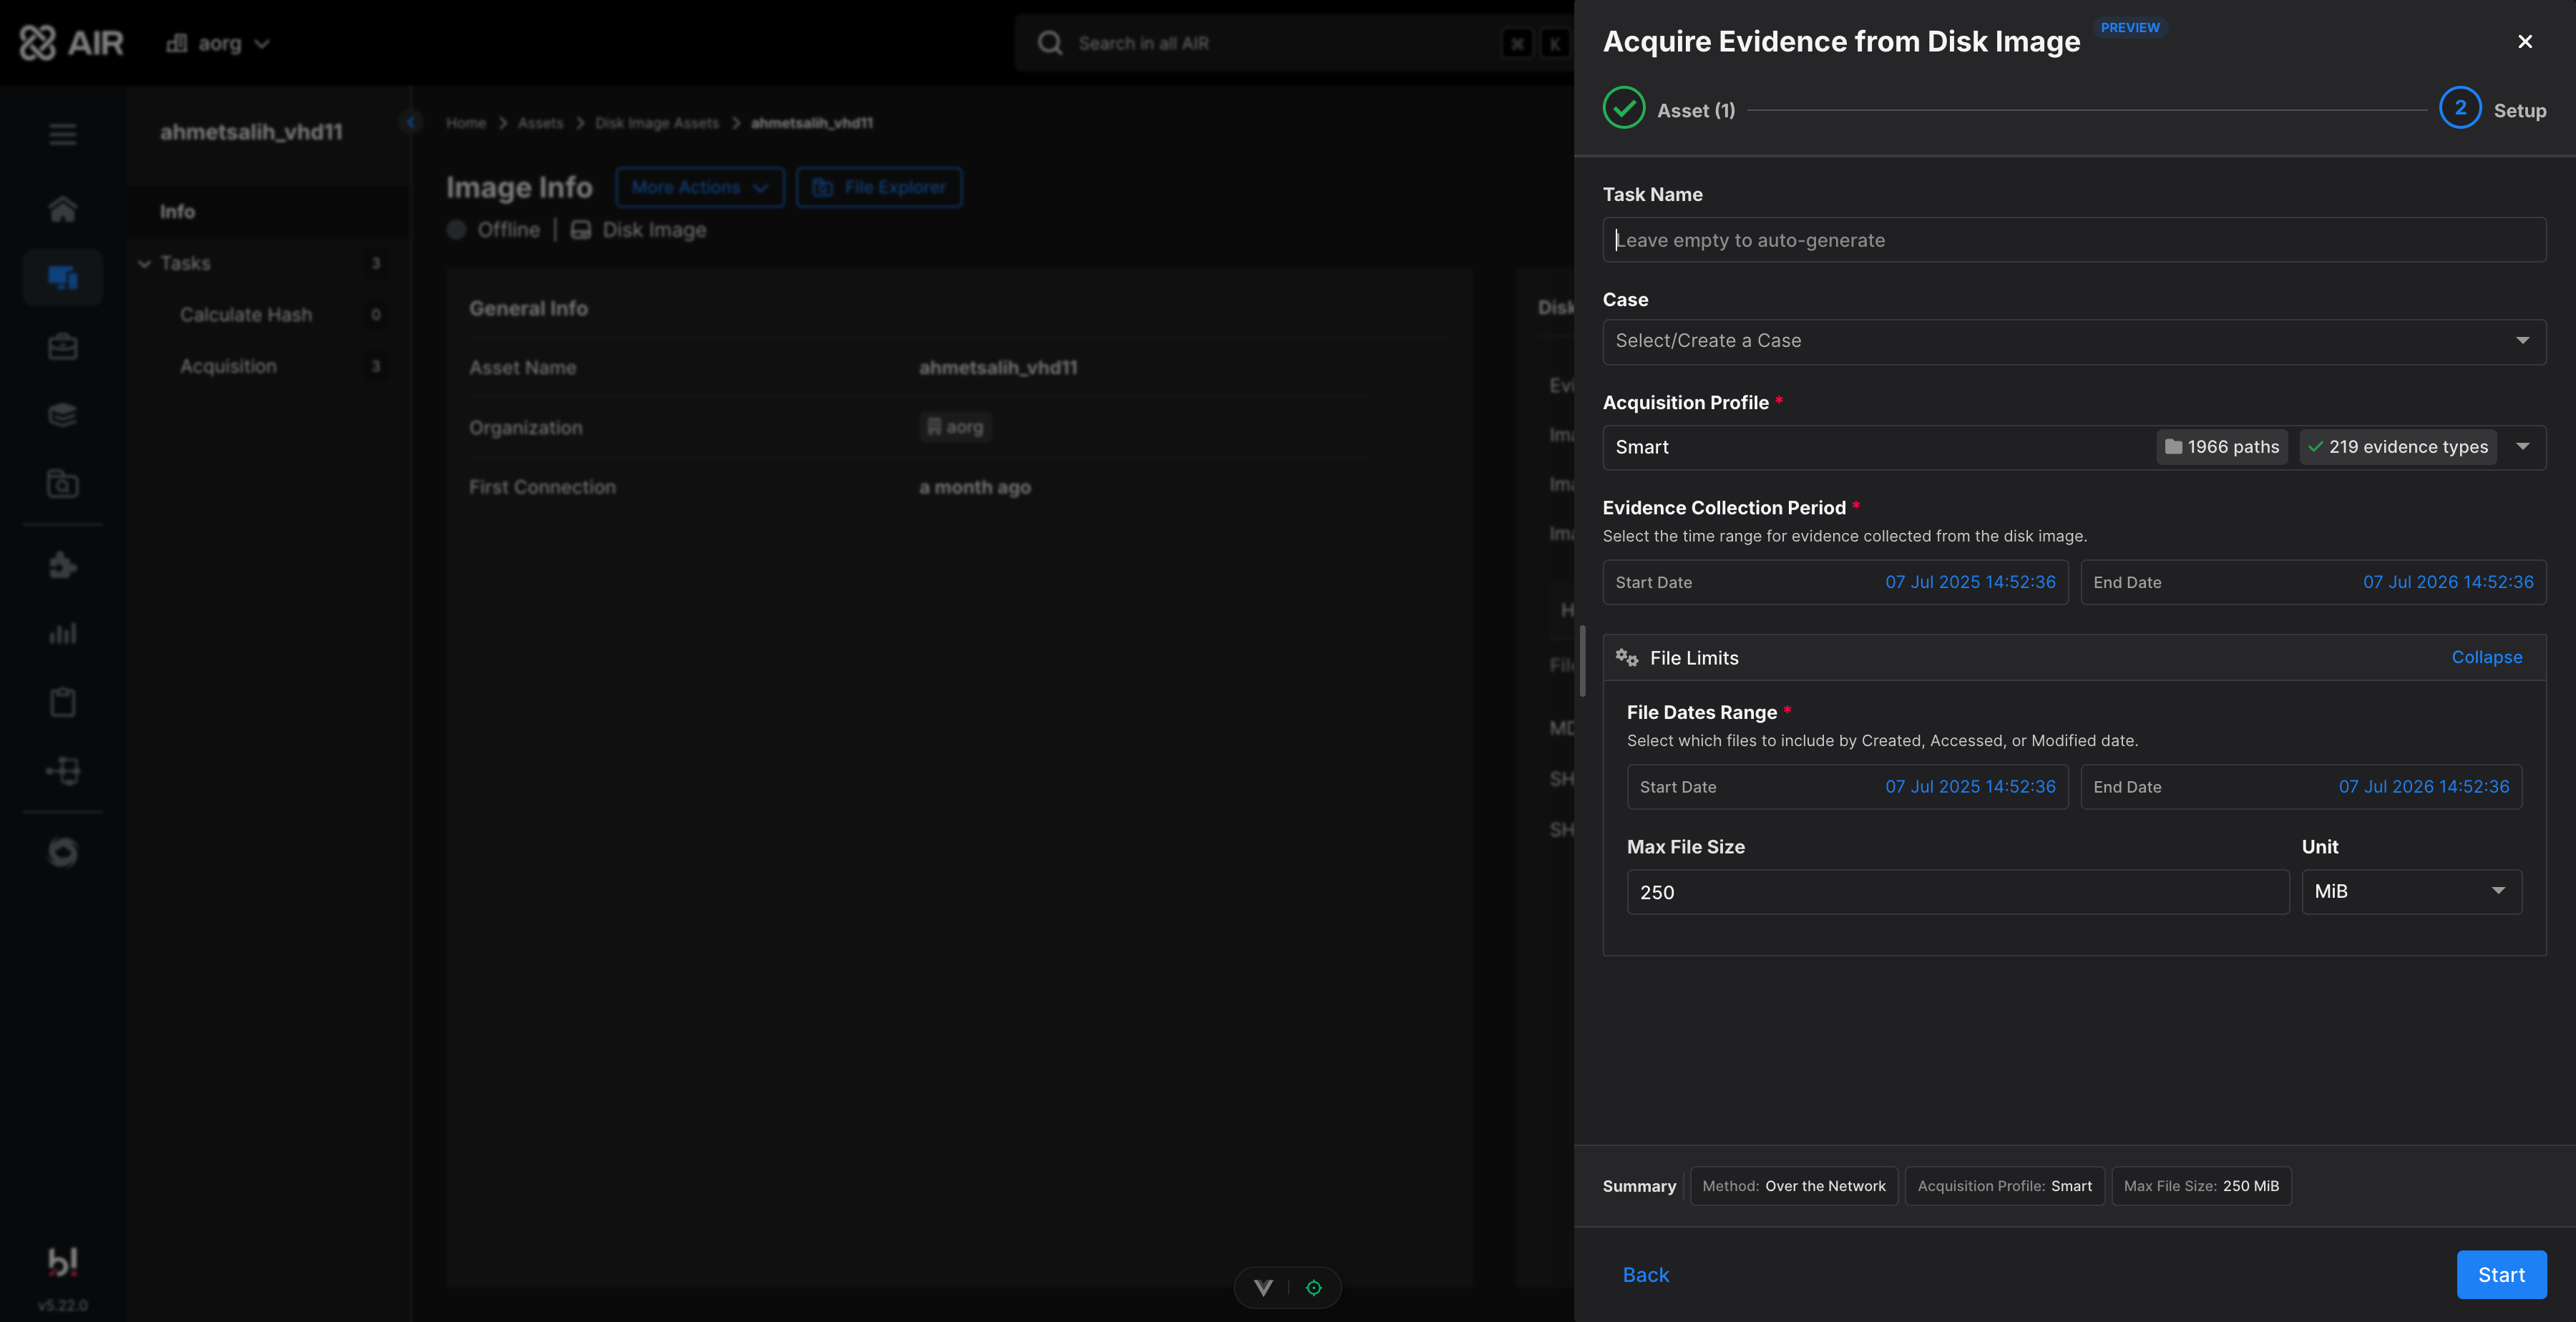
Disk Image Evidence Acquisition: Setup step for over-the-network acquisition
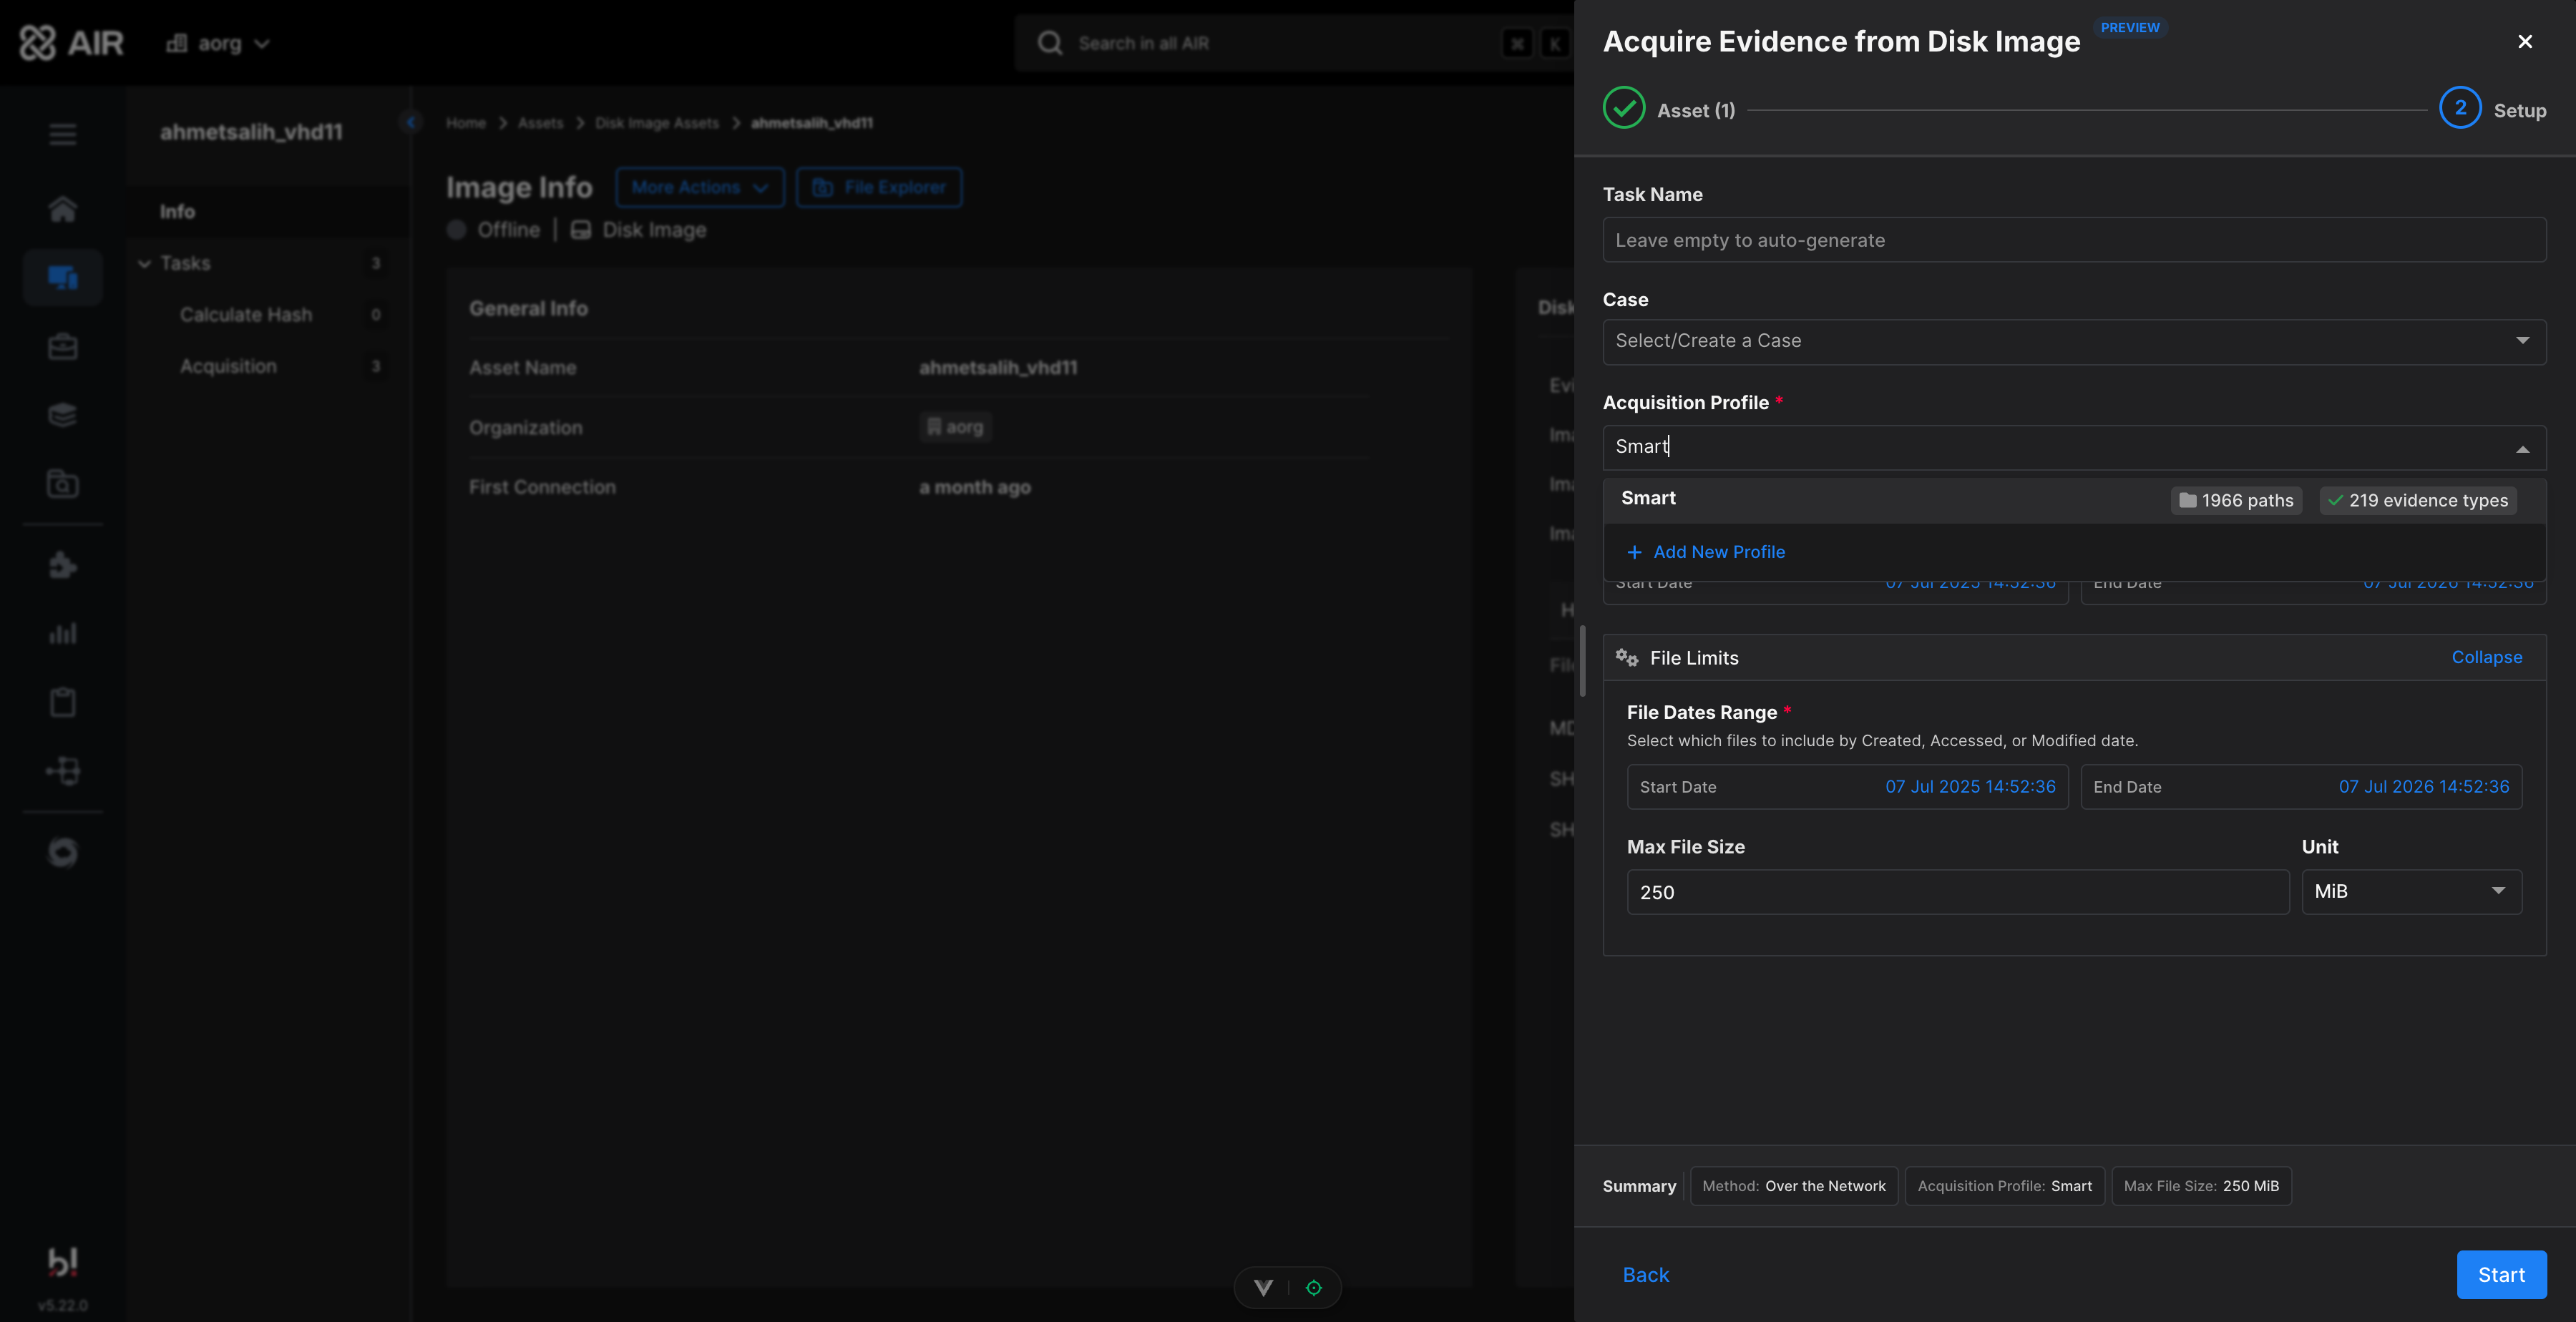
Disk Image Evidence Acquisition: Selecting an Acquisition Profile
The task appears under Tasks with the type Disk Image Acquisition. You can follow its progress as AIR enumerates and scans the files on the image. Completed acquisitions are listed on the asset under Tasks > Acquisition, where the acquired evidence can be downloaded or opened for investigation:
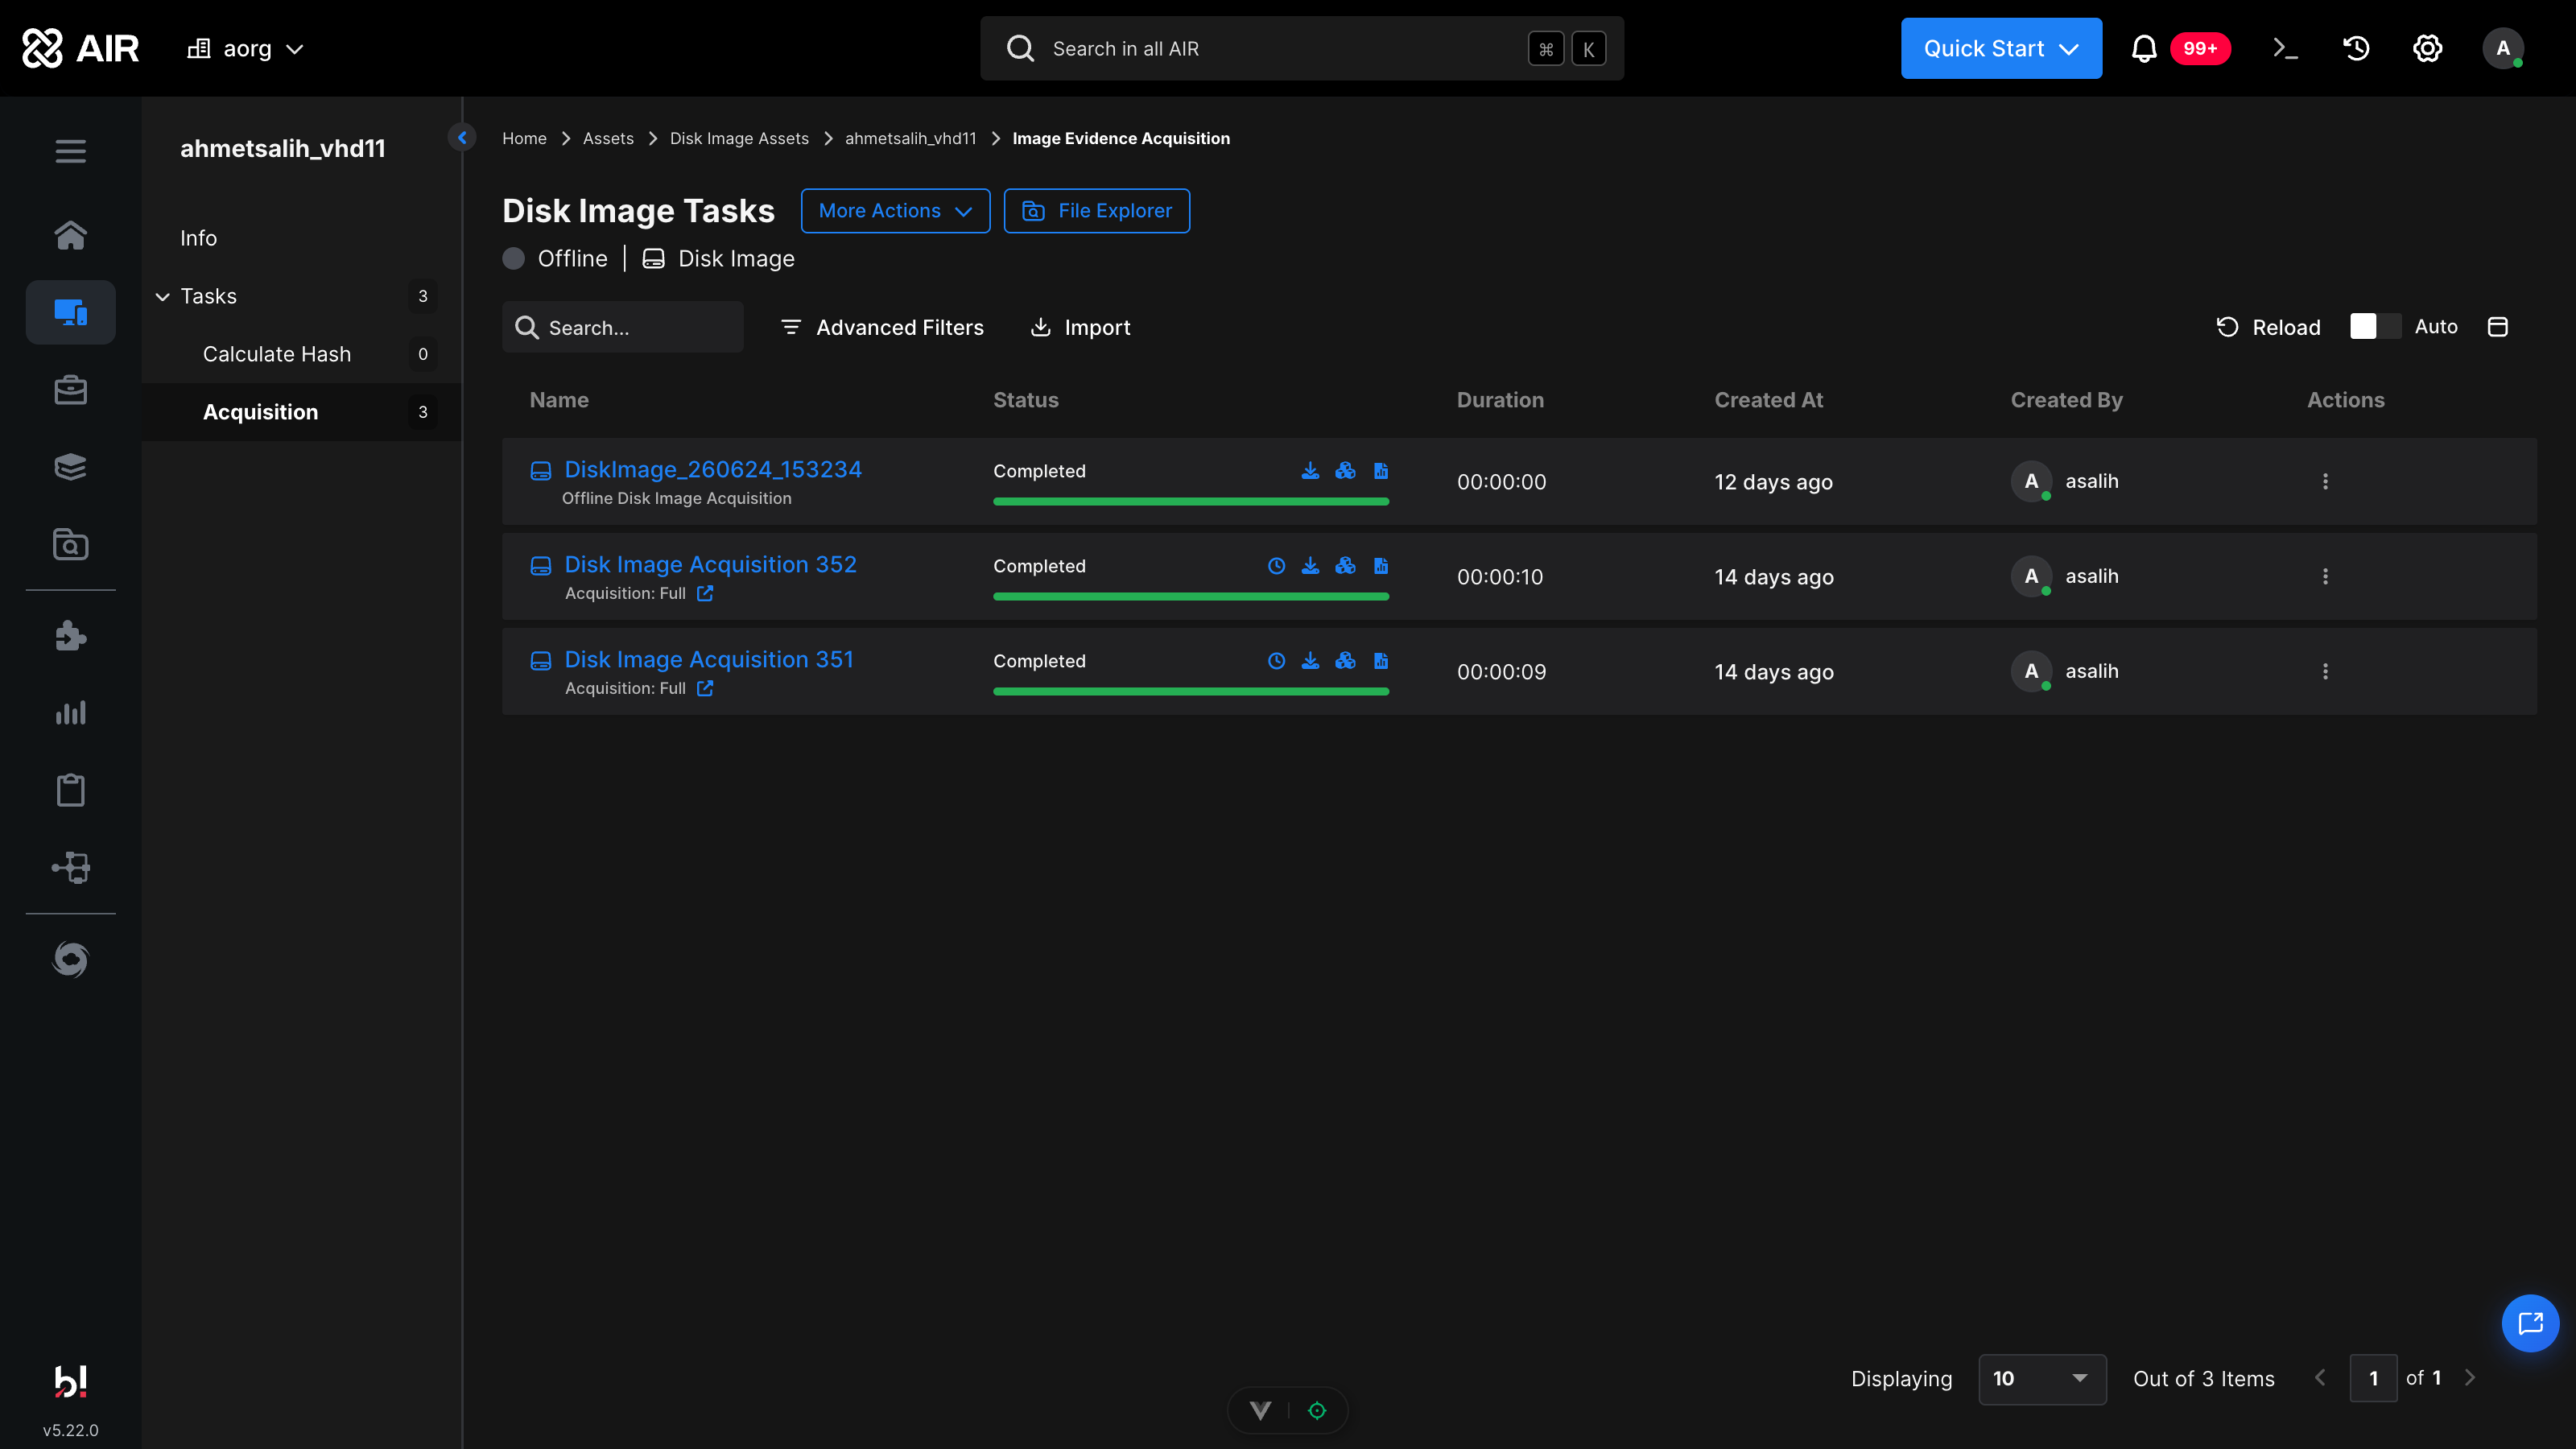
Disk Image Evidence Acquisition: Completed acquisition tasks on a Disk Image asset
Acquiring Evidence Off-Network
Section titled “Acquiring Evidence Off-Network”Off-network acquisition is designed for disk images that AIR cannot reach - for example, an image sitting on an analyst workstation, an air-gapped lab machine, or a host without connectivity to the AIR Console. AIR prepares a portable acquisition package; you run it next to the image and bring the result back to the console.
Creating the Off-Network task package
Section titled “Creating the Off-Network task package”-
From the Quick Start menu, select Acquire Evidence, then From Disk Image. Off-Network is the default Acquisition Method.
-
Keep Include Acquisition Binary selected to include the binary in the download. Clear it only if the target machine already has the latest binary. Click Next:
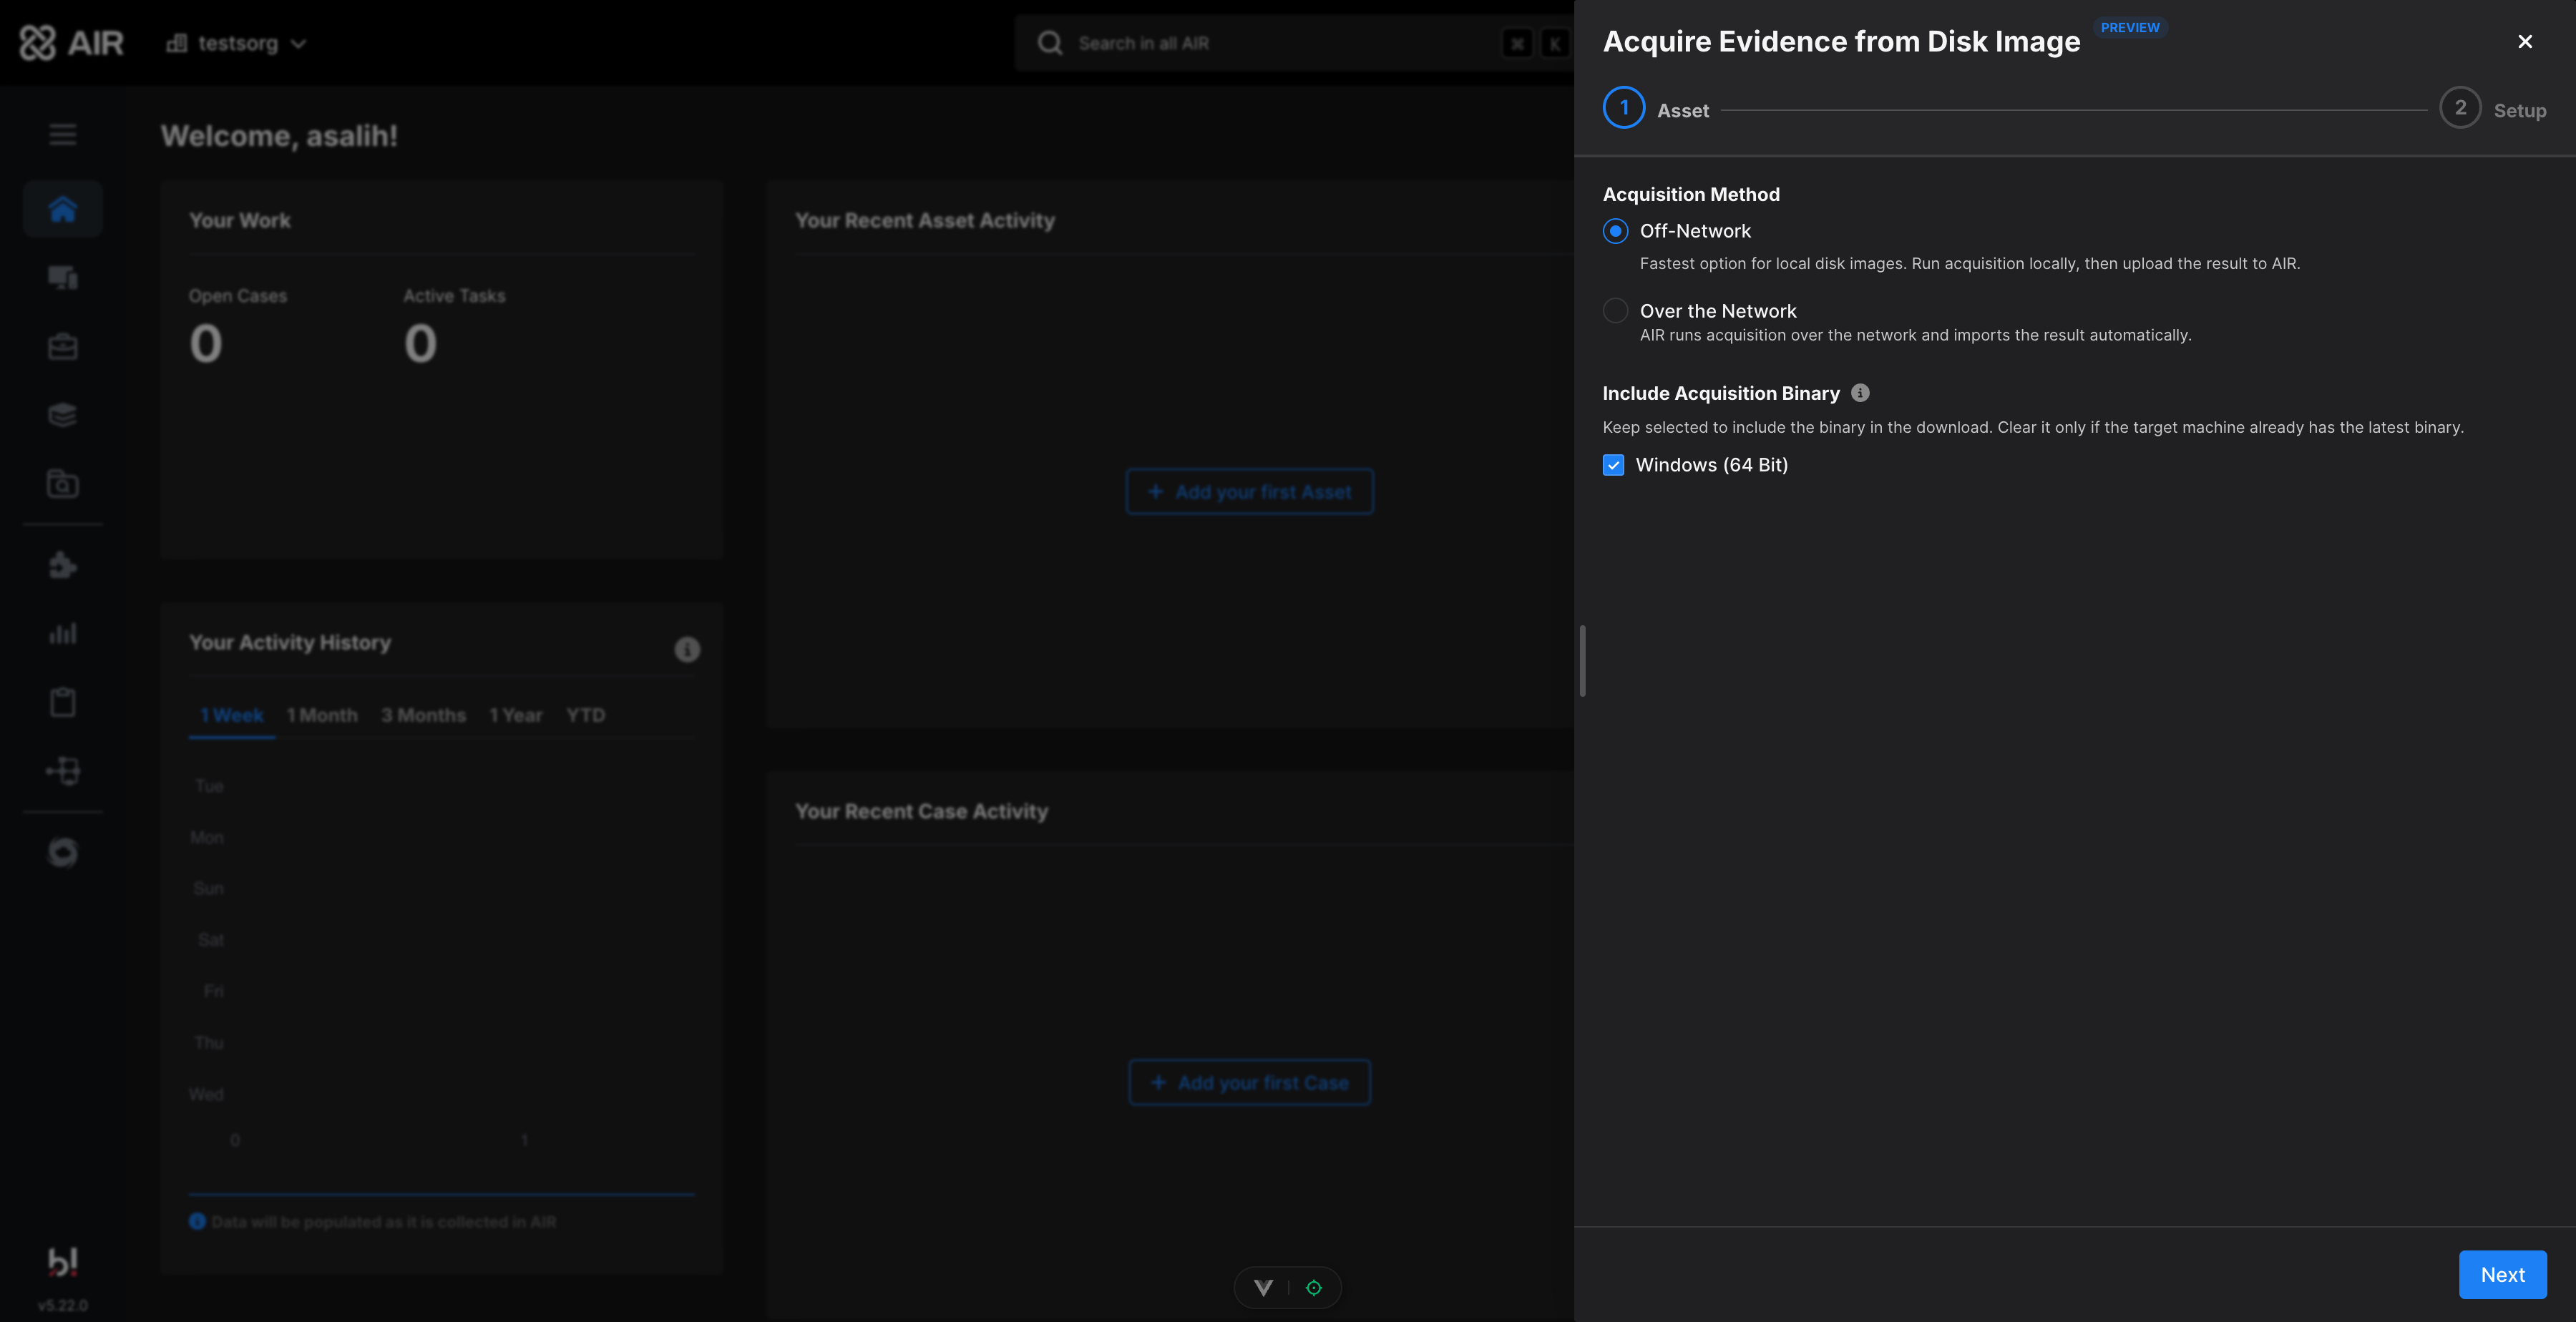
Disk Image Evidence Acquisition: Off-Network acquisition method
-
In the Setup step, configure the Task Name, Acquisition Profile, Evidence Collection Period, and File Limits exactly as you would for an over-the-network task, then select Download Task or Share Task:
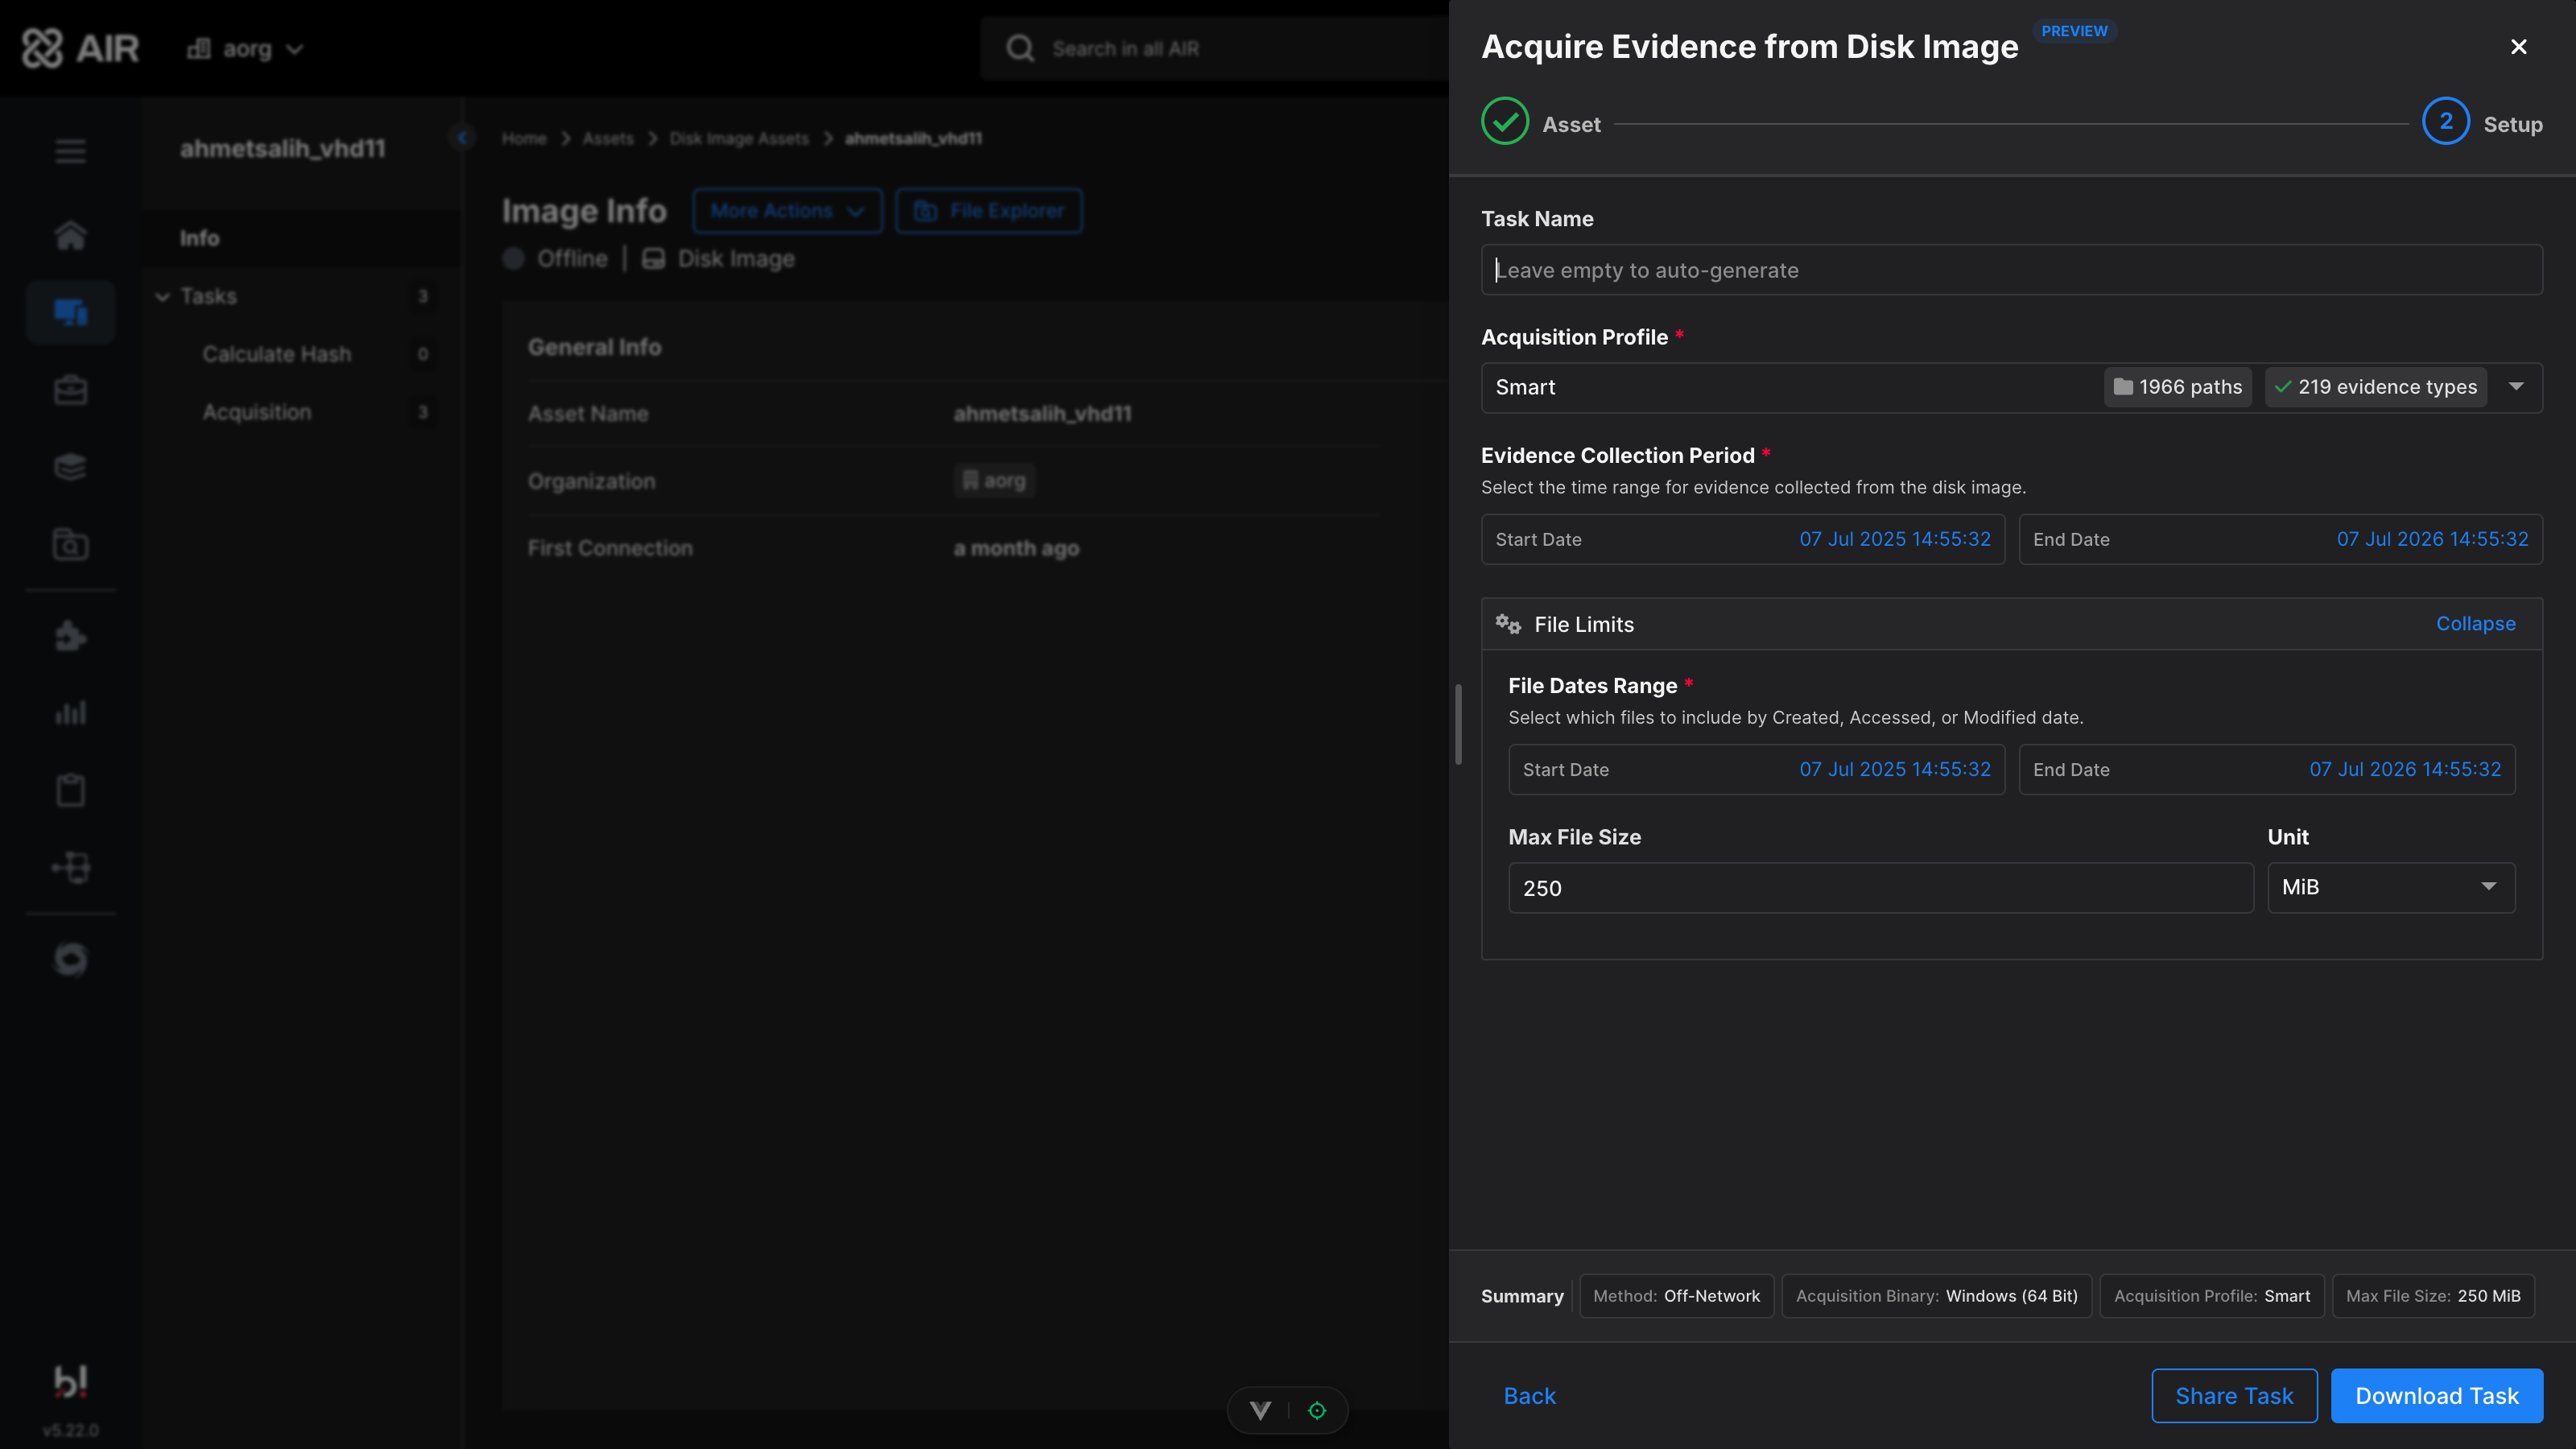
Disk Image Evidence Acquisition: Off-Network setup with Download Task and Share Task
- Download Task downloads the Off-Network Disk Image Evidence Acquisition package as a zip file directly.
- Share Task generates a download link you can pass to the analyst who will run the acquisition.
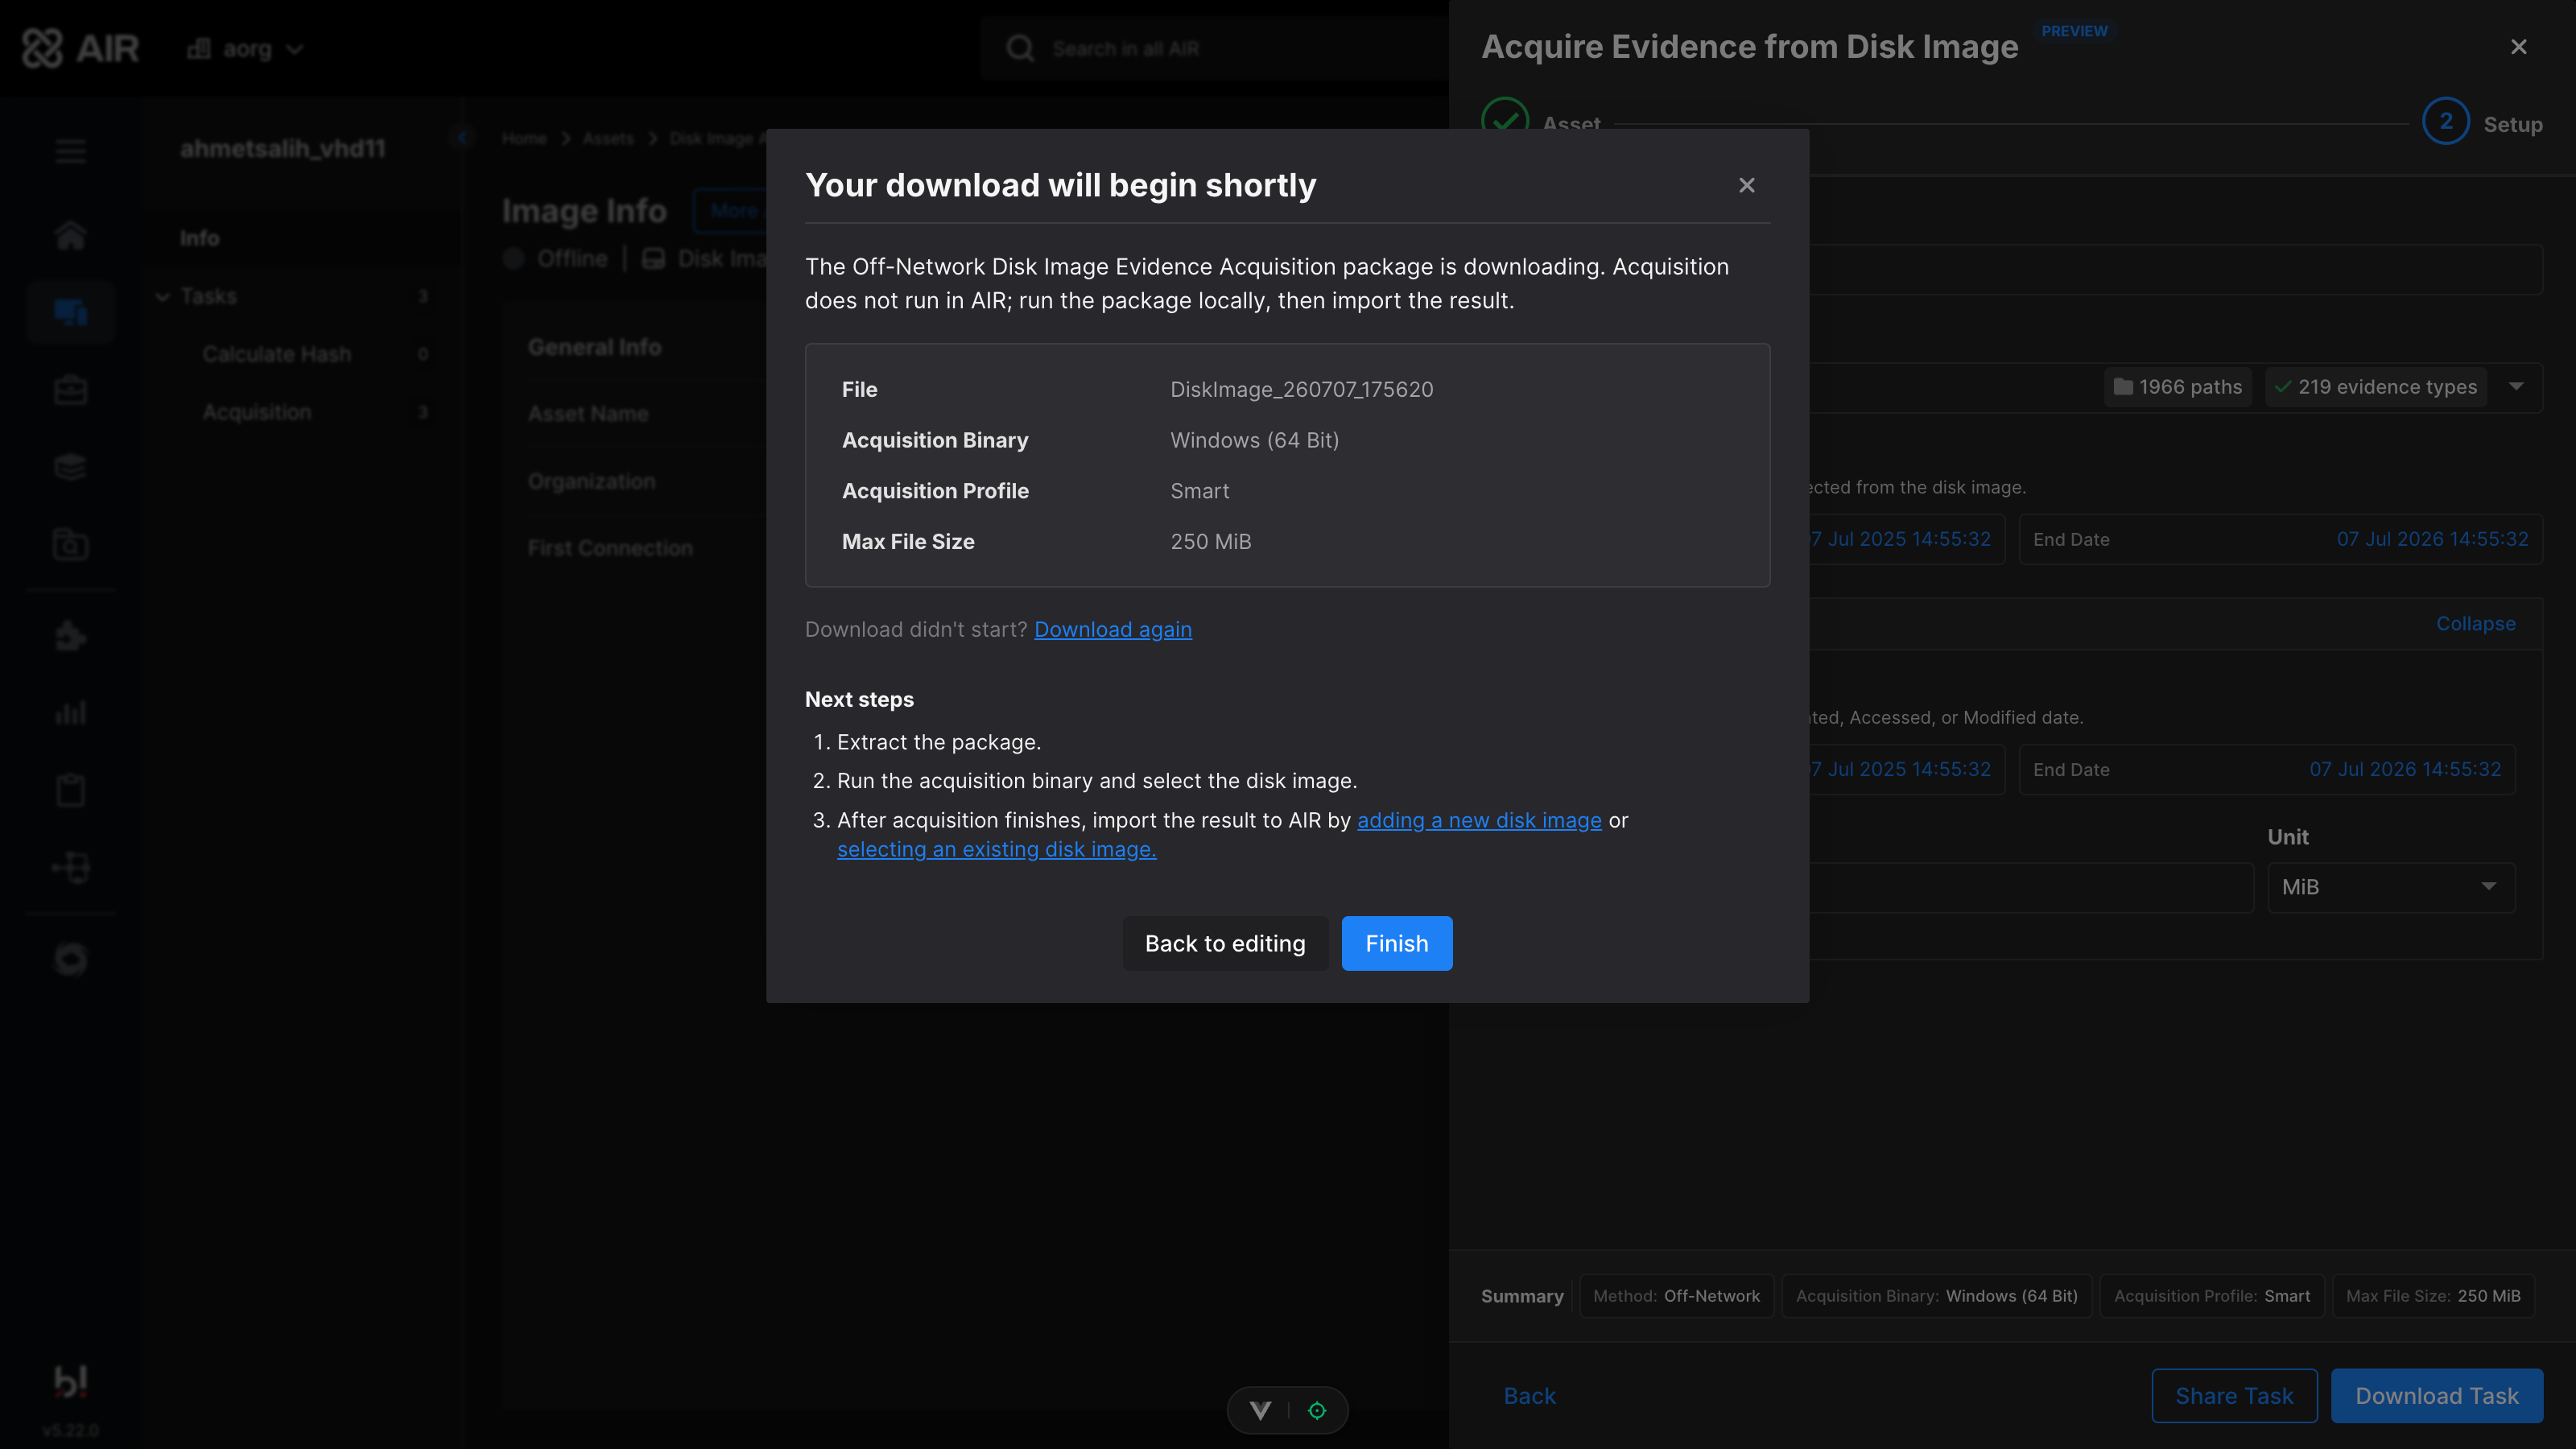
Disk Image Evidence Acquisition: Package download and next steps
Running the acquisition locally
Section titled “Running the acquisition locally”The package contains a Task.dat file (the acquisition configuration created by the AIR Console), the acquisition binary together with a prebuilt Plaso runtime, and a README. The Plaso runtime ships inside the package and is used directly by the acquisition binary, so nothing needs to be installed on the target machine - no Python, no separate Plaso setup.
- Extract the package to a directory on a host that can access the disk image.
- Run the acquisition binary with a double-click or from a Terminal. The program reads the Task.dat file located in the same folder as the executable.
- When prompted, enter the absolute path to the disk image (.vhdx / .E01 / .dd / …). You can also pass the path on the command line to skip the prompt:
galileo_windows_amd64.exe --image-path "D:\Evidence\workstation01.E01"The binary launches the bundled Plaso engine against the disk image; the image is read directly and never modified, and no files from it are extracted to disk. Progress is printed in the Terminal while the acquisition is running. When it finishes, the result is written as a case file (Case.ppc) to a timestamped folder next to the executable (use --output-dir to change the location).
Importing the result into AIR
Section titled “Importing the result into AIR”- Return to the AIR Console and open the Disk Image Off-Network page (also linked from the wizard’s Next steps as ‘adding a new disk image’ or ‘selecting an existing disk image’).
- Optionally select a Case, then drag the result file into the import area or click browse (supports .ppc and .zip).
- Click Import. The result is imported as a Disk Image asset, and the task appears as Offline Disk Image Acquisition on the asset - the acquired evidence is then available in the console, the same as an over-the-network acquisition.
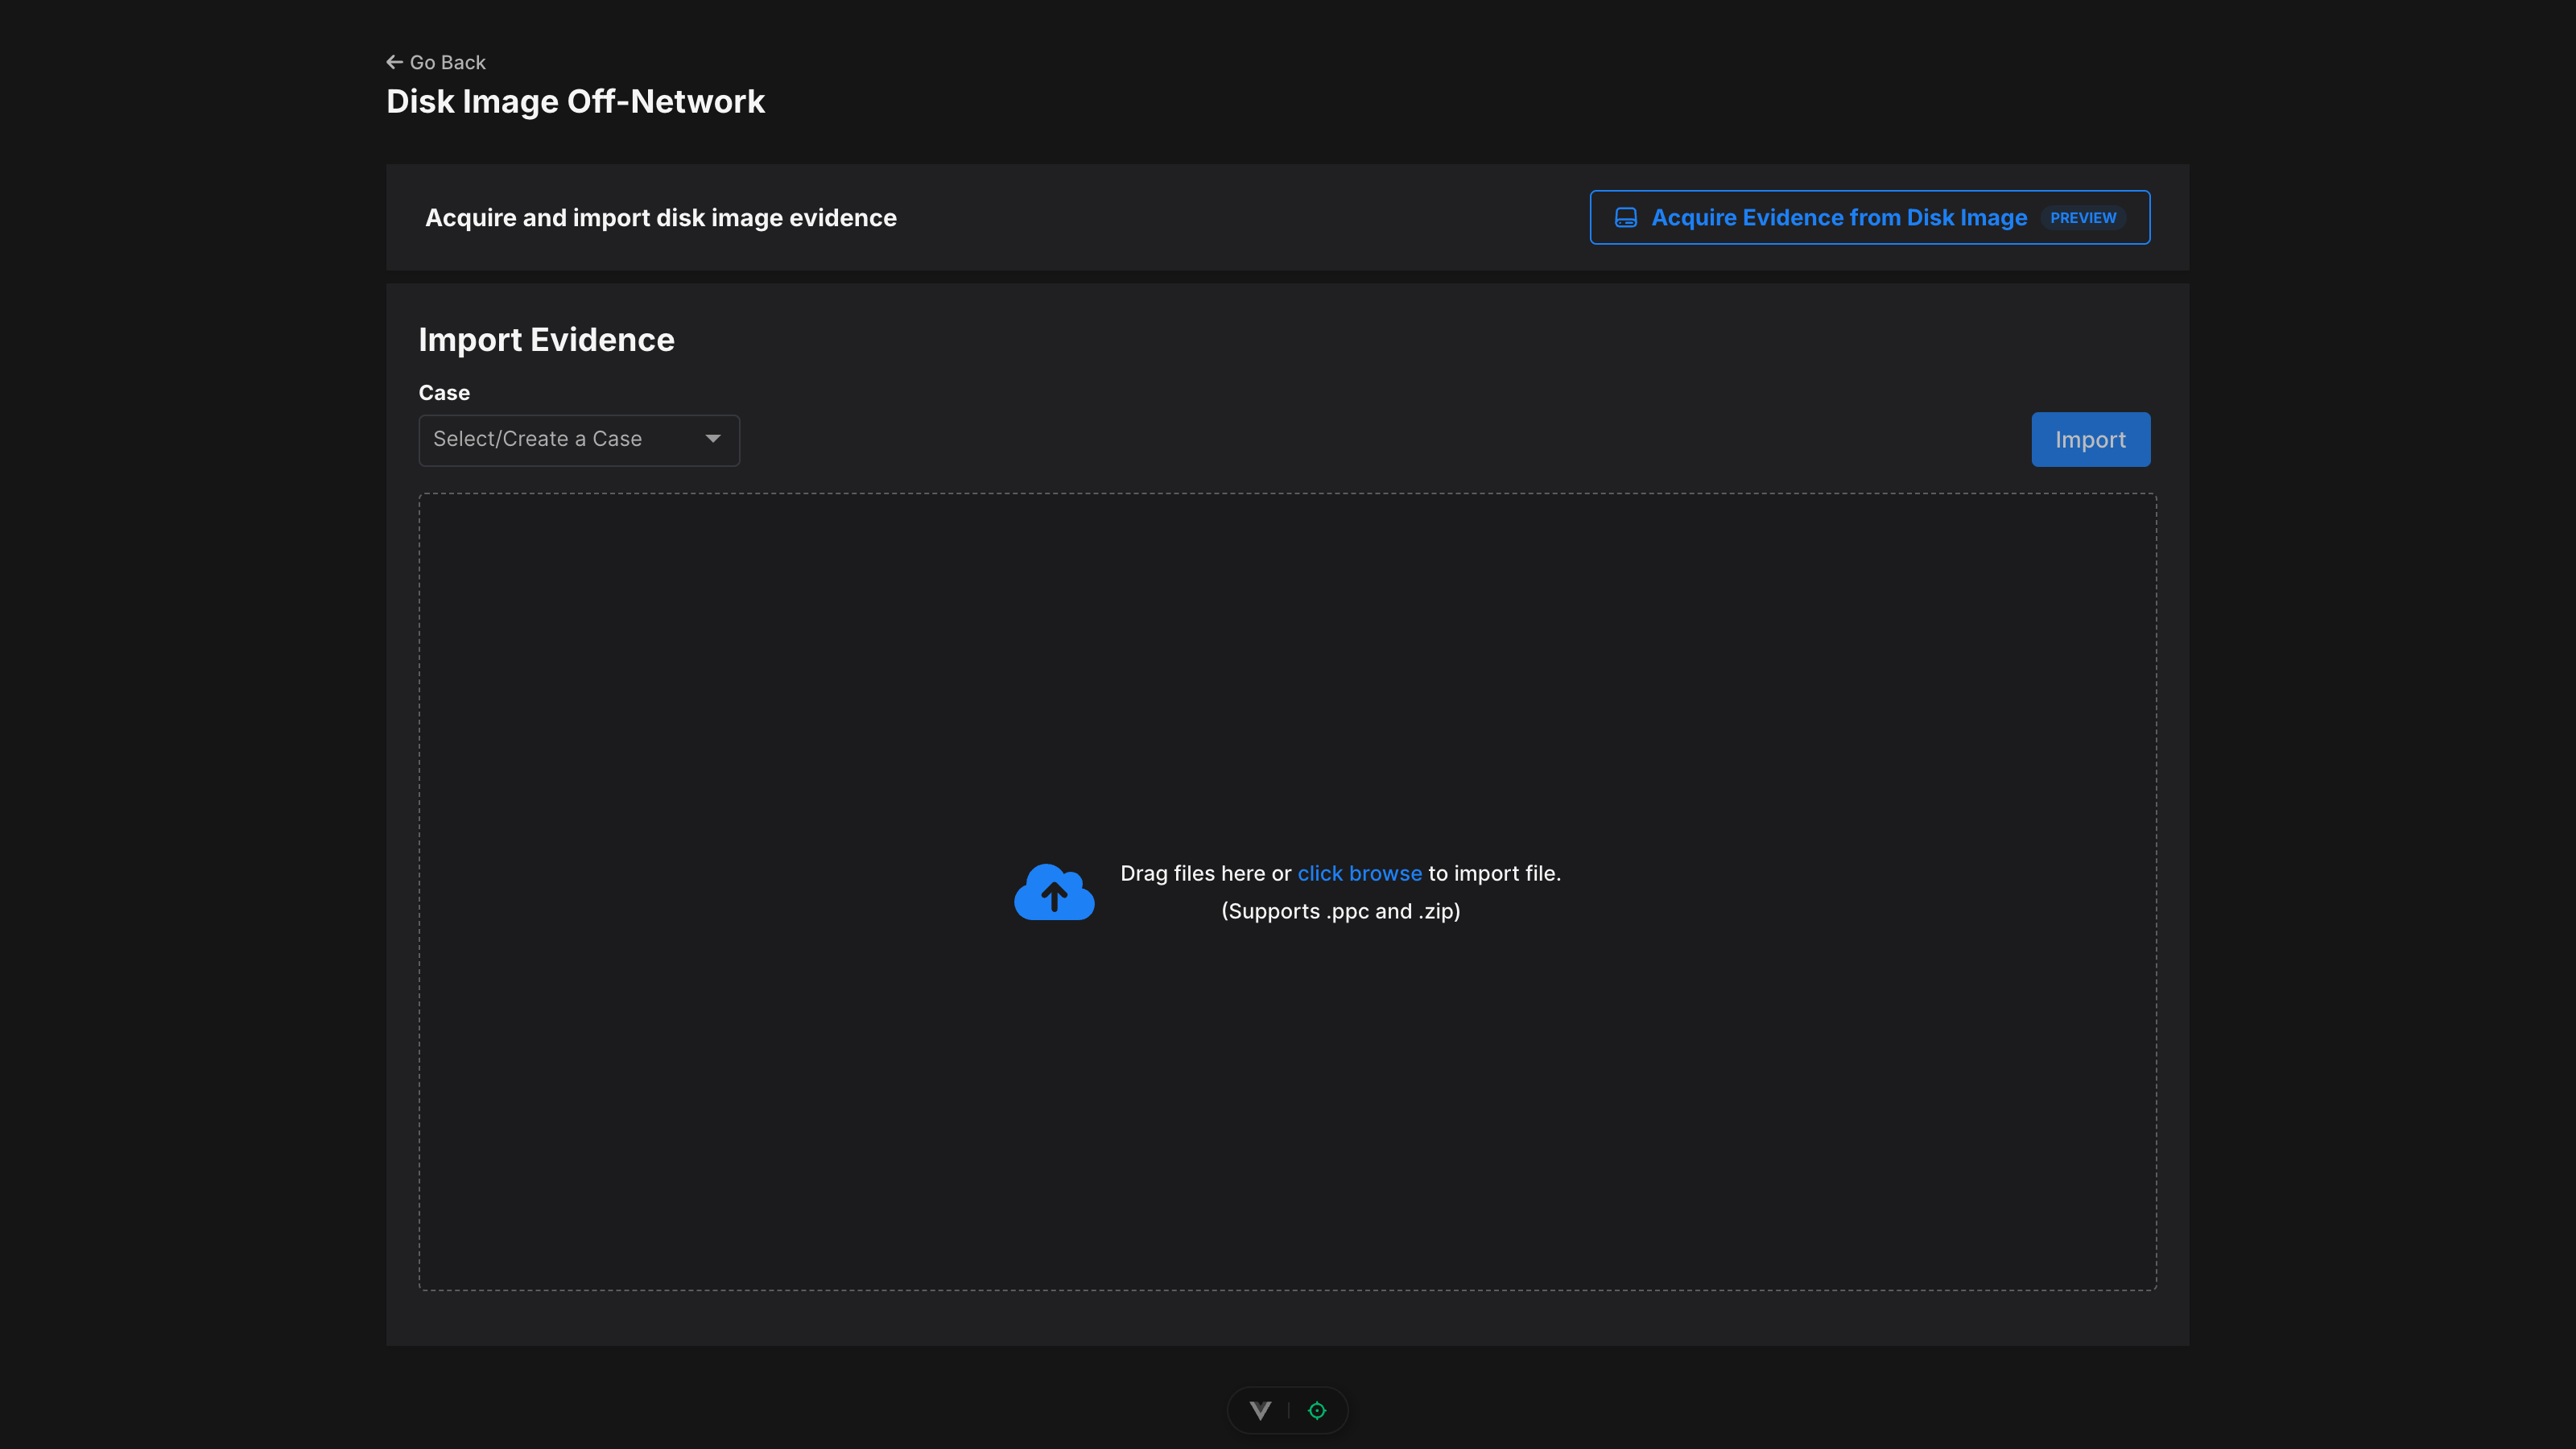
Disk Image Evidence Acquisition: Disk Image Off-Network import page
Notes and Limitations
Section titled “Notes and Limitations”- The off-network acquisition binary is currently available for Windows (64 Bit).
- Hash calculation is unavailable for off-network disk images because the source image is not reachable by AIR.
- The off-network task package never contains evidence repository credentials - only the acquisition configuration (evidence types, paths or patterns, date ranges, and file limits).
- Over-the-network acquisition requires the Disk Image asset to be Managed, i.e. reachable through its evidence repository.