

Automations
Overview
Section titled “Overview”Automations let AIR respond to events without manual intervention. You define what starts the workflow (a trigger) and what AIR does next (one or more actions). AIR then runs the workflow every time the trigger fires, whether that is a new asset registering, a Hunt/Triage task finishing, a TAXII feed syncing, a schedule becoming due, or an external system calling AIR.
Typical use cases include:
- When a new asset registers, start an evidence acquisition and email the SOC team.
- When an acquisition produces high-severity findings, isolate the asset and notify a Slack channel.
- Every night, run Auto Asset Tagging on all Linux servers.
- When a threat intelligence feed delivers new rules, run a Hunt/Triage task on selected assets.
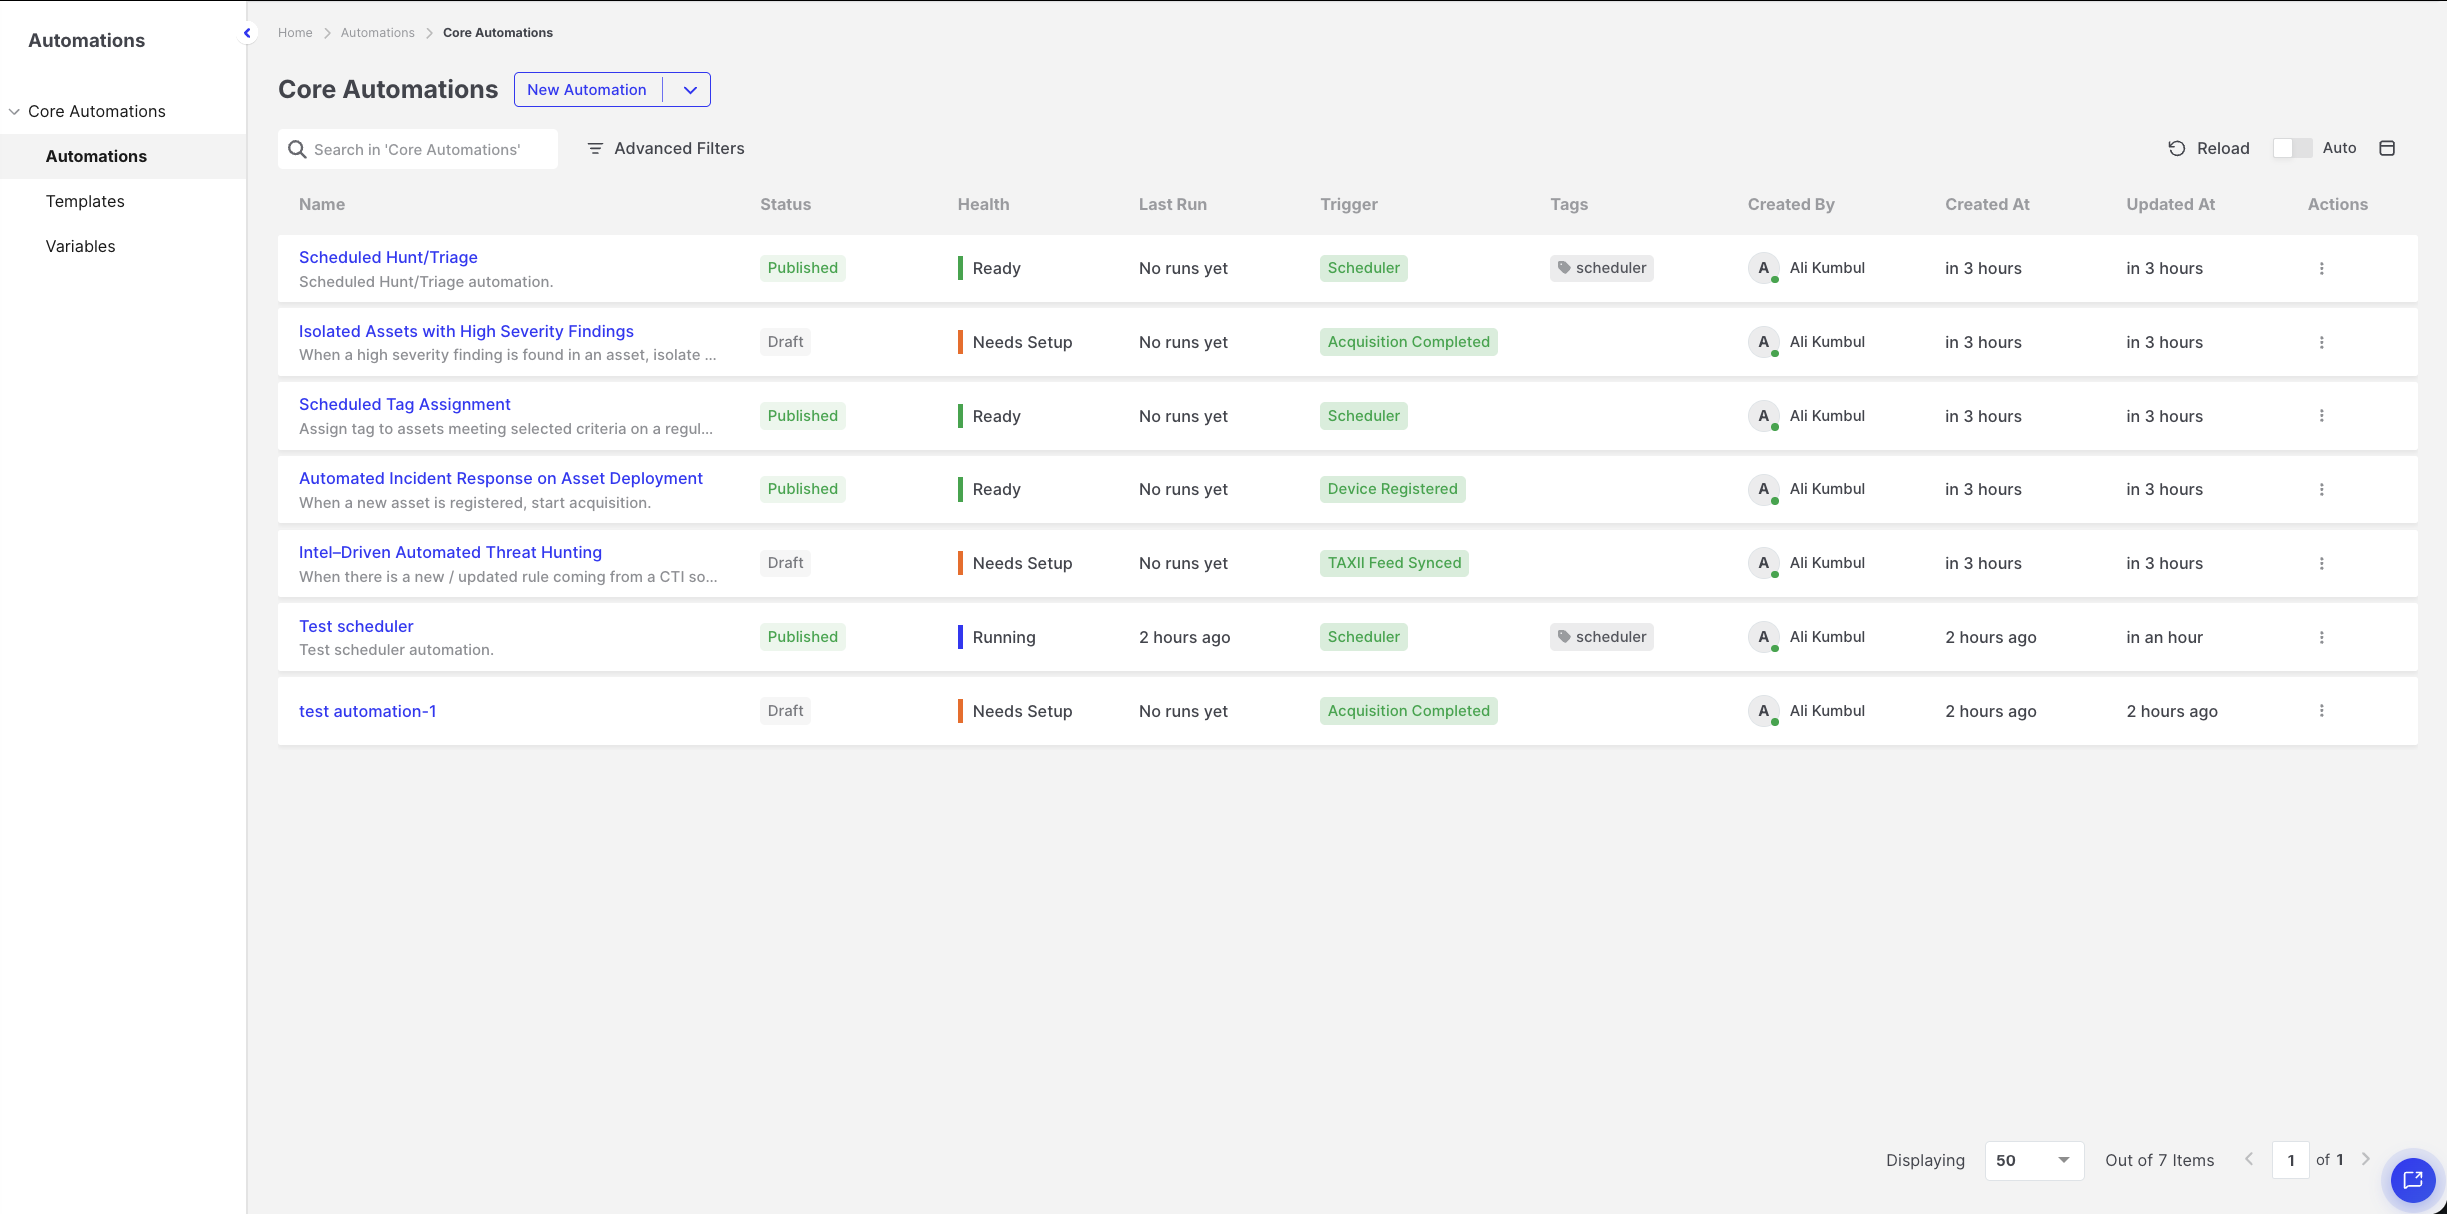
Automations: Automations list
Where to find Automations
Section titled “Where to find Automations”Select Automations from the main menu. The section contains three pages:
| Page | Purpose |
|---|---|
| Core Automations | Create, edit, publish, and monitor your automations. |
| Templates | Start from ready-made automations for common use cases. See Templates. |
| Variables | Store reusable values and credentials for use in automations. See Variables. |
How an automation is built
Section titled “How an automation is built”Each automation is a single chain of steps displayed on a canvas:
- One trigger: the event that starts the automation. See Triggers.
- One or more actions: the work AIR performs, in sequence. See Actions.
You can rename any step. Renaming a step does not change the order of the chain or break any expression that refers to that step.
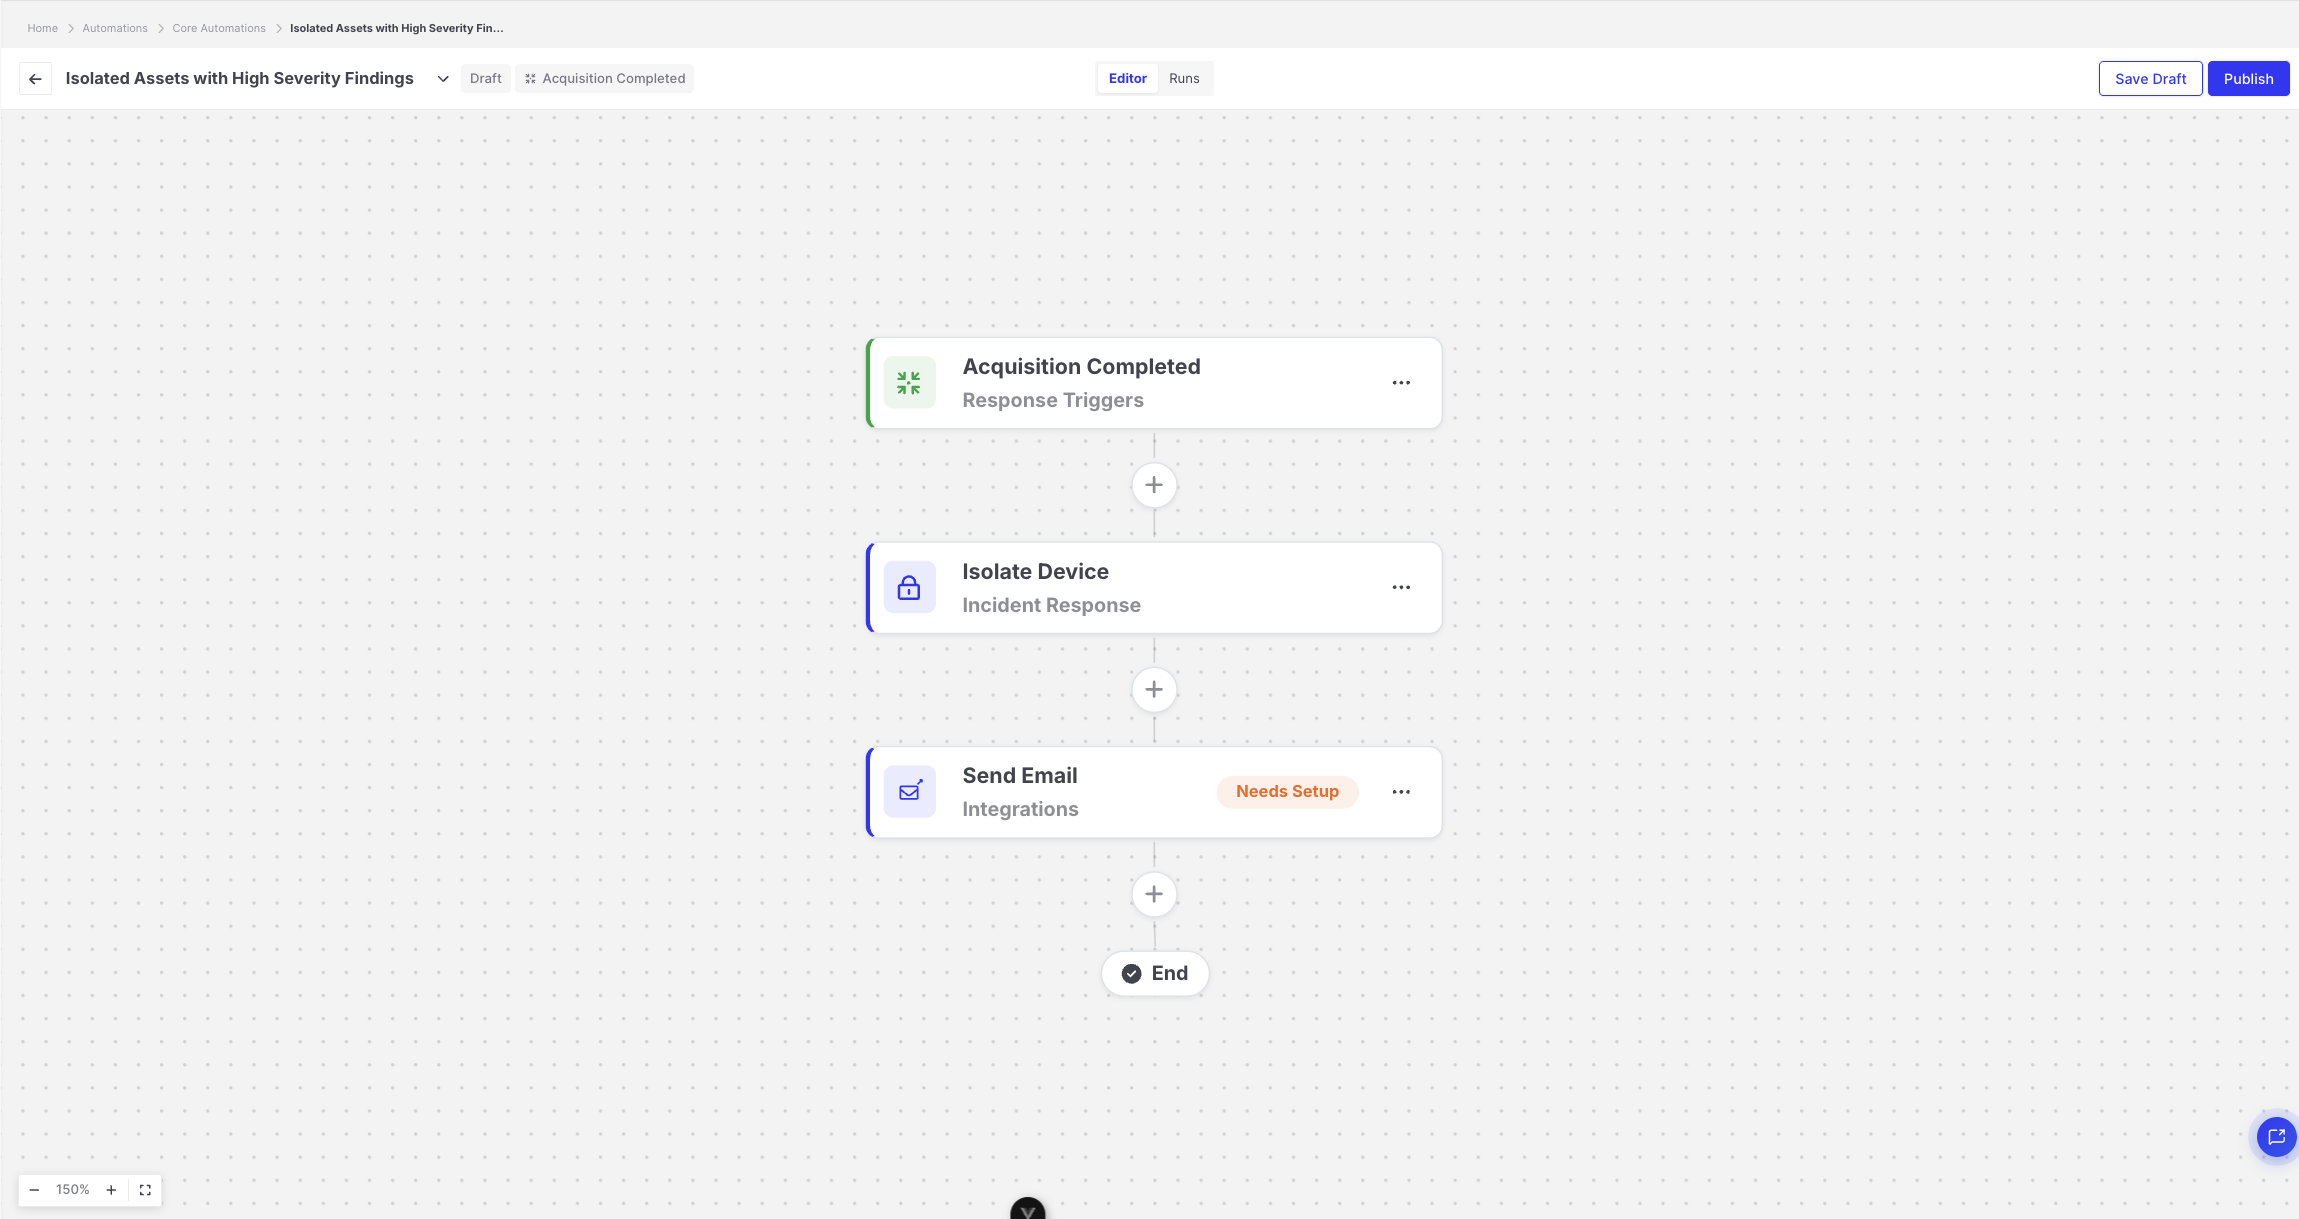
Automations: Automation editor canvas
Using data from earlier steps
Section titled “Using data from earlier steps”Most action text fields accept template expressions in double curly braces, for example the email subject and body, the Slack message, and the HTTP URL, headers, and body. AIR replaces each expression with the actual value when the automation runs.
You can add an expression in two ways:
- Type it: enter
{{in the field to see suggestions for the values available at that point in the chain. - Use the variable picker: click Add Variables (the lightning-bolt icon) above the field.
Variable picker
Section titled “Variable picker”The variable picker lets you browse the available data and insert it without typing the expression:
- Click Add Variables above the field.
- Under Use Data From, select a source: the trigger, a previous action, Global, Target Asset, or your stored Variables.
- Under Choose Data, click the value you need. To open grouped data, click the group; use the back arrow to return to the previous level.
- AIR inserts the expression, for example
{{targetAsset.name}}, at the cursor position.
The picker only lists steps that come before the current step, because later steps have not run yet. Encrypted variables are labeled Encrypted, and their values are never displayed.
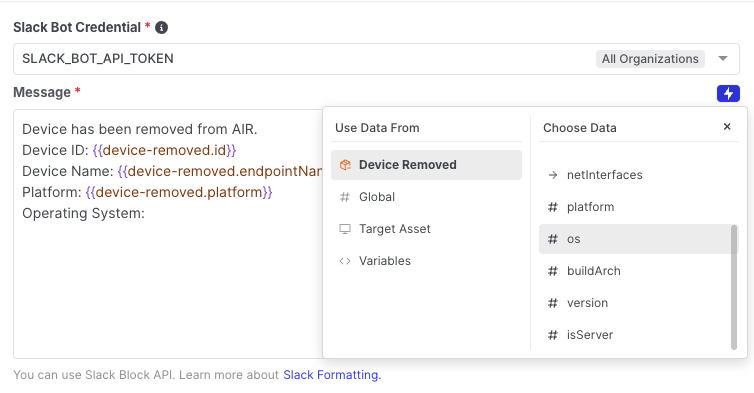
Automations: Variable picker
The most commonly used expressions are:
| Expression | Returns |
|---|---|
{{targetAsset.name}} | The name of the asset the execution runs for. Also available: id, platform, os, ipAddress, tags, and organizationId. |
{{global.automationName}} | The name of the automation. Also available: automationId, runId, executionId, and consoleAddress. |
{{<step-key>.<field>}} | Data produced by the trigger or a previous action, for example {{triage-completed.triageMatchCount}}. |
{{variables.KEY}} | The value of a stored variable. |
Automation lifecycle
Section titled “Automation lifecycle”Creating an automation
Section titled “Creating an automation”Click New Automation and select one of the following options:
- Create from scratch: enter a name, and an optional description and tags.
- Start from template: select a template from the catalog. See Templates.
- Import Automation: upload an
.automationfile exported from another AIR Console.
Whichever option you choose, the automation belongs to the organization you are currently viewing. You do not select an organization, and you cannot move the automation to another organization later. To create an automation for a different organization, switch to that organization first.
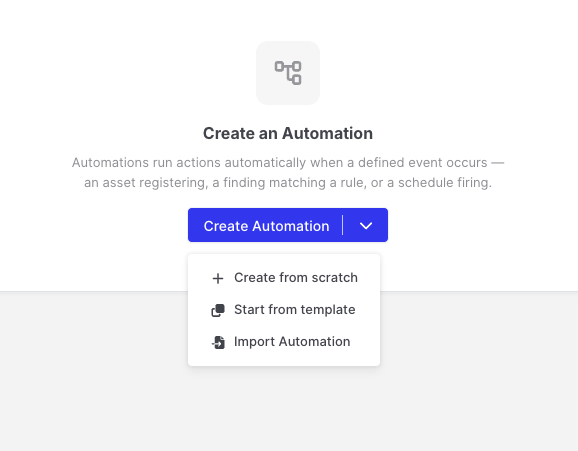
Automations: New Automation menu
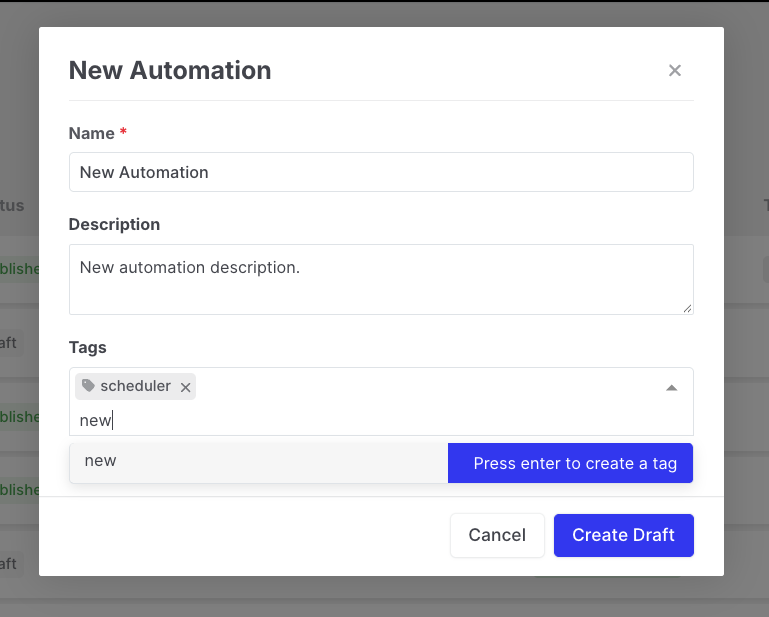
Automations: Create Draft dialog
Draft and published states
Section titled “Draft and published states”An automation is always in one of two states:
| State | Description |
|---|---|
| Draft | Saved but inactive. A draft does not react to its trigger and can be incomplete; steps that still require configuration are marked Needs Setup. |
| Published | Active. The automation runs every time its trigger fires. |
Use the following controls in the editor:
- Save Draft: saves your work without activating it. A draft requires at least a trigger.
- Publish: validates the whole automation and activates it immediately. To publish, the automation must have a trigger, at least one action, and every step fully configured.
- Publish Changes: applies your edits to an automation that is already published.
- Unpublish: stops the automation from reacting to new events. Any runs still in progress are also stopped, so AIR asks you to confirm first. Past runs and history are kept.
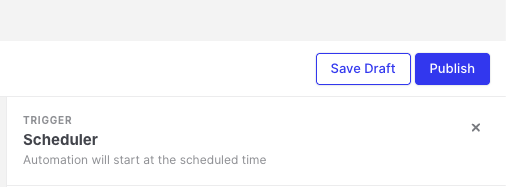
Automations: Editor header with Save Draft and Publish buttons
Editing, exporting, and deleting
Section titled “Editing, exporting, and deleting”From the automation list or the editor, you can:
- Edit the steps on the canvas, or select Edit Details to change the name, description, and tags.
- Export Automation to an
.automationfile. You can choose whether to include the step configuration. Secrets, such as HTTP trigger secrets, tokens, and credential headers, are never written to the file. You can only export automations that are saved and fully configured. - Delete the automation. This permanently removes its configuration.
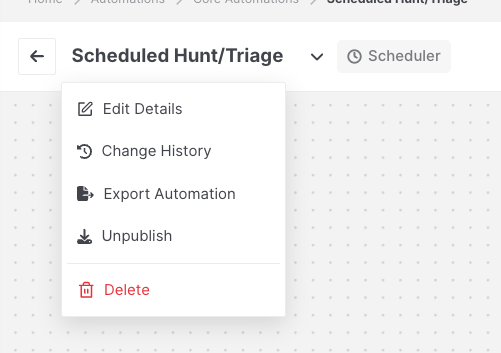
Automations: Detail dropdown
Change History
Section titled “Change History”The Change History view shows a snapshot of the automation each time it changes, starting from the first time it is saved as a draft. A new entry is recorded when you save a draft, rename the automation, edit its description or tags, change its trigger or action configuration, publish it, or unpublish it. Saving without any change does not add an entry.
Change History is available for drafts and published automations alike, and is kept when you unpublish an automation. It is not the same as the run history; see Runs.
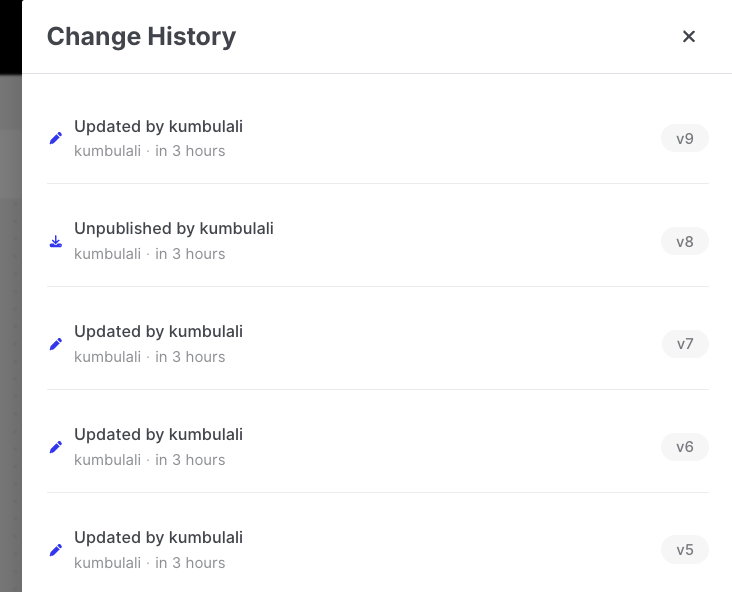
Automations: Change History panel
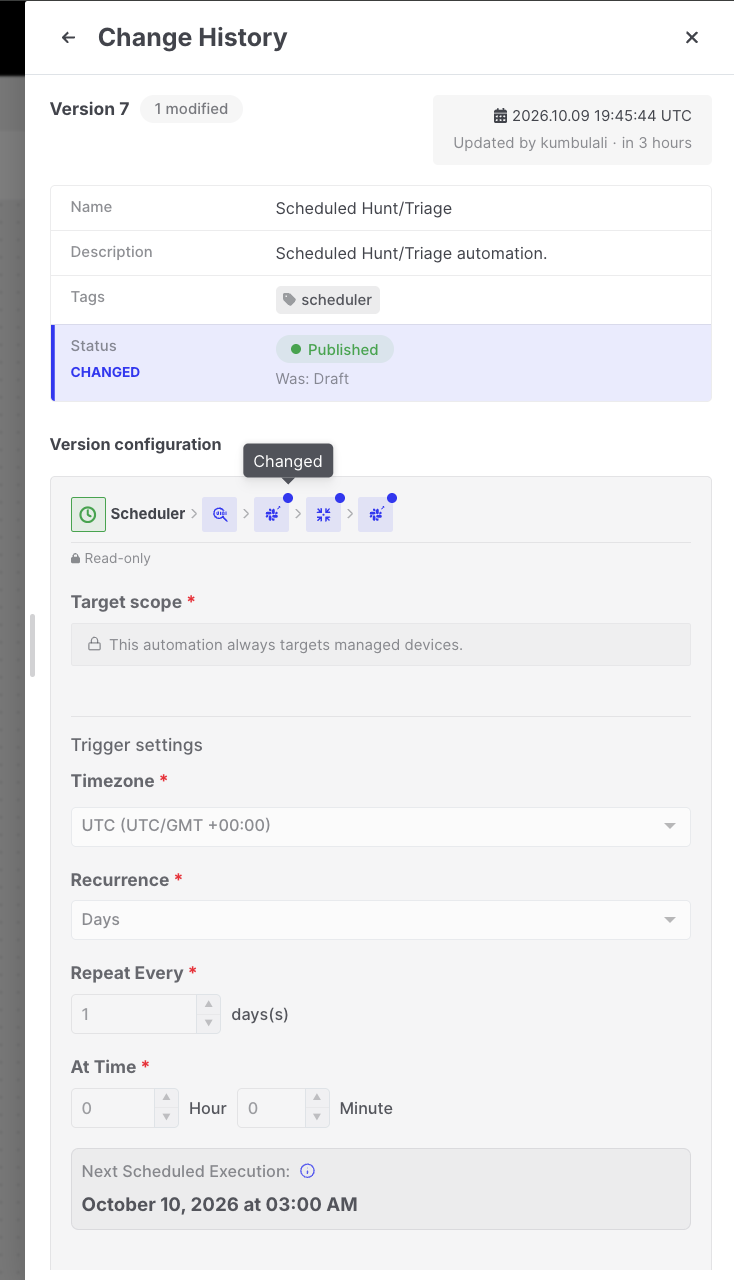
Automations: Change History version detail
The automation list
Section titled “The automation list”The Core Automations page lists the automations of the organization you are currently viewing, including:
- Status: Published or Draft.
- Health: a summary that combines the configuration and the latest run:
- Needs Setup: the configuration is incomplete.
- Running, Failed, or Canceled: the status of the latest run.
- Ready: the last run completed, or the automation has not run yet.
- Last Run information and tags.
You can search the list, and publish, unpublish, edit, or delete automations directly from it.
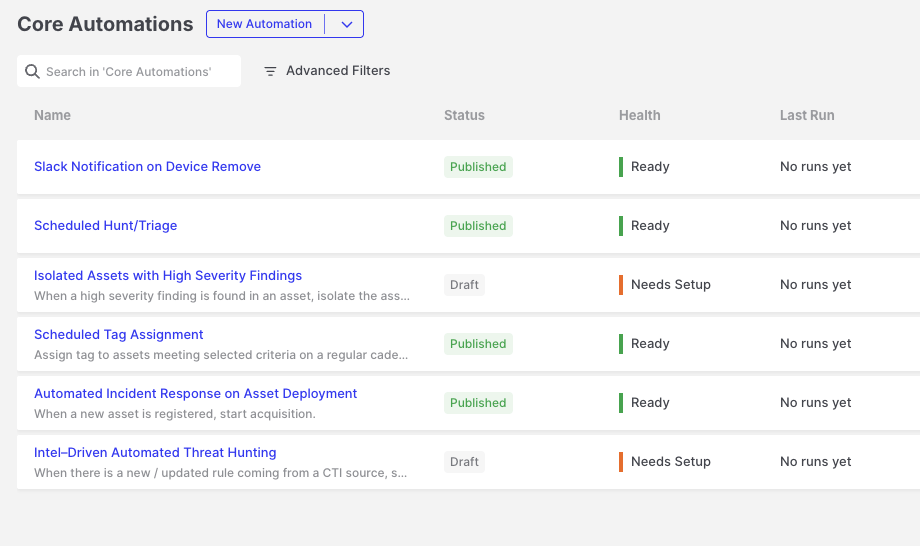
Automations: Automation list with Health and Status columns
Organizations and access
Section titled “Organizations and access”- One organization per automation: every automation belongs to exactly one organization, the one it was created in. It only runs for assets in that organization, and only that organization’s users can see or change it.
- Resources used by an automation: the cases, Auto Asset Tagging rules, and variables you can select in an automation come from the automation’s organization. Hunt/Triage rules come from the automation’s organization, plus rules that are available to all organizations.
- Visibility of runs and executions: you only see the automations, runs, and executions of the organization you are currently viewing. This also applies to users with access to all organizations, such as Global Administrators: to see another organization’s automations and executions, switch to that organization.
- Deleting an organization: when an organization is deleted, its automations are deleted together with their runs and executions.
- Privileges: the View Automations privilege lets users open Automations and view automations in read-only mode. The Manage Automations privilege is required to create, edit, publish, unpublish, delete, import, or stop automations. See User Roles.
- Ownership: automations run on behalf of the Console, not the user who created them. A published automation keeps running even if its author leaves the organization.
Licensing
Section titled “Licensing”Automations must be included in your license package. If the feature is not enabled, or the license is locked down or expired, no automation runs and action tests are refused. If a run is interrupted for this reason, the next action is recorded as Action Blocked, together with the reason.