UI Guide
Layout Overview
Section titled “Layout Overview”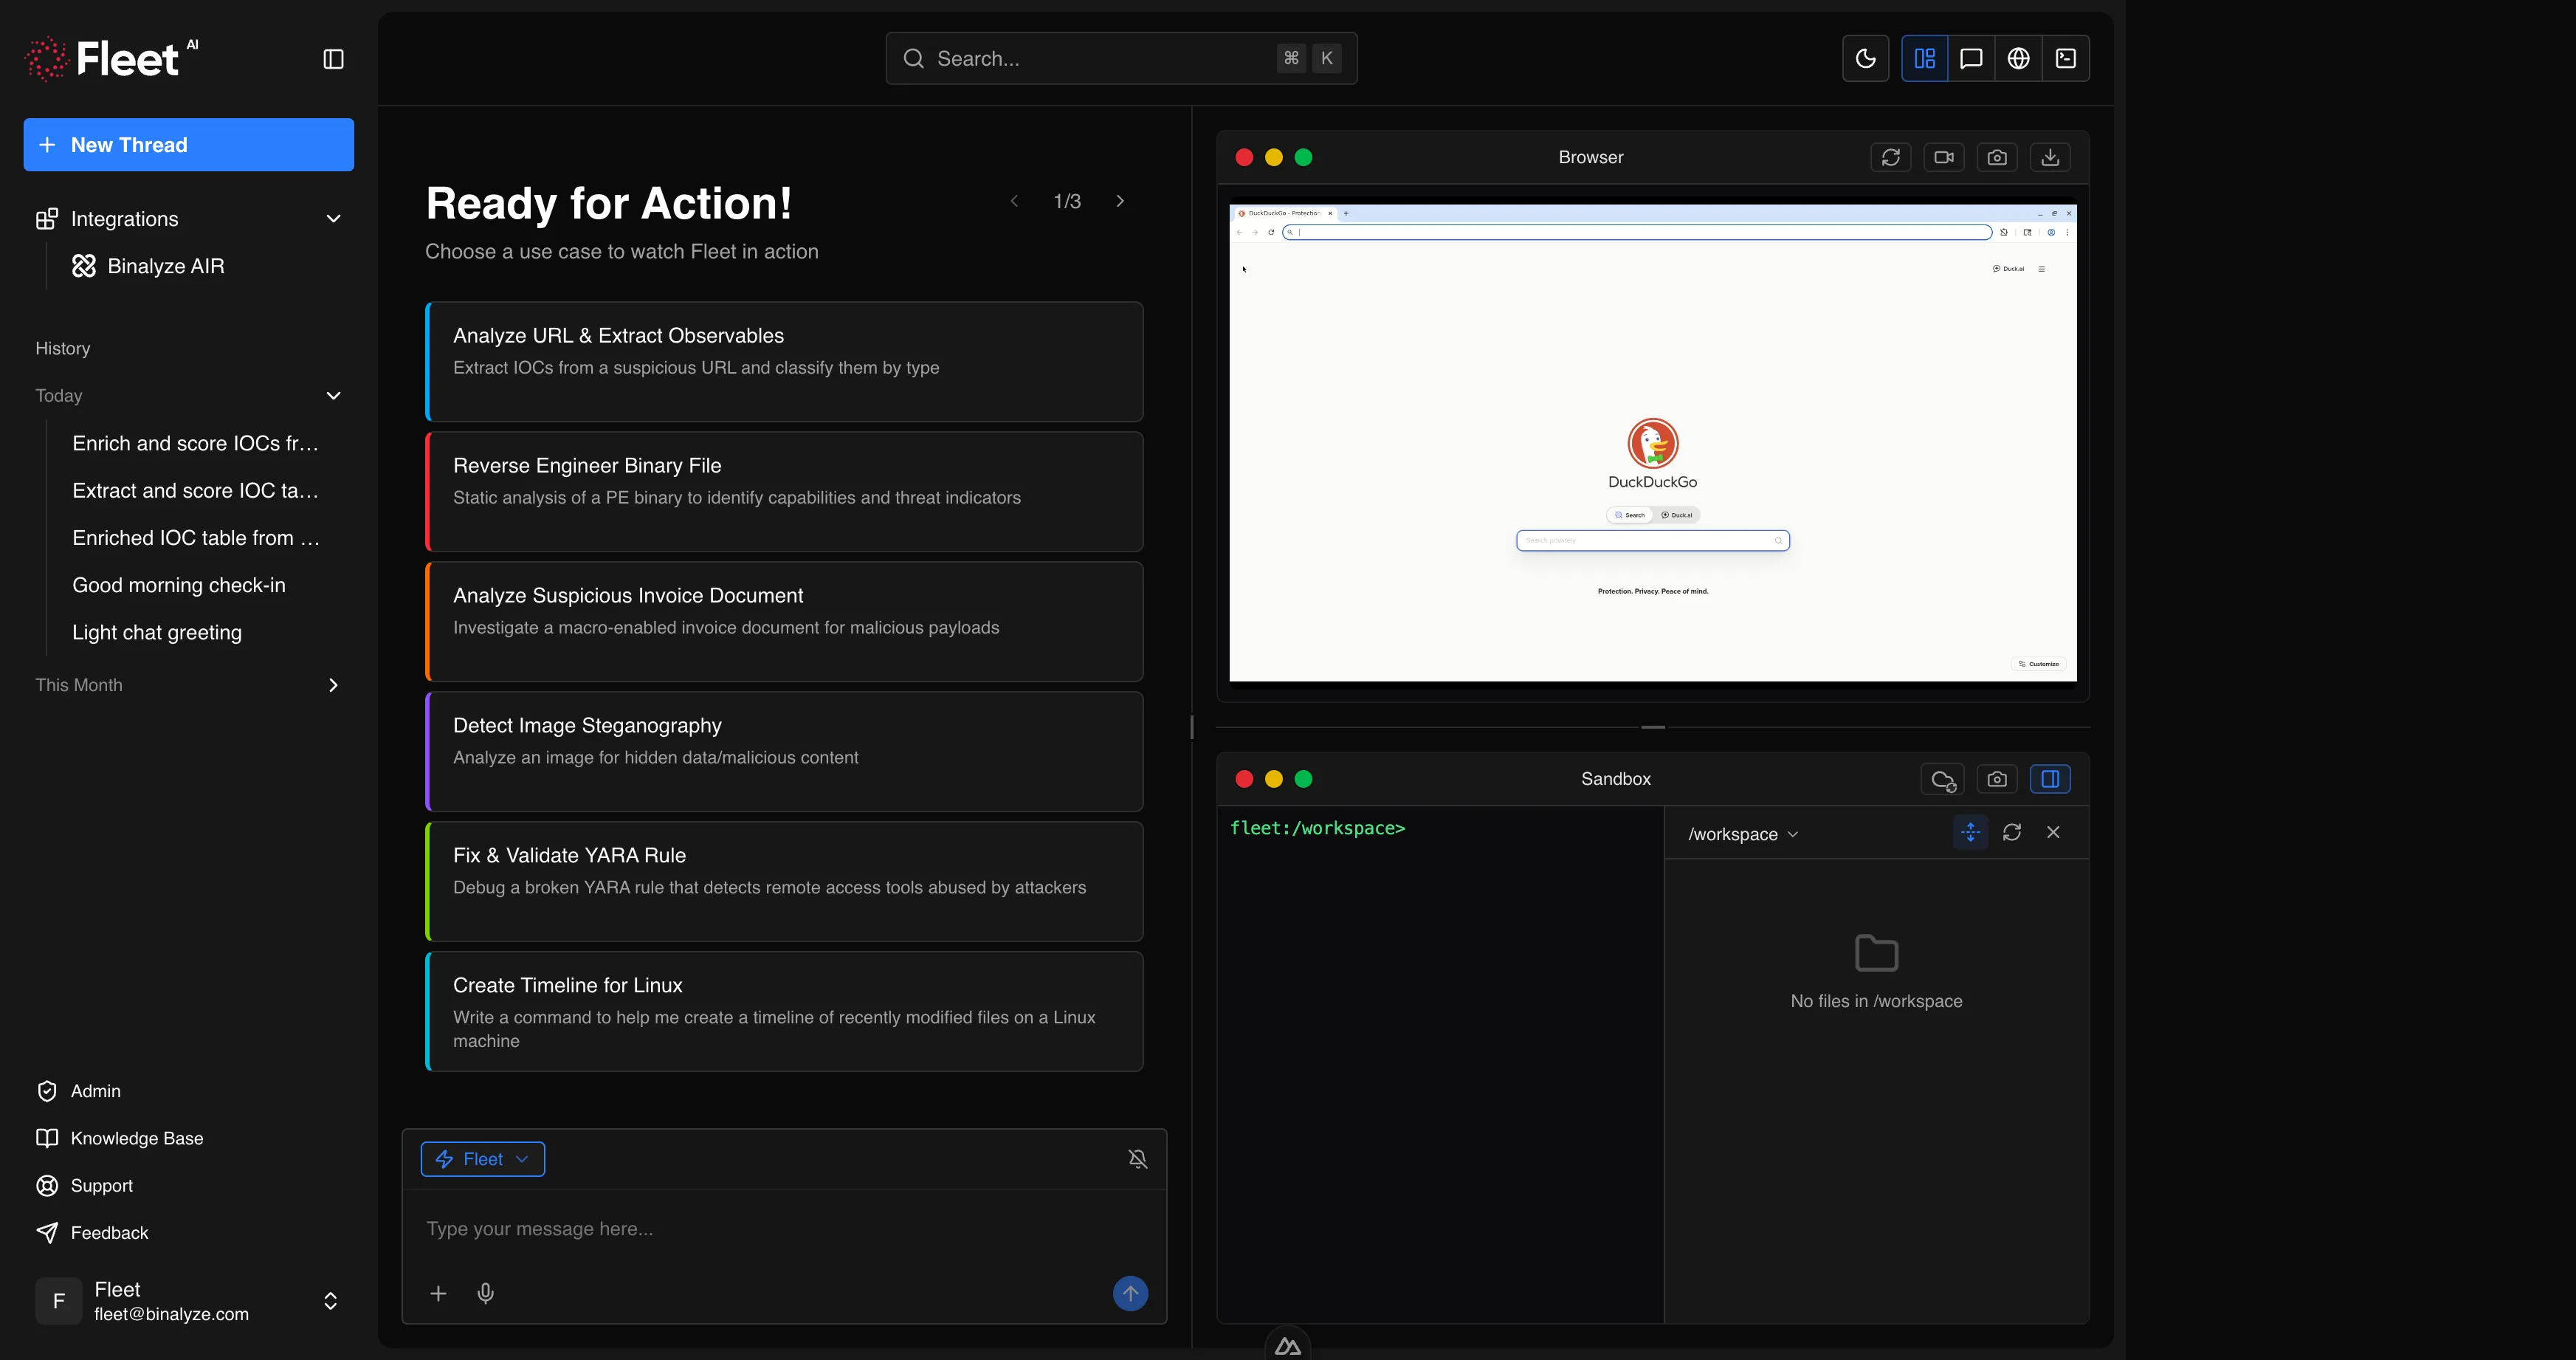
Fleet’s interface is organized into three main areas:
| Area | Purpose |
|---|---|
| Sidebar | Navigation, chat history, integrations, user menu |
| Header | Breadcrumbs, global search, theme toggle, view controls |
| Content area | The main workspace where conversations, settings, and other views are displayed |
On desktop, the sidebar is always visible and can be collapsed to maximize the content area. On mobile, the sidebar opens as a slide-out panel when triggered from the header.
The content area adapts based on the current view. During a conversation, it can be split into resizable panels for the chat, browser, and terminal/workspace side by side.
Home Screen
Section titled “Home Screen”The home screen is the first view you see after logging in. It serves as the starting point for all new conversations.
Quickstart Cards
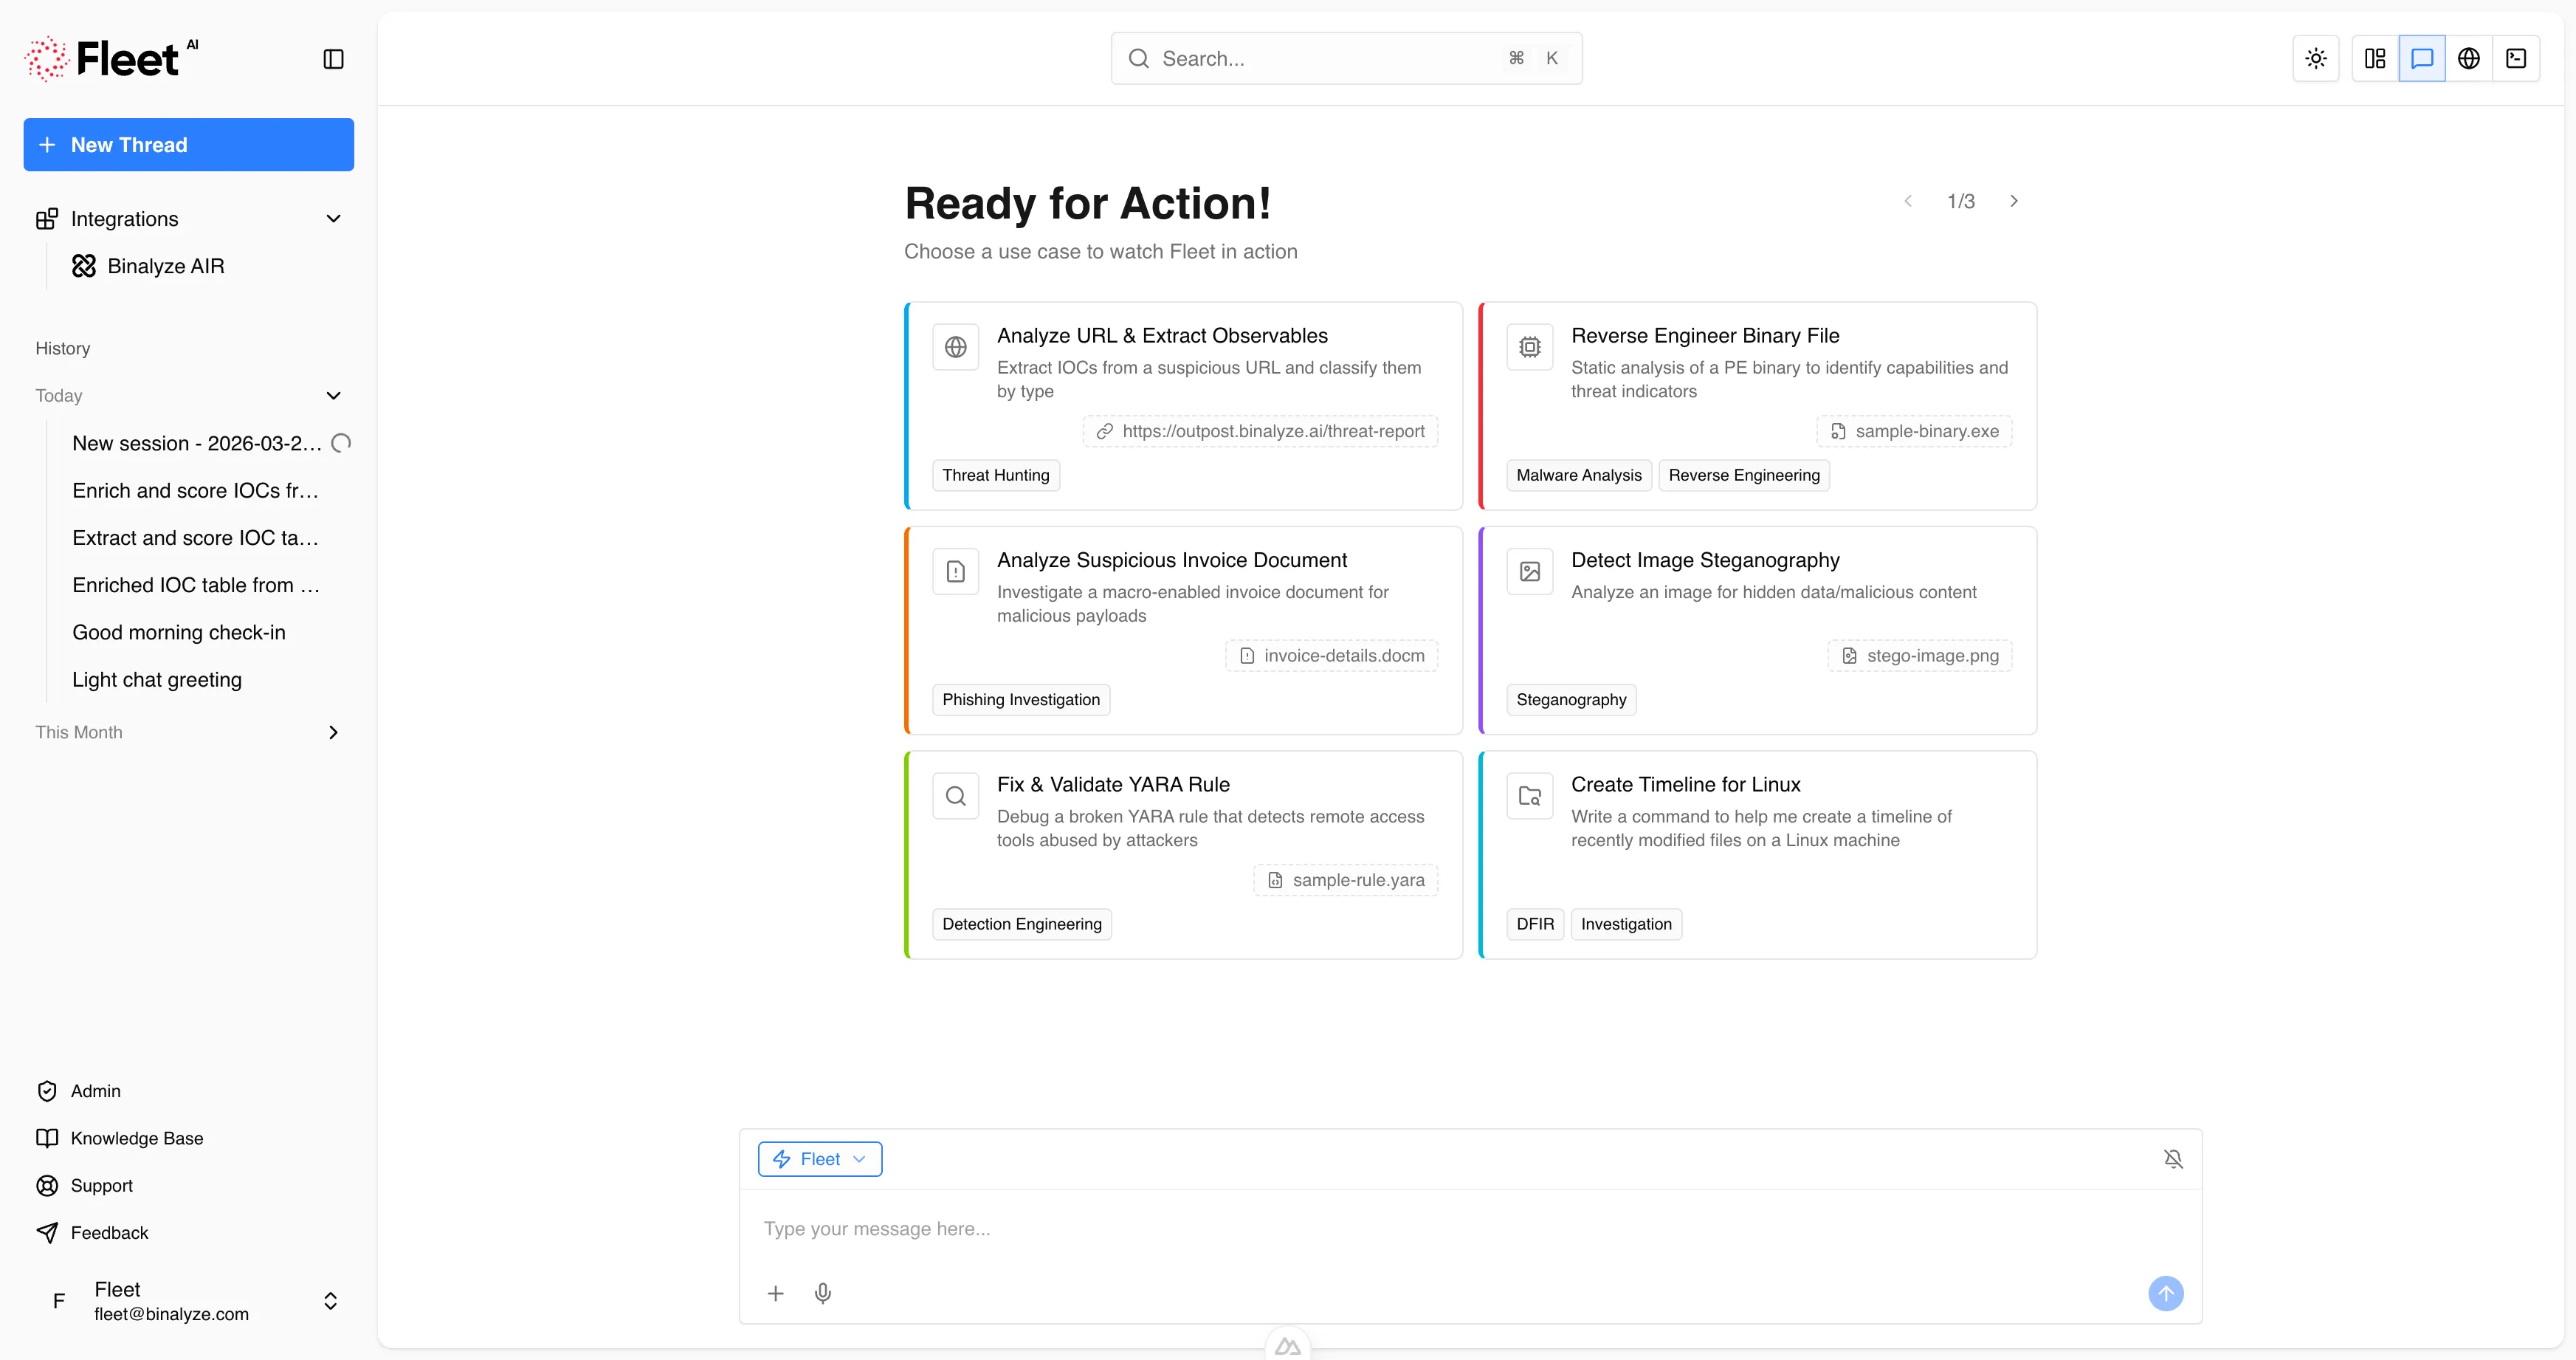
Section titled “Quickstart Cards”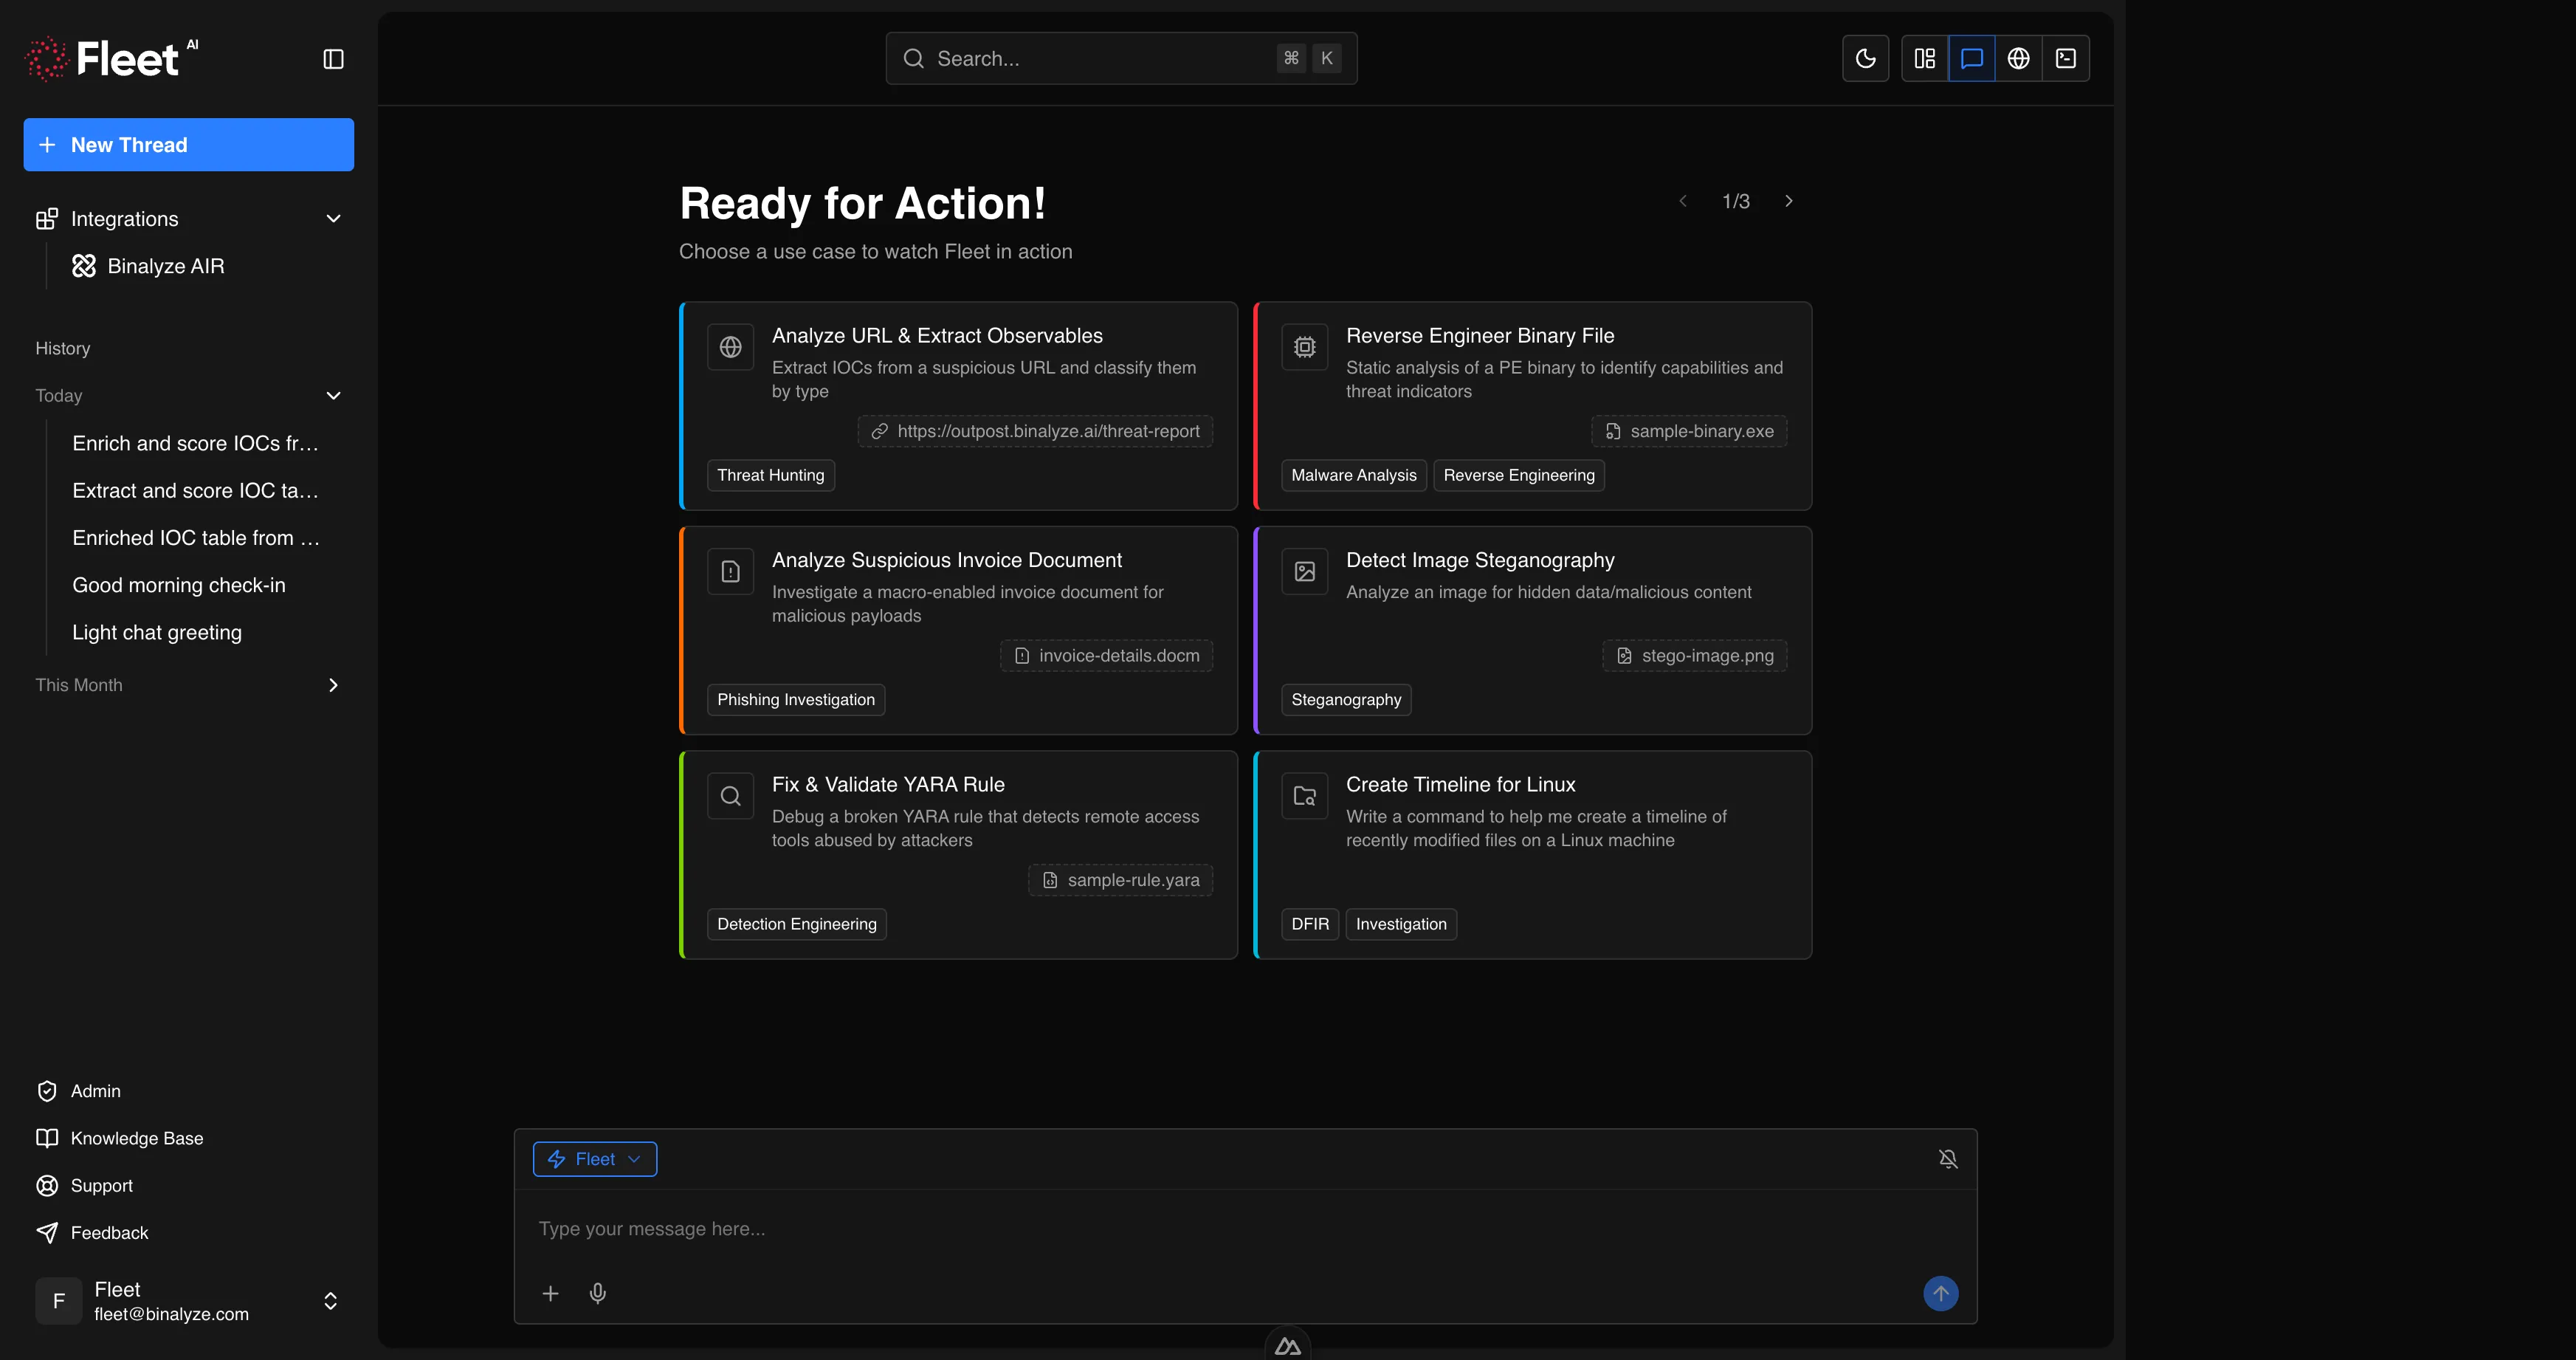
The center of the home screen displays a library of quickstart cards organized by category (Threat Hunting, Malware Analysis, Reverse Engineering, Phishing Investigation, Detection Engineering, DFIR and Investigation, Network Forensics, Steganography). Each card shows a title and brief description of the workflow it initiates.
Cards are paginated when there are more than fit on screen. Use the navigation controls to browse categories.
Clicking a card pre-fills the composer with a ready-to-use prompt and, where applicable, attaches a sample file. You can modify the prompt or replace the attachment before sending.
See Quickstarts for the full list of available cards.
Composer
Section titled “Composer”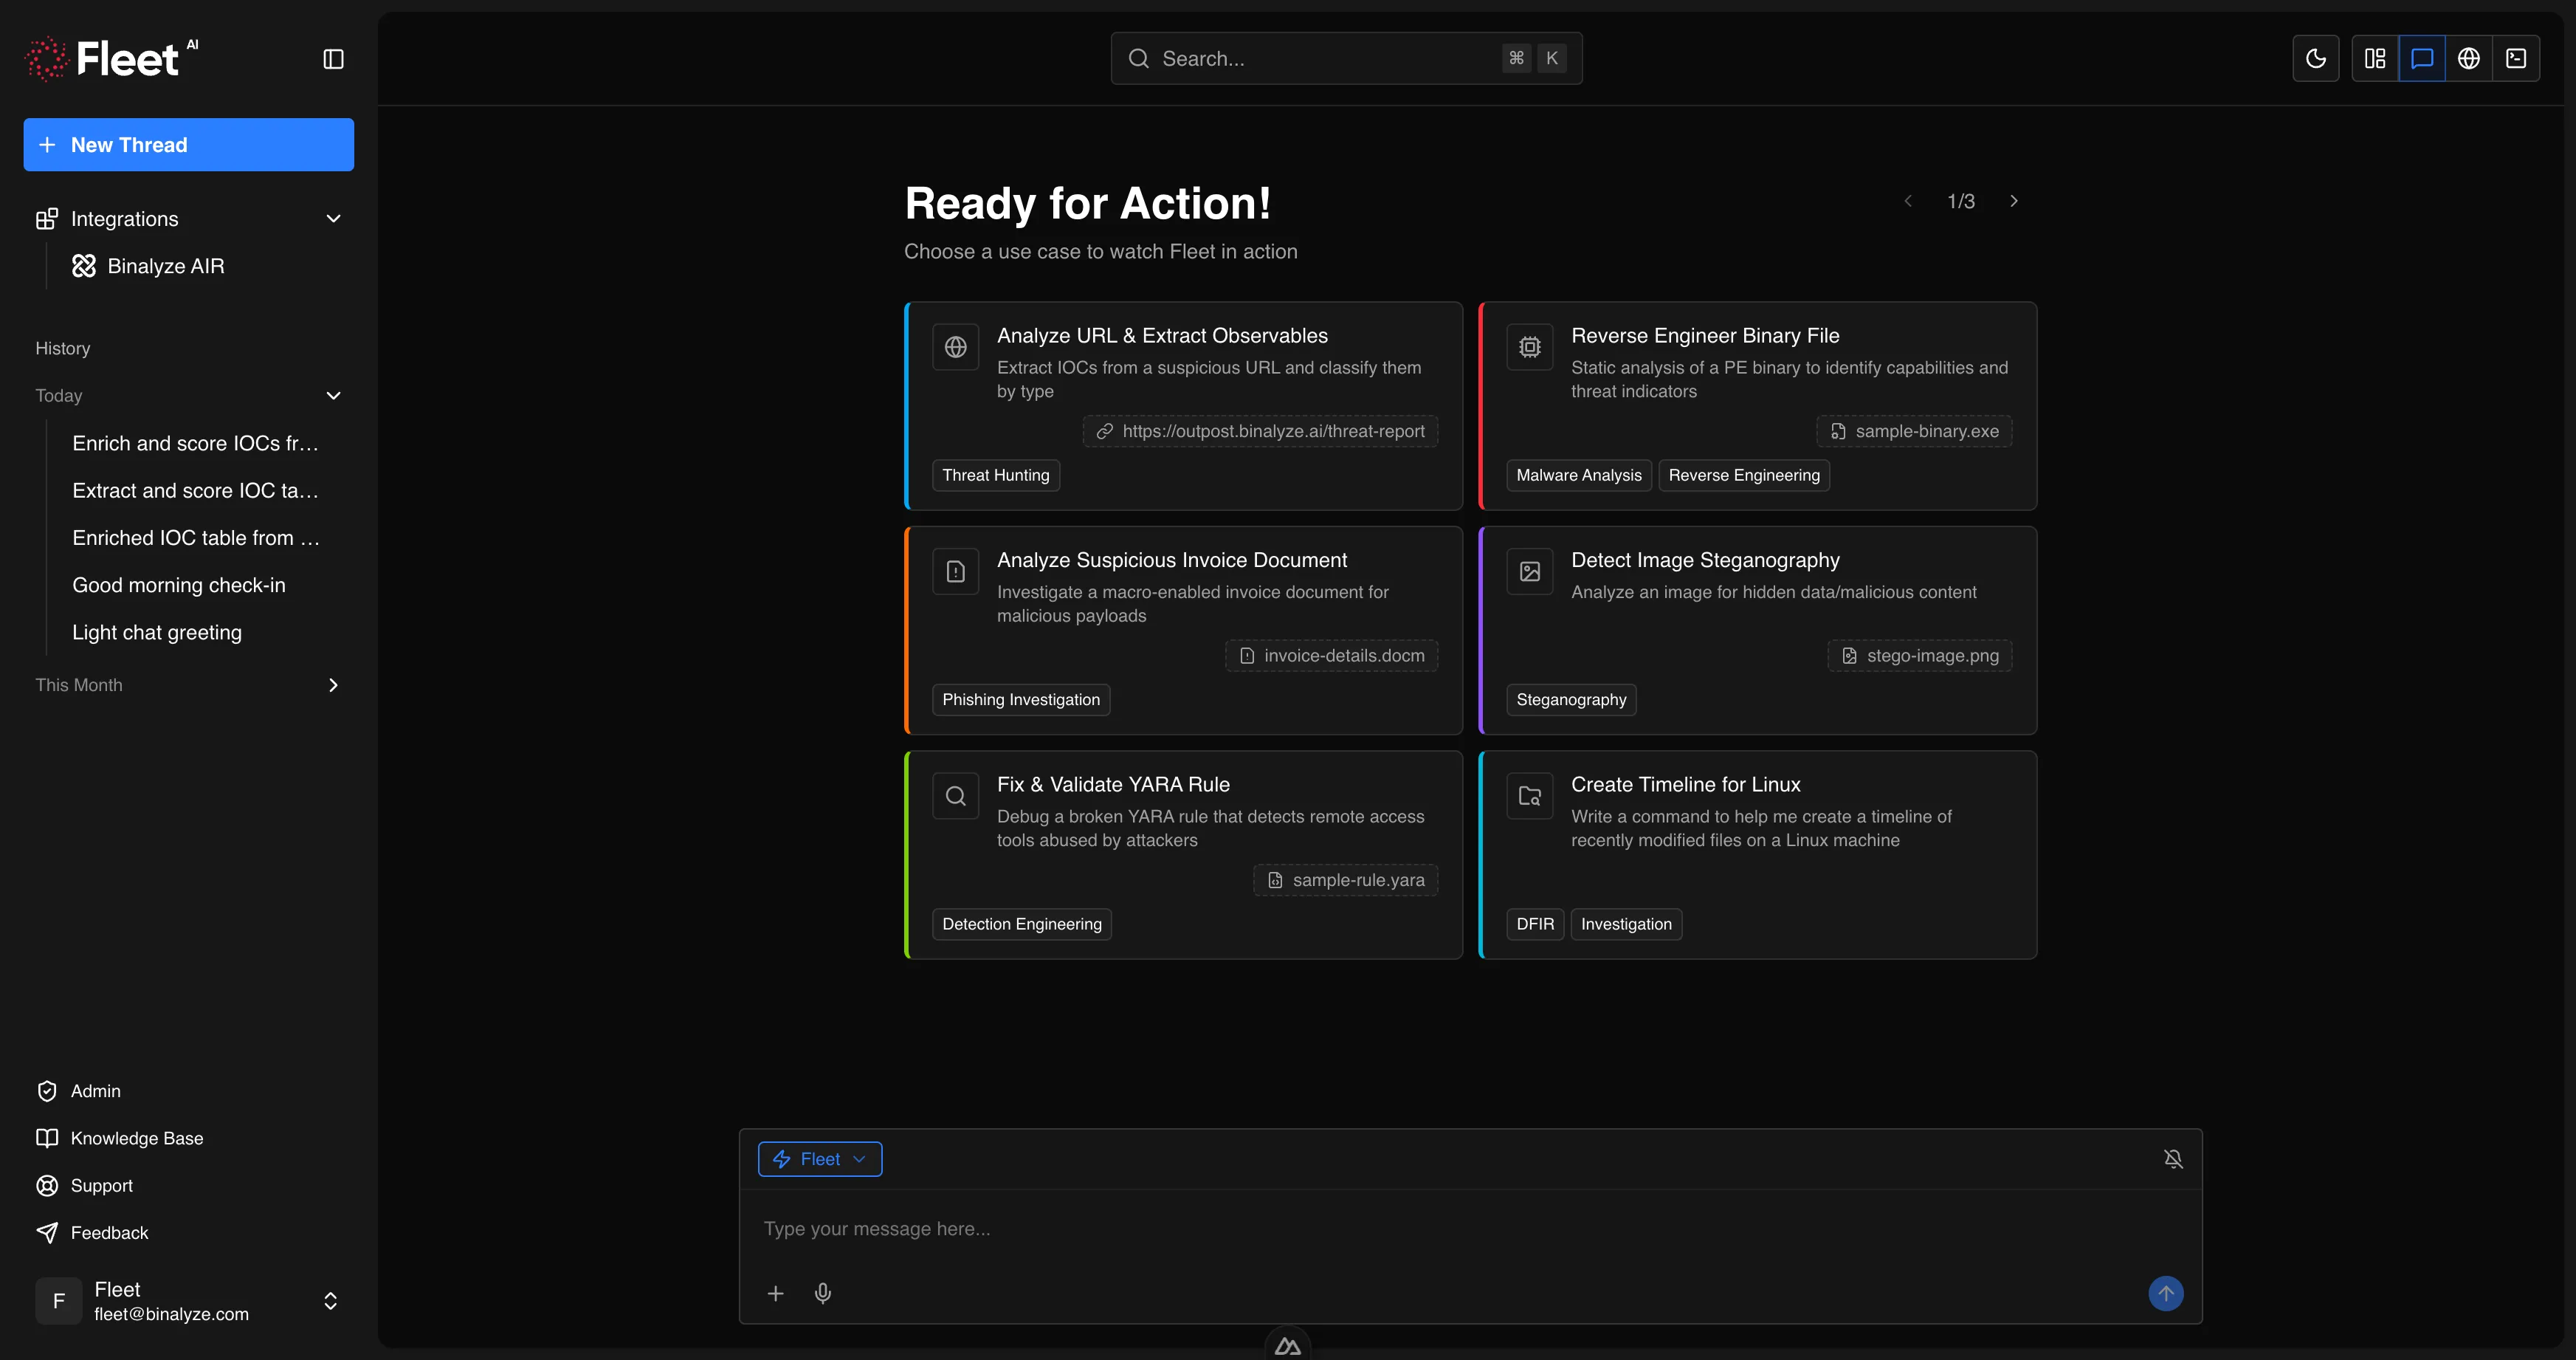
Below the quickstart cards is the main composer — a text input where you type your prompt. The composer on the home screen is in its expanded form, giving you full space to write detailed requests.
You can attach files by:
- Clicking the attachment button in the composer
- Dragging and dropping files anywhere onto the home screen (a drop overlay appears to confirm)
The composer also provides:
- Voice input — dictate your prompt using the microphone button
- Sound toggle — enable or disable completion sounds
- Mode selector — choose the assistant mode (when multiple modes are available)
Press Enter to send the prompt and start a new conversation. Fleet creates a new session and navigates to the conversation view.
Conversation View
Section titled “Conversation View”The conversation view is where you interact with Fleet during an active session. It displays the full message history and provides the composer for follow-up messages.
Message Stream
Section titled “Message Stream”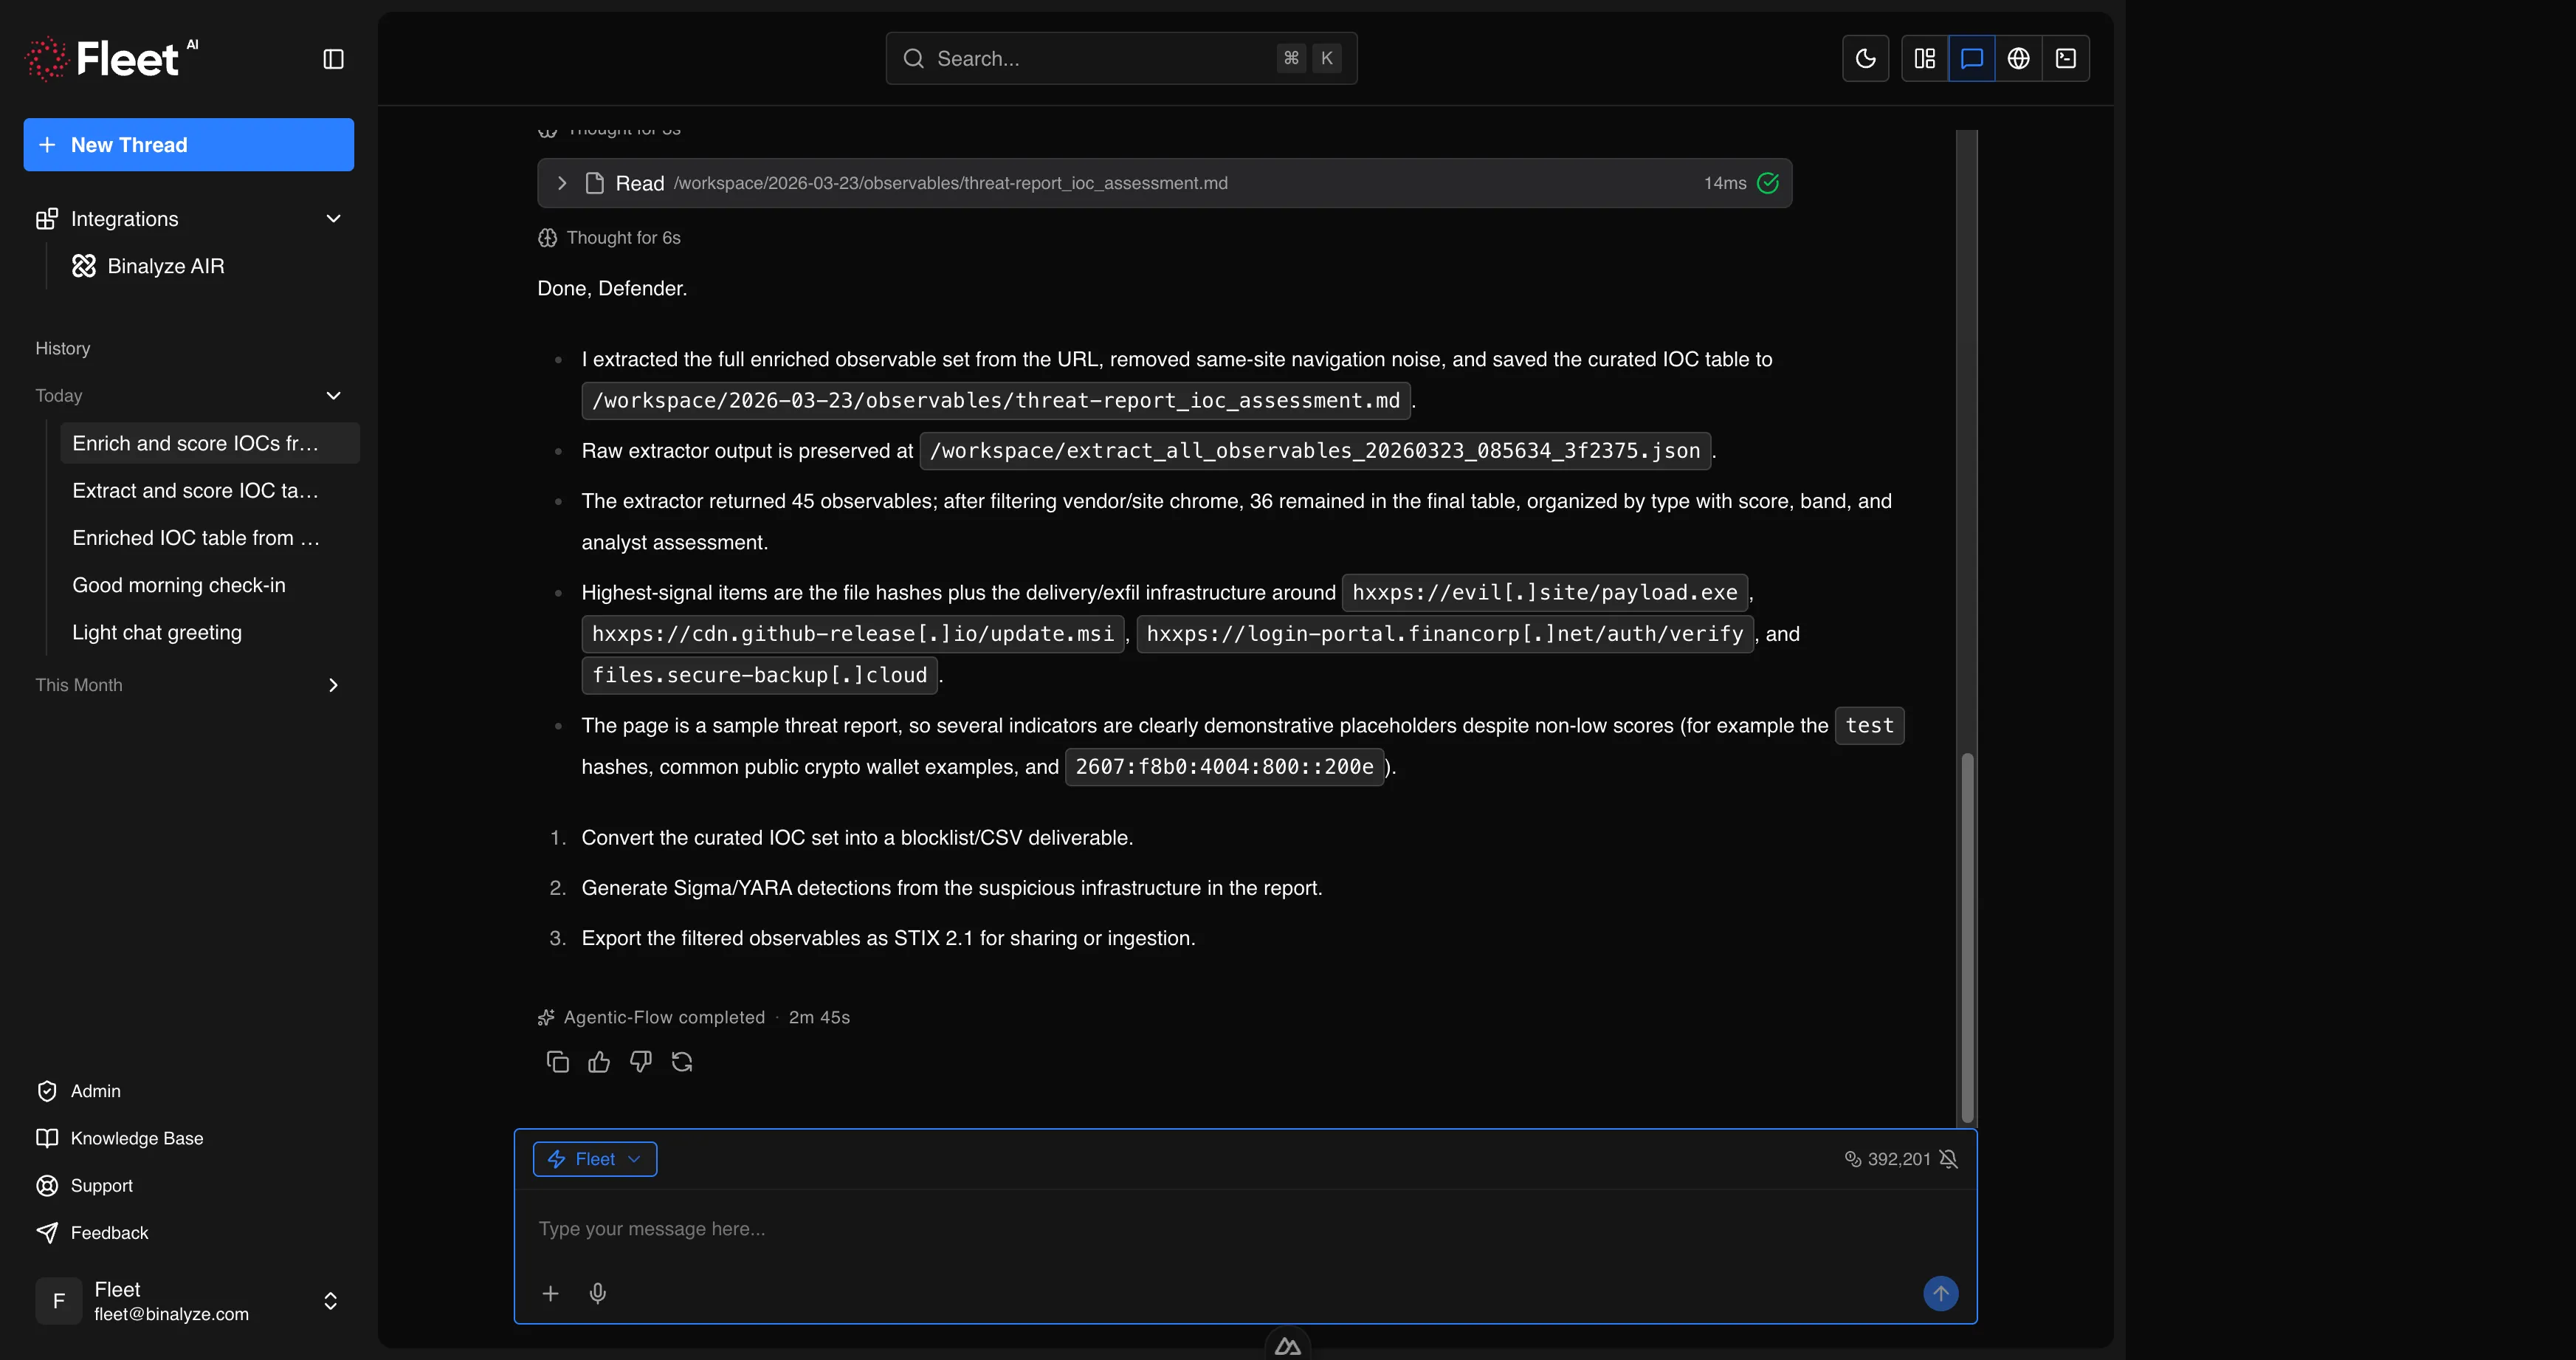
Messages appear in chronological order, scrolling down as the conversation progresses:
- Your messages — displayed with your text and any attached files
- Fleet’s responses — displayed with structured output including text, code blocks, tables, and generated files
- Reasoning blocks — collapsible sections showing Fleet’s thought process and tool selection logic (click to expand or collapse)
- Tool outputs — results from specific tools Fleet used during analysis, displayed with headers identifying the tool and its output
- Interactive prompts — when Fleet needs input from you mid-analysis, it presents structured prompts (confirmation buttons, single-choice options, multi-select lists, or free-text fields)
- Error messages — dismissible banners at the bottom of the chat area if something goes wrong
When Fleet is actively working, a loading indicator shows progress. You can observe the analysis in real time as results stream in.
Scroll and Search
Section titled “Scroll and Search”For long conversations:
- A scroll-to-bottom button appears when you scroll up, letting you jump back to the latest message
- In-thread search (keyboard shortcut) opens a search bar at the top of the conversation. Type to find text within the current session, with match navigation (previous/next) to jump between results
Compact Composer
Section titled “Compact Composer”In the conversation view, the composer switches to a compact form at the bottom of the message stream. It provides the same capabilities as the home screen composer (text input, attachments, voice, mode selector) plus:
- Stop button — abort the current generation if Fleet is still working
- Usage indicator — shows token usage when relevant
Sidebar
Section titled “Sidebar”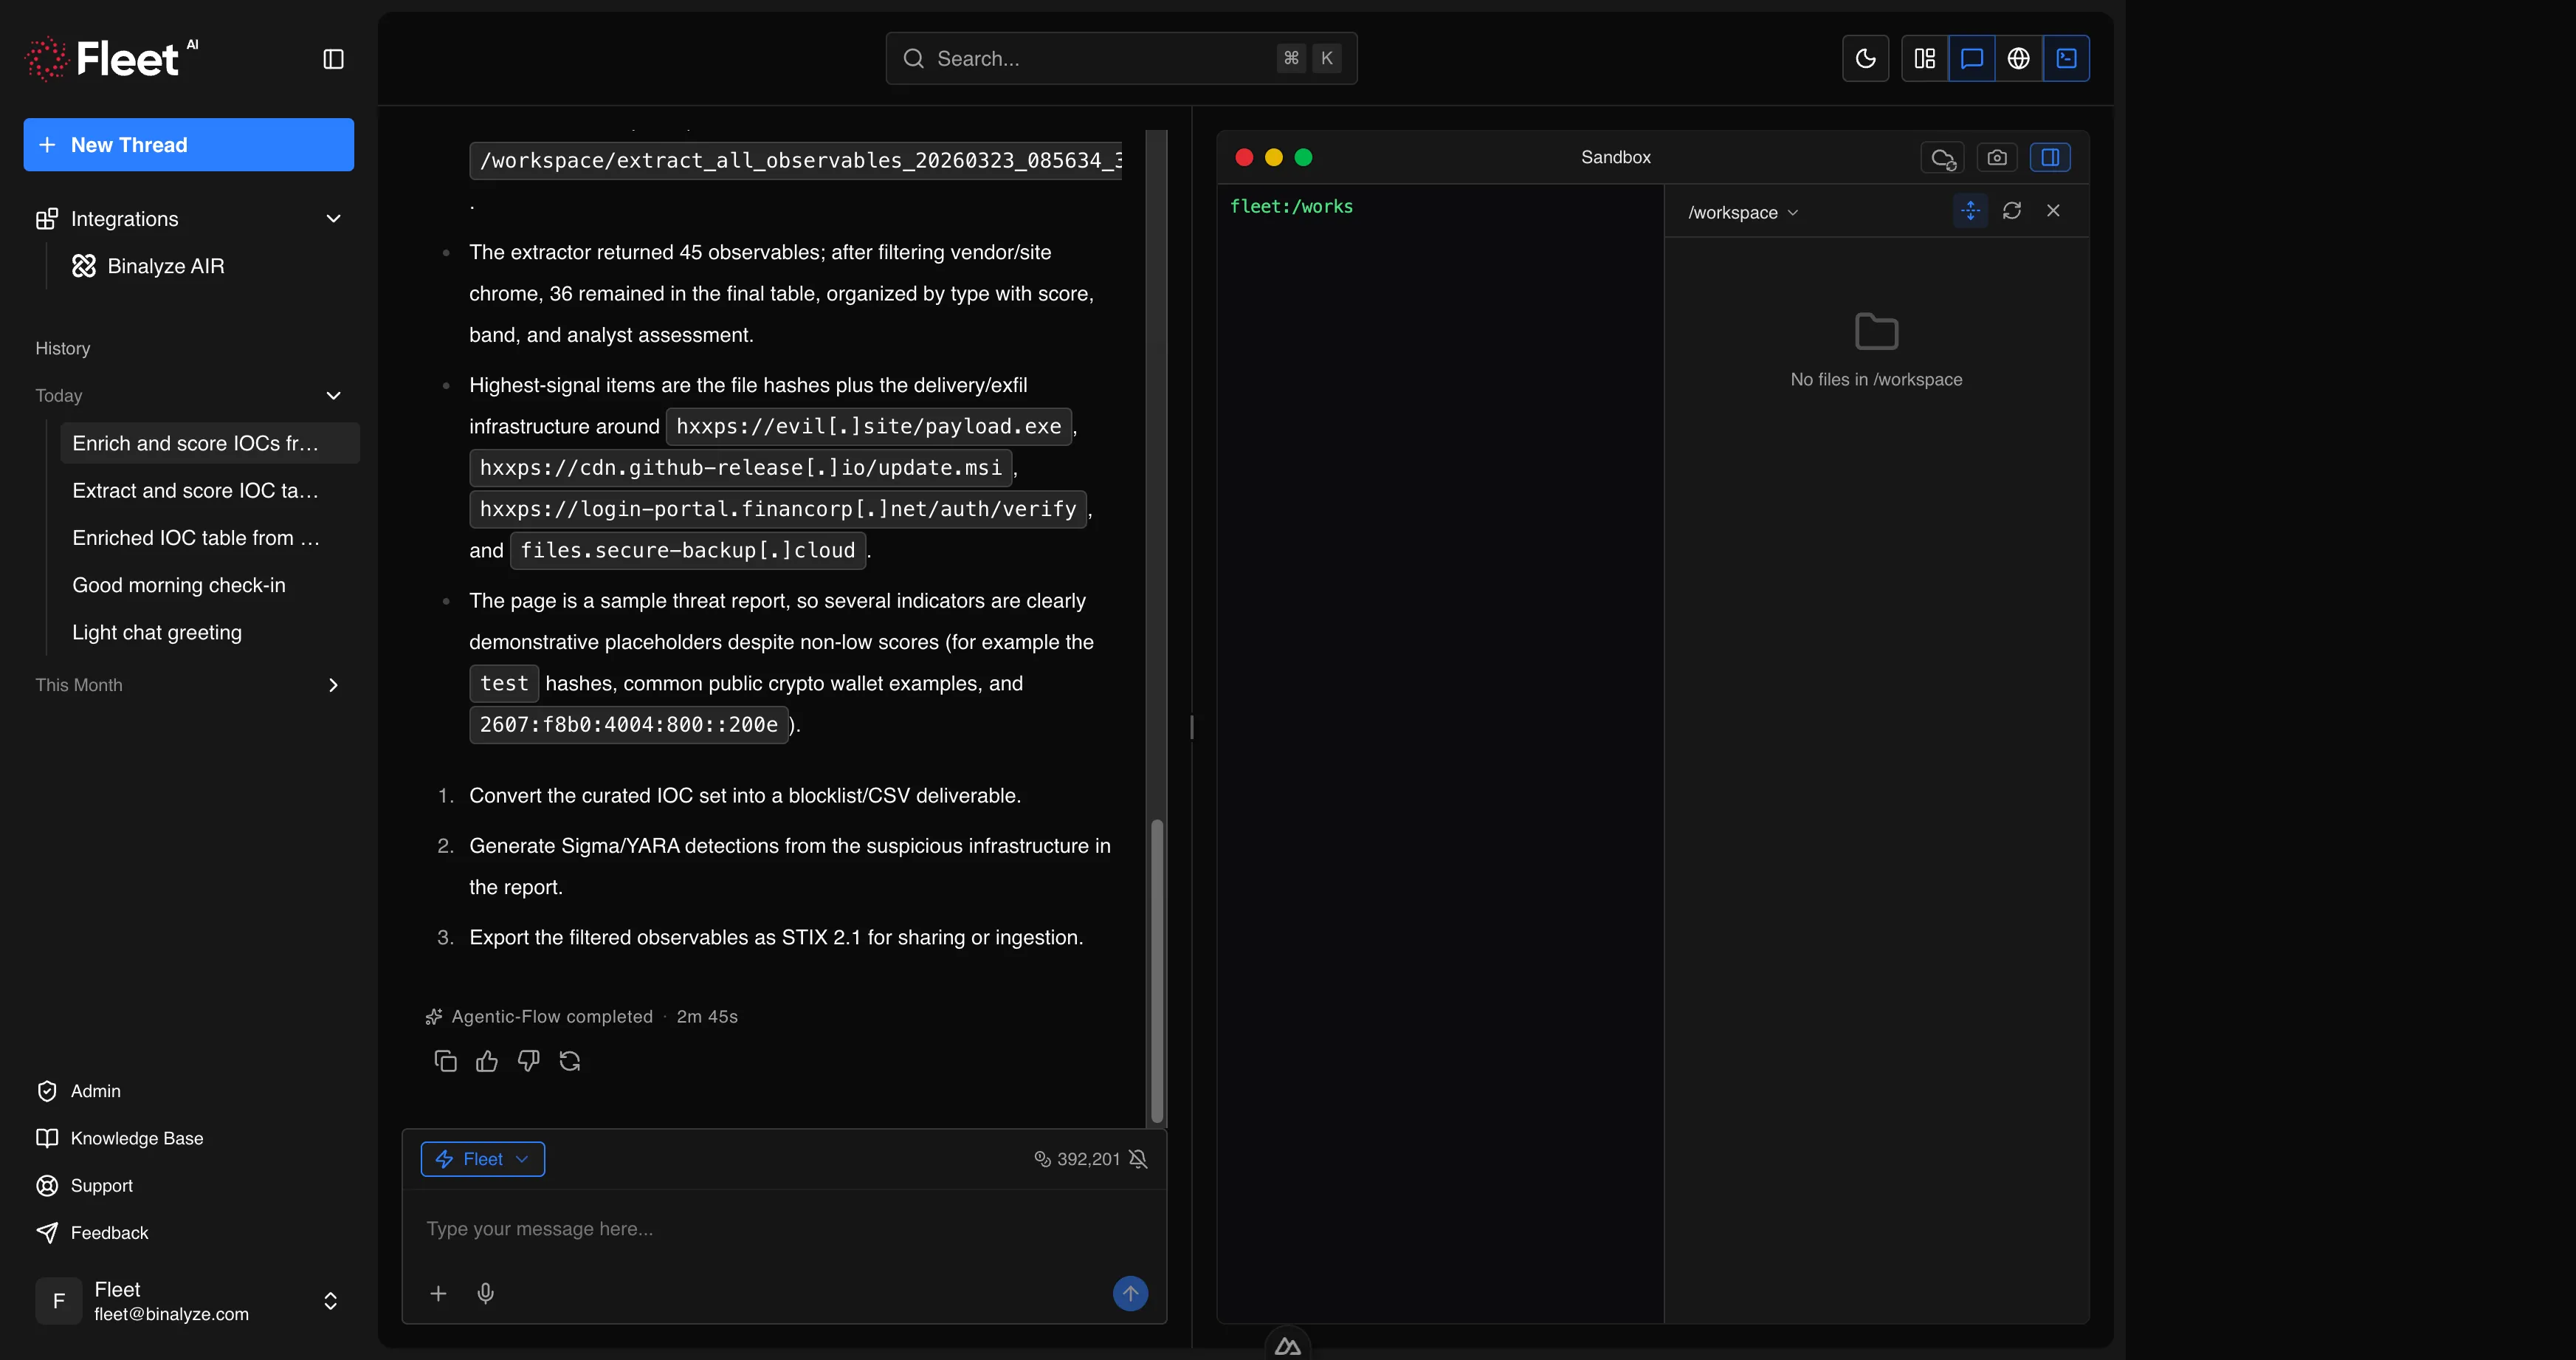
The sidebar is the primary navigation element, always accessible on the left side of the screen.
Top Section
Section titled “Top Section”- Logo — clicking the logo returns to the home screen
- Collapse/expand control — toggle the sidebar width on desktop. When collapsed, only icons are visible; hovering reveals labels
- New chat button — start a fresh conversation (keyboard shortcut available)
Integrations
Section titled “Integrations”A dedicated section listing configured integrations (such as AIR). Clicking an integration navigates to its configuration page.
Chat History
Section titled “Chat History”All previous conversations are listed below the integrations section, grouped chronologically. Each entry shows the conversation title (auto-generated from the first message or manually renamed).
Right-clicking or using the menu on a conversation entry provides:
- Rename — change the conversation title
- Delete — remove the conversation (with confirmation)
Active conversations show a busy indicator when Fleet is currently working.
Footer
Section titled “Footer”- Admin — visible only to users with administrator privileges; links to the admin dashboard
- Documentation — links to this knowledge base
- Support — links to Binalyze support
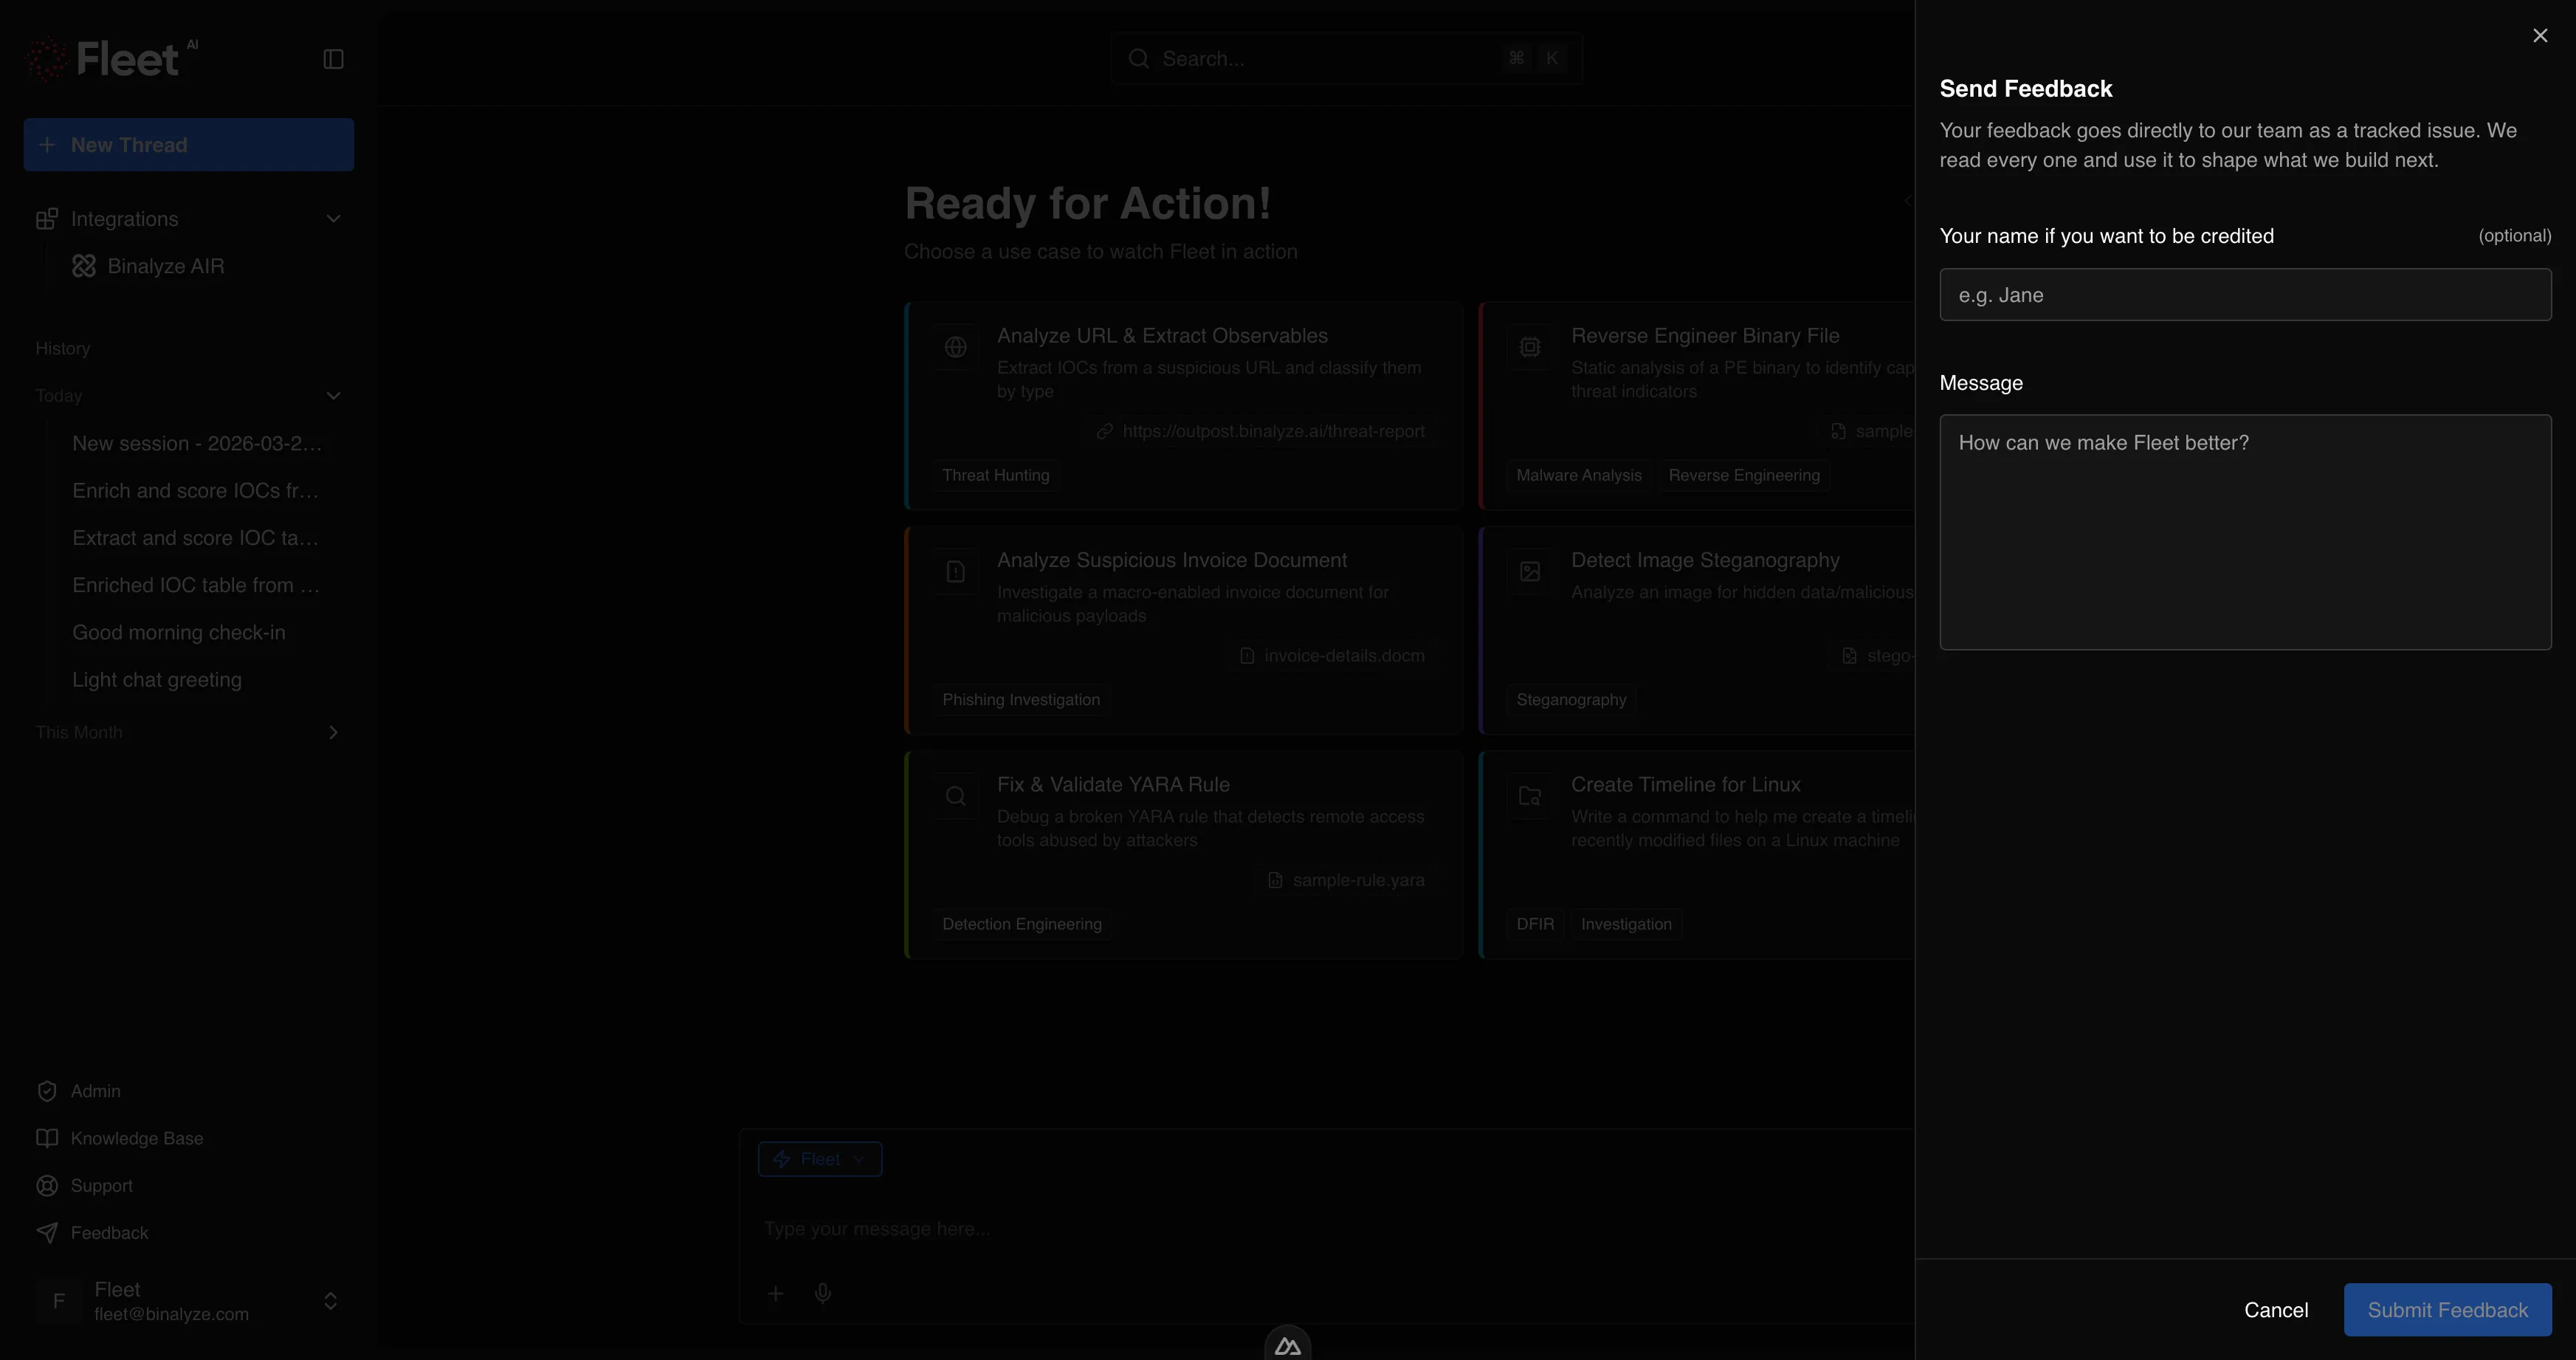
- Feedback — opens a feedback panel where you can submit product feedback directly
User Menu
Section titled “User Menu”At the bottom of the sidebar, your avatar and email are displayed. Clicking opens a menu with:
- Settings — navigate to the settings pages
- Billing — navigate to usage and plan information
- Log out — end your session
Header
Section titled “Header”The header bar runs across the top of the content area.
Breadcrumbs
Section titled “Breadcrumbs”On pages with navigation depth (settings, integrations, admin), breadcrumbs show your current location and allow quick navigation to parent pages.
Global Search
Section titled “Global Search”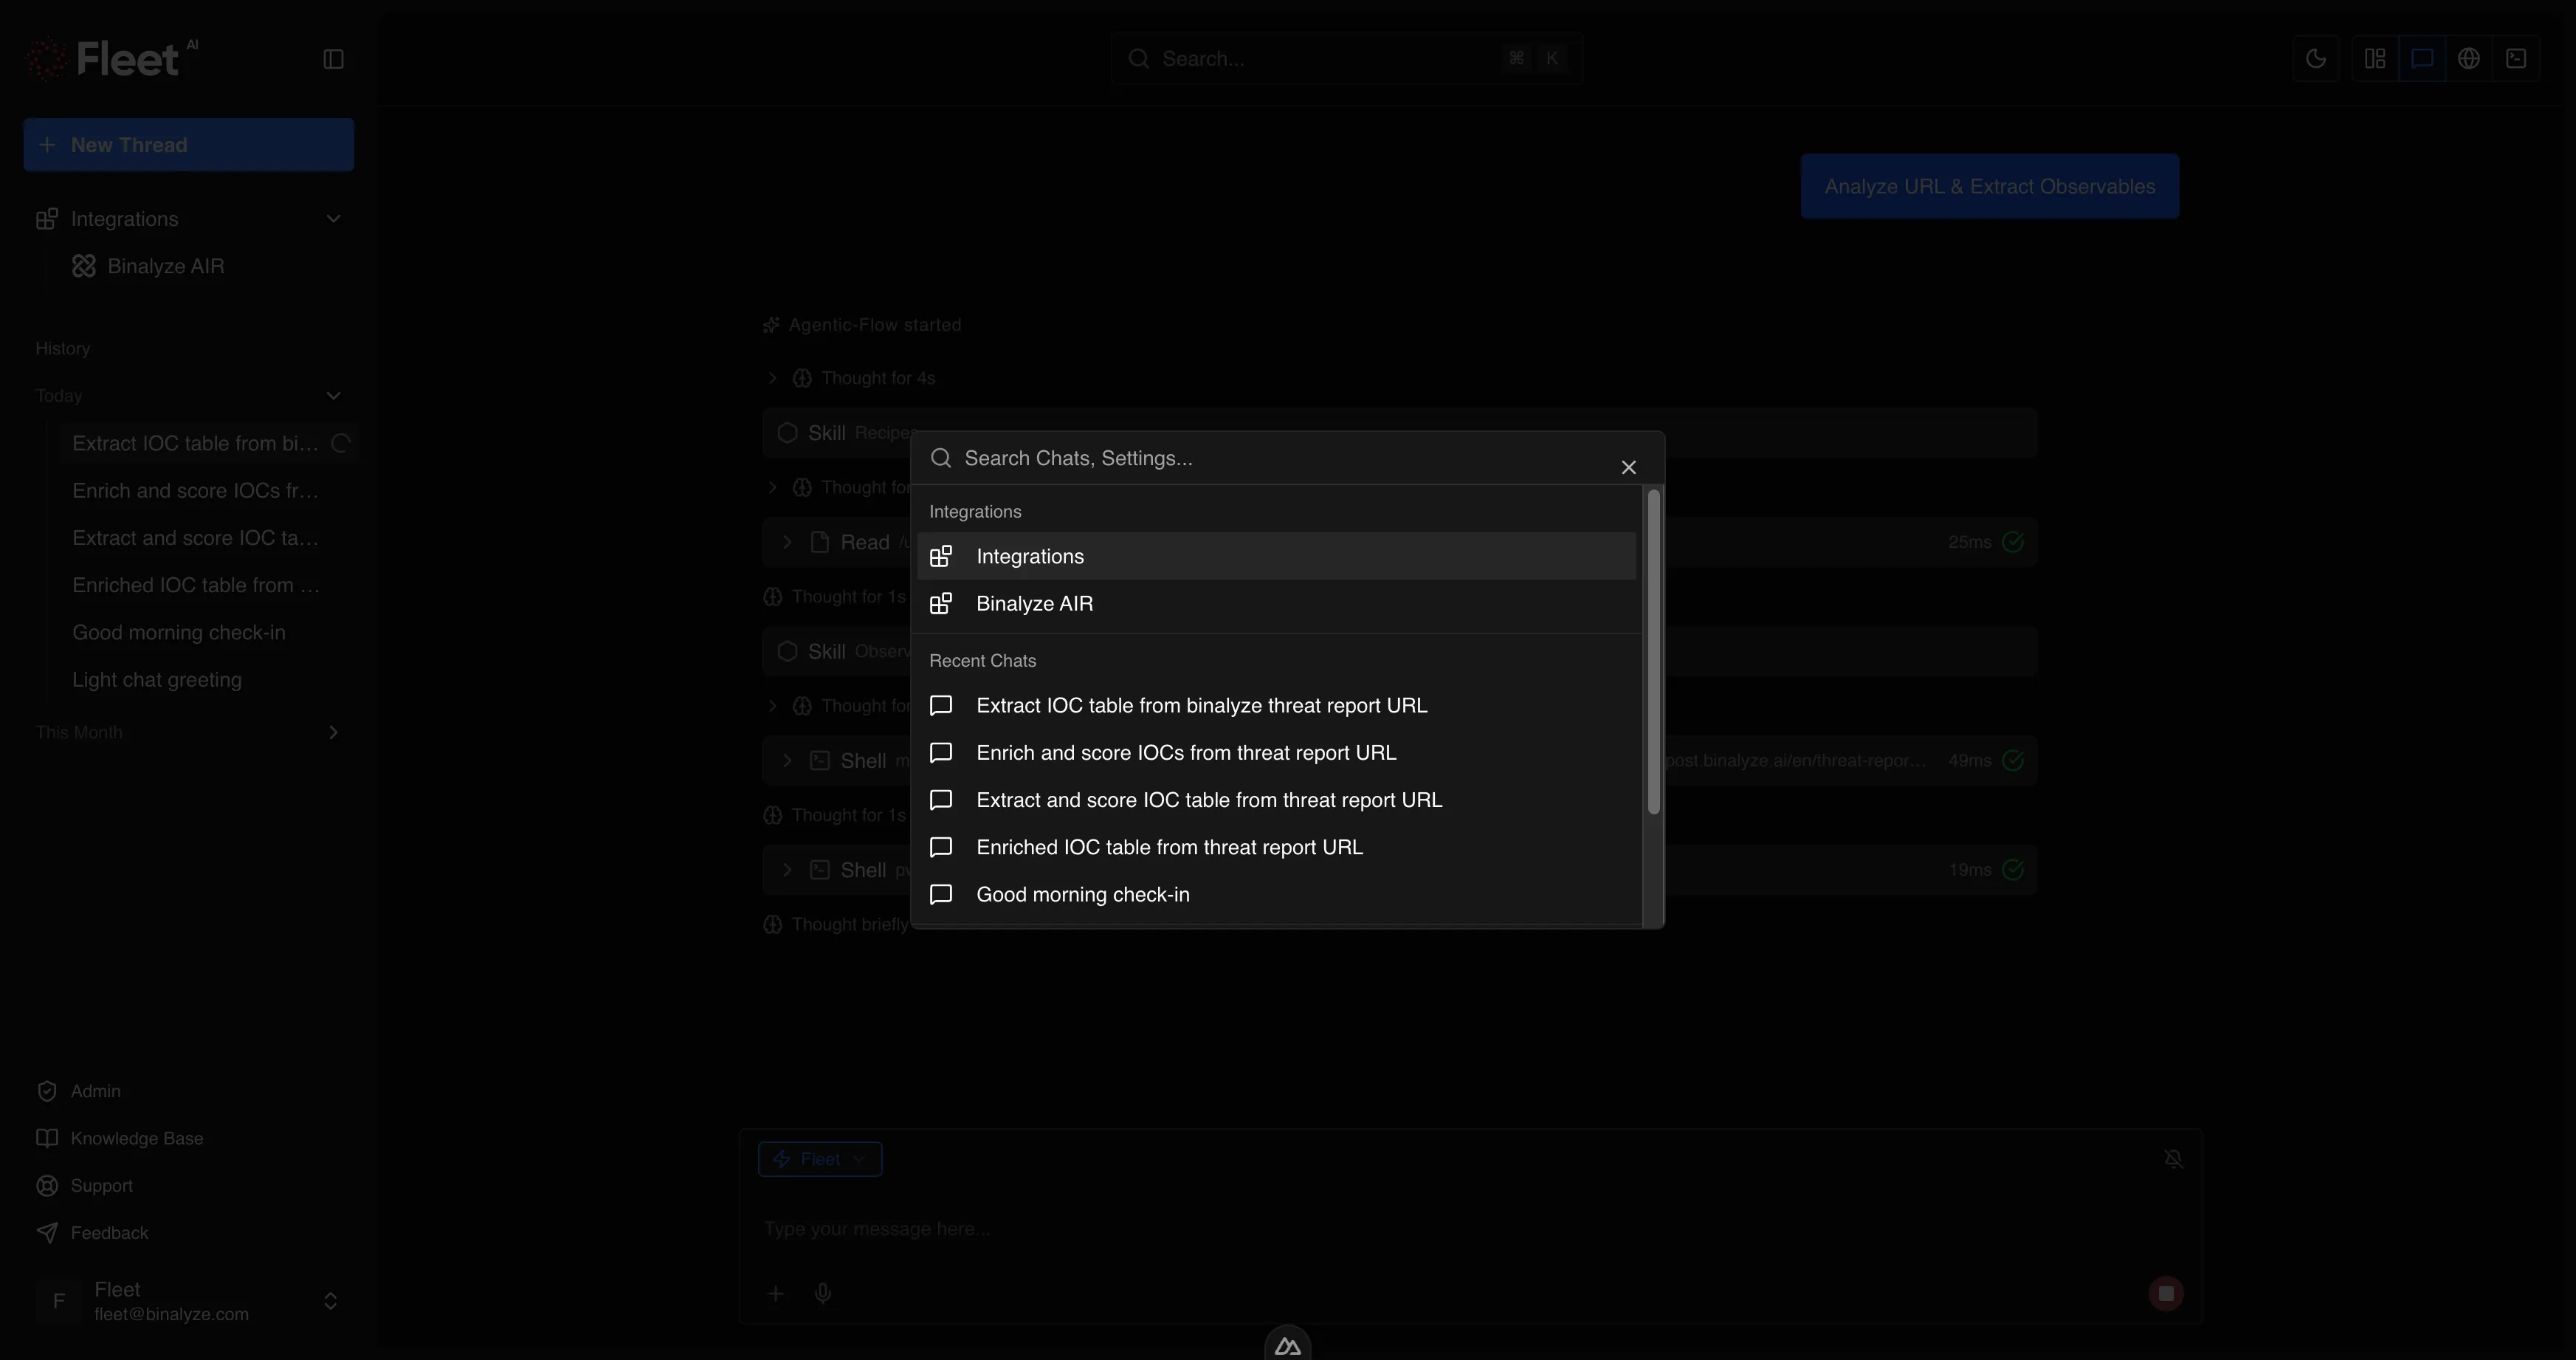
A search/command palette accessible via keyboard shortcut. It provides:
- Chat search — find previous conversations by content
- Navigation — jump to settings, integrations, or other pages
- Recent items — quick access to recently viewed conversations
Theme Toggle
Section titled “Theme Toggle”Switch between light mode and dark mode. The preference persists across sessions. Fleet’s interface, including logos and images, adapts to the selected theme.
View Selector
Section titled “View Selector”Available during conversations, the view selector controls which panels are visible in the content area:
| View | What It Shows |
|---|---|
| Chat only | Full-width conversation |
| Chat + Browser | Conversation alongside the remote browser panel |
| Chat + Terminal | Conversation alongside the terminal/workspace panel |
| Chat + Browser + Terminal | All three panels side by side |
Panels can be resized by dragging the dividers between them. The layout persists within the session.
A keyboard shortcut cycles through the available view configurations.
Workspace Panels
Section titled “Workspace Panels”When enabled via the view selector, workspace panels appear alongside the conversation.
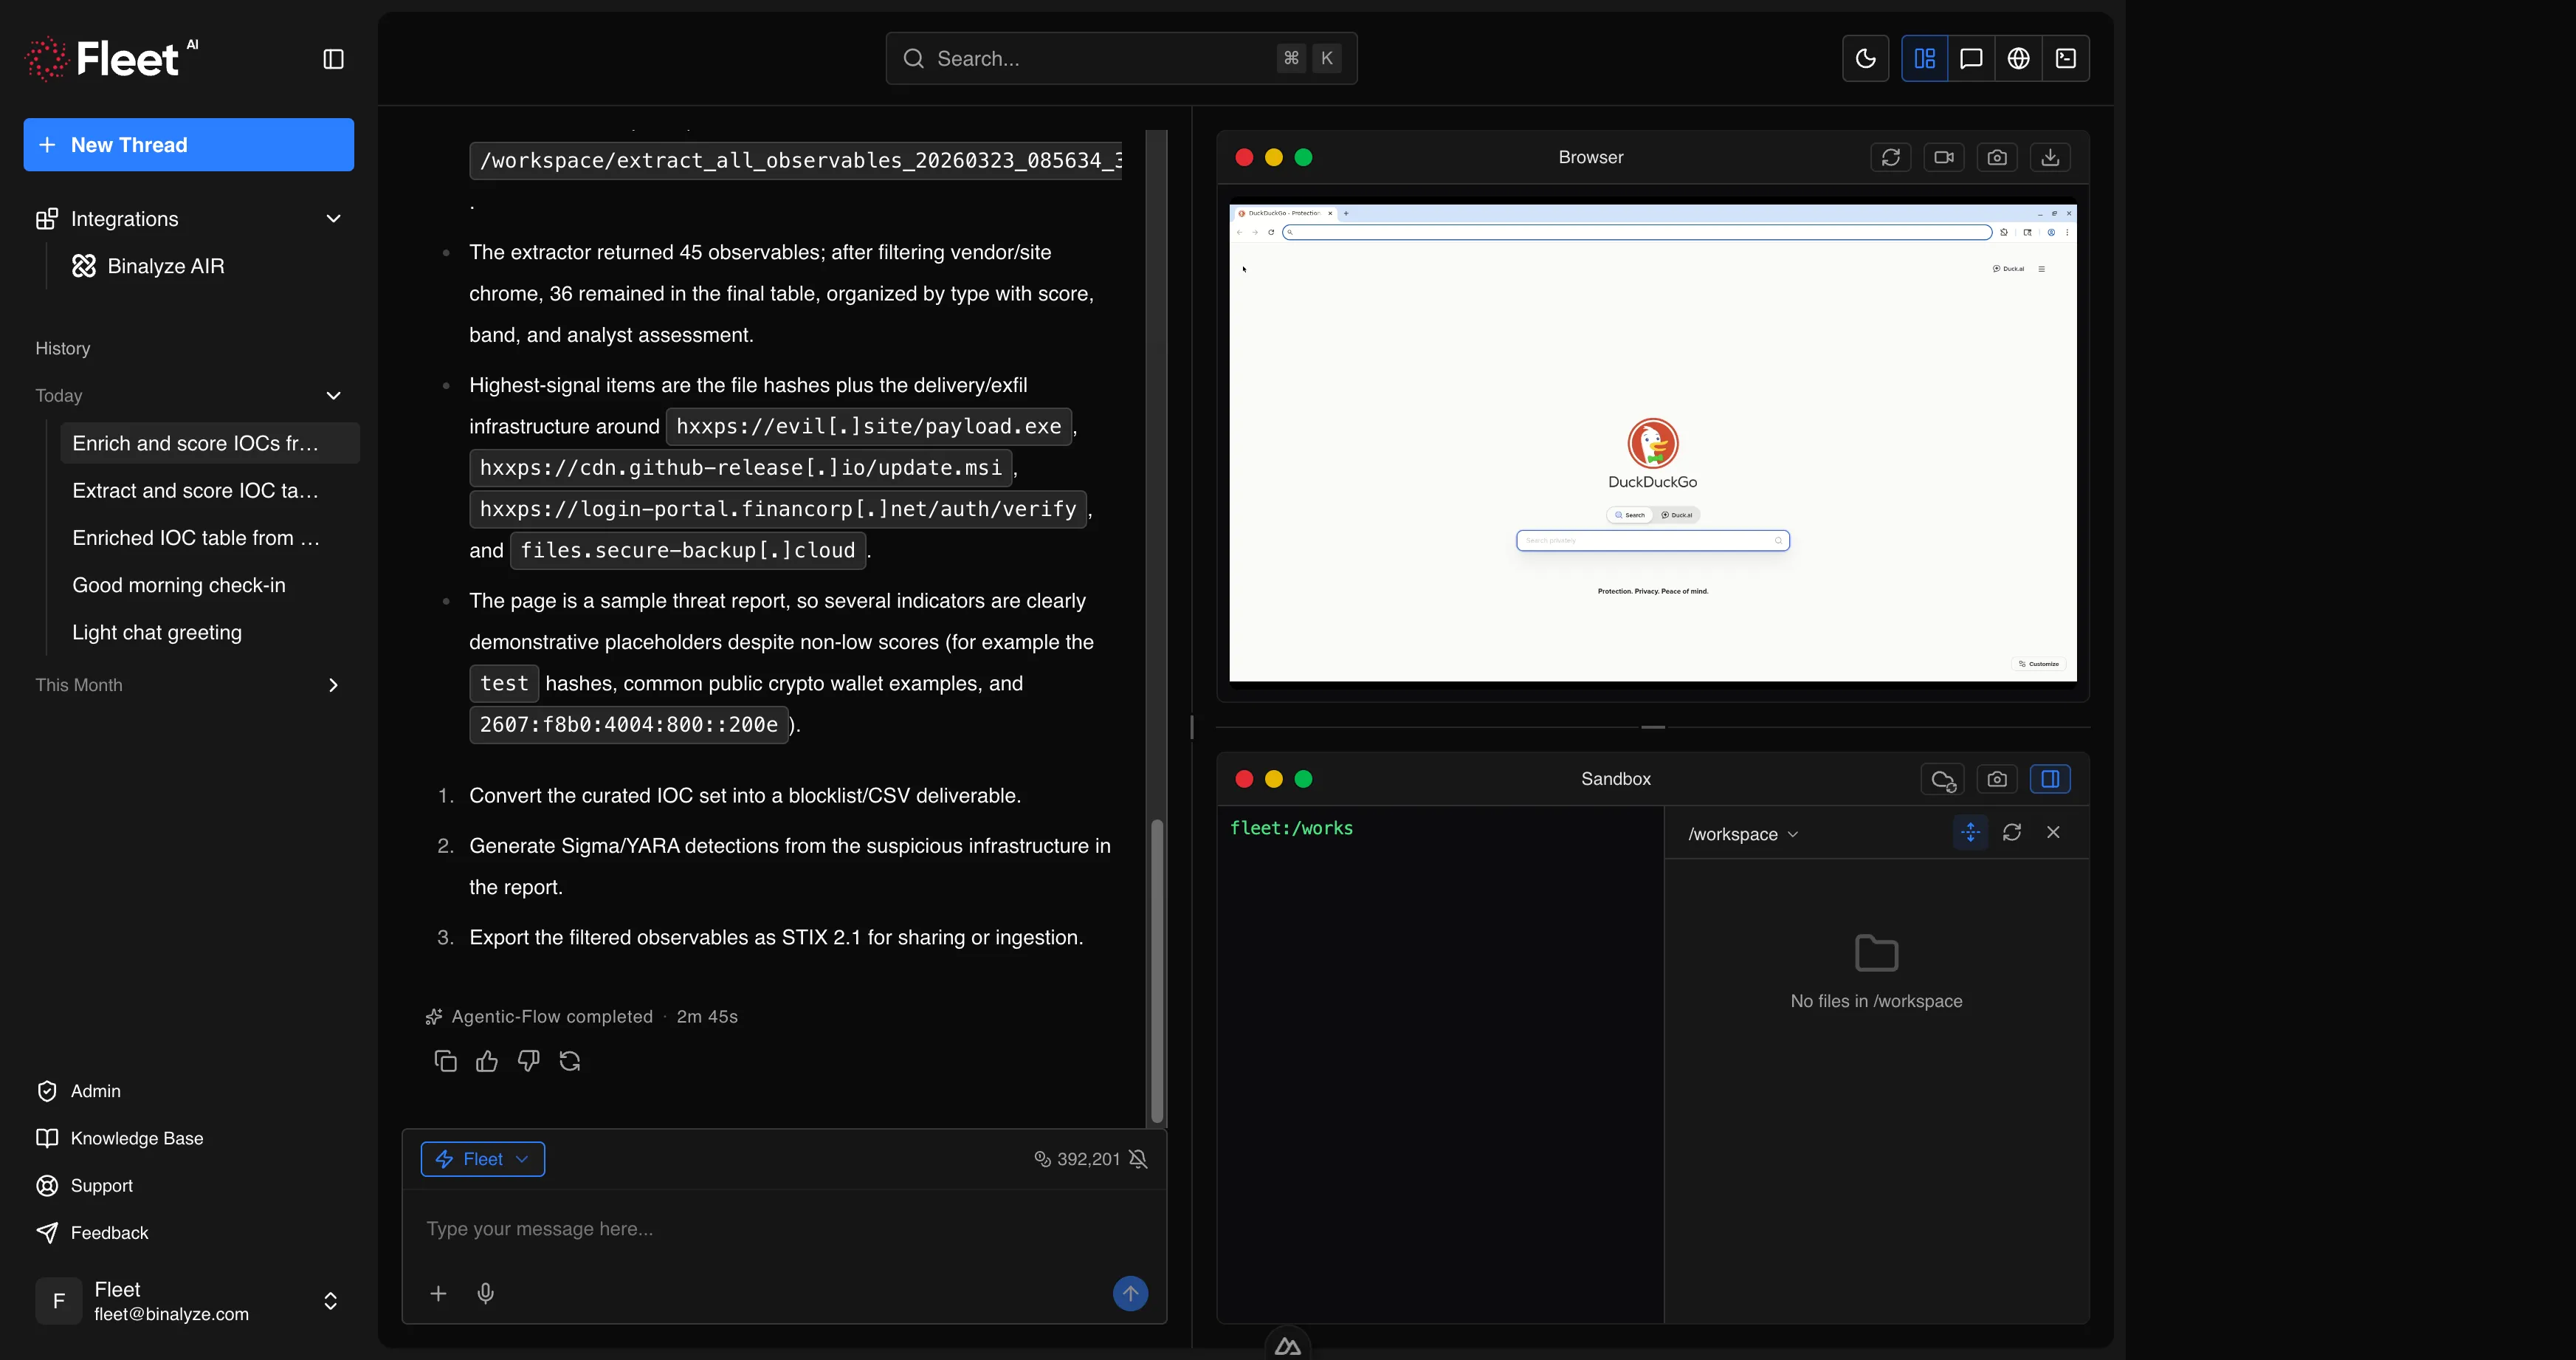
Browser Panel
Section titled “Browser Panel”The browser panel displays Fleet’s remote browser. When Fleet performs browser automation (navigating URLs, taking screenshots, interacting with web pages), the activity is visible here in real time.
You can observe:
- Page navigation and loading
- Element interactions (clicks, form fills)
- Screenshots being captured
- Files being downloaded
The browser runs in an isolated environment separate from your local machine and network. See Browser Automation for capability details.
Terminal Panel
Section titled “Terminal Panel”
The terminal panel provides interactive shell access to Fleet’s analysis environment. It supports multiple tabs, so you can run several terminal sessions simultaneously.
Use the terminal to:
- Run commands directly in Fleet’s Linux environment
- Inspect files generated during analysis
- Execute custom scripts or tools
- Verify analysis results manually
File Workspace
Section titled “File Workspace”The file workspace is accessible from the terminal panel area and provides a visual file tree of all files in Fleet’s working directory. This includes:
- Files you uploaded as attachments
- Files Fleet generated during analysis (reports, detection rules, STIX bundles, deobfuscated code)
- Files downloaded from web pages or AIR endpoints
The file tree supports:
- Browsing — navigate the directory structure
- Preview — click a file to preview its contents
- Download — download individual files or directories to your local machine
See Workspace and Terminal for full details.
Settings
Section titled “Settings”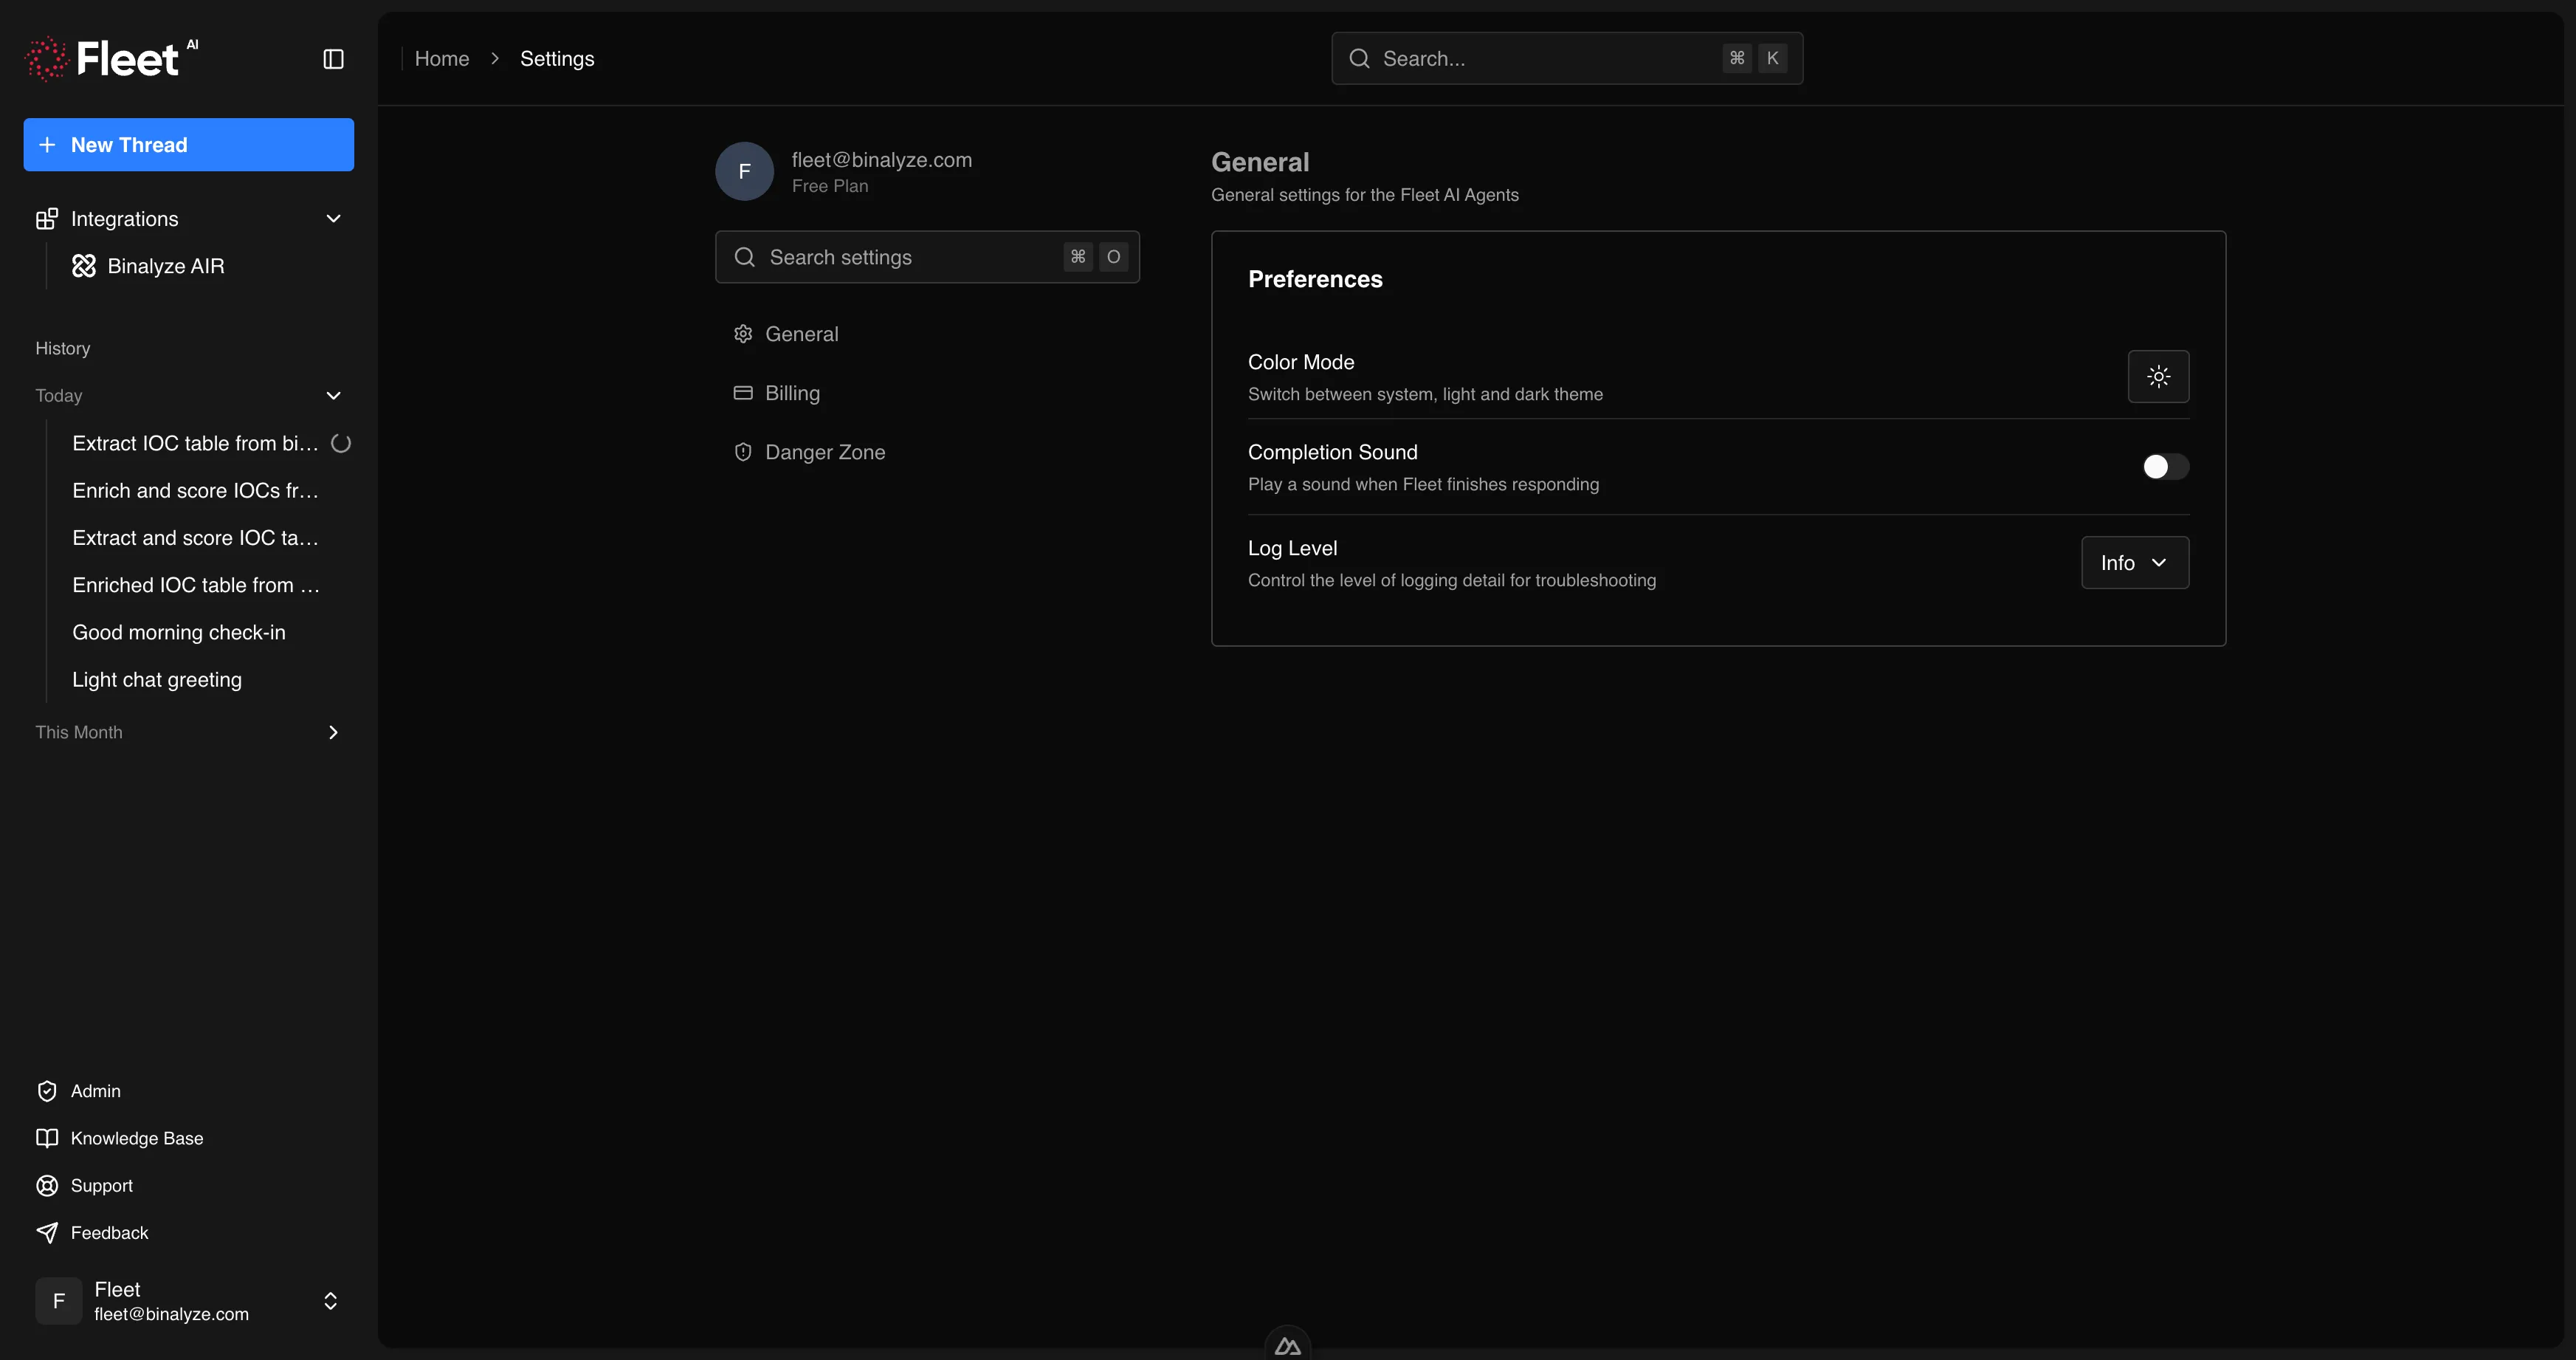
The settings area is accessible from the user menu in the sidebar. On desktop, a sub-navigation sidebar lists the available settings pages. On mobile, settings pages are accessible via horizontal tabs.
General
Section titled “General”General preferences for your Fleet experience:
- Sound — enable or disable notification sounds when Fleet completes a task
- Logging — configure the verbosity of operational logging
Billing
Section titled “Billing”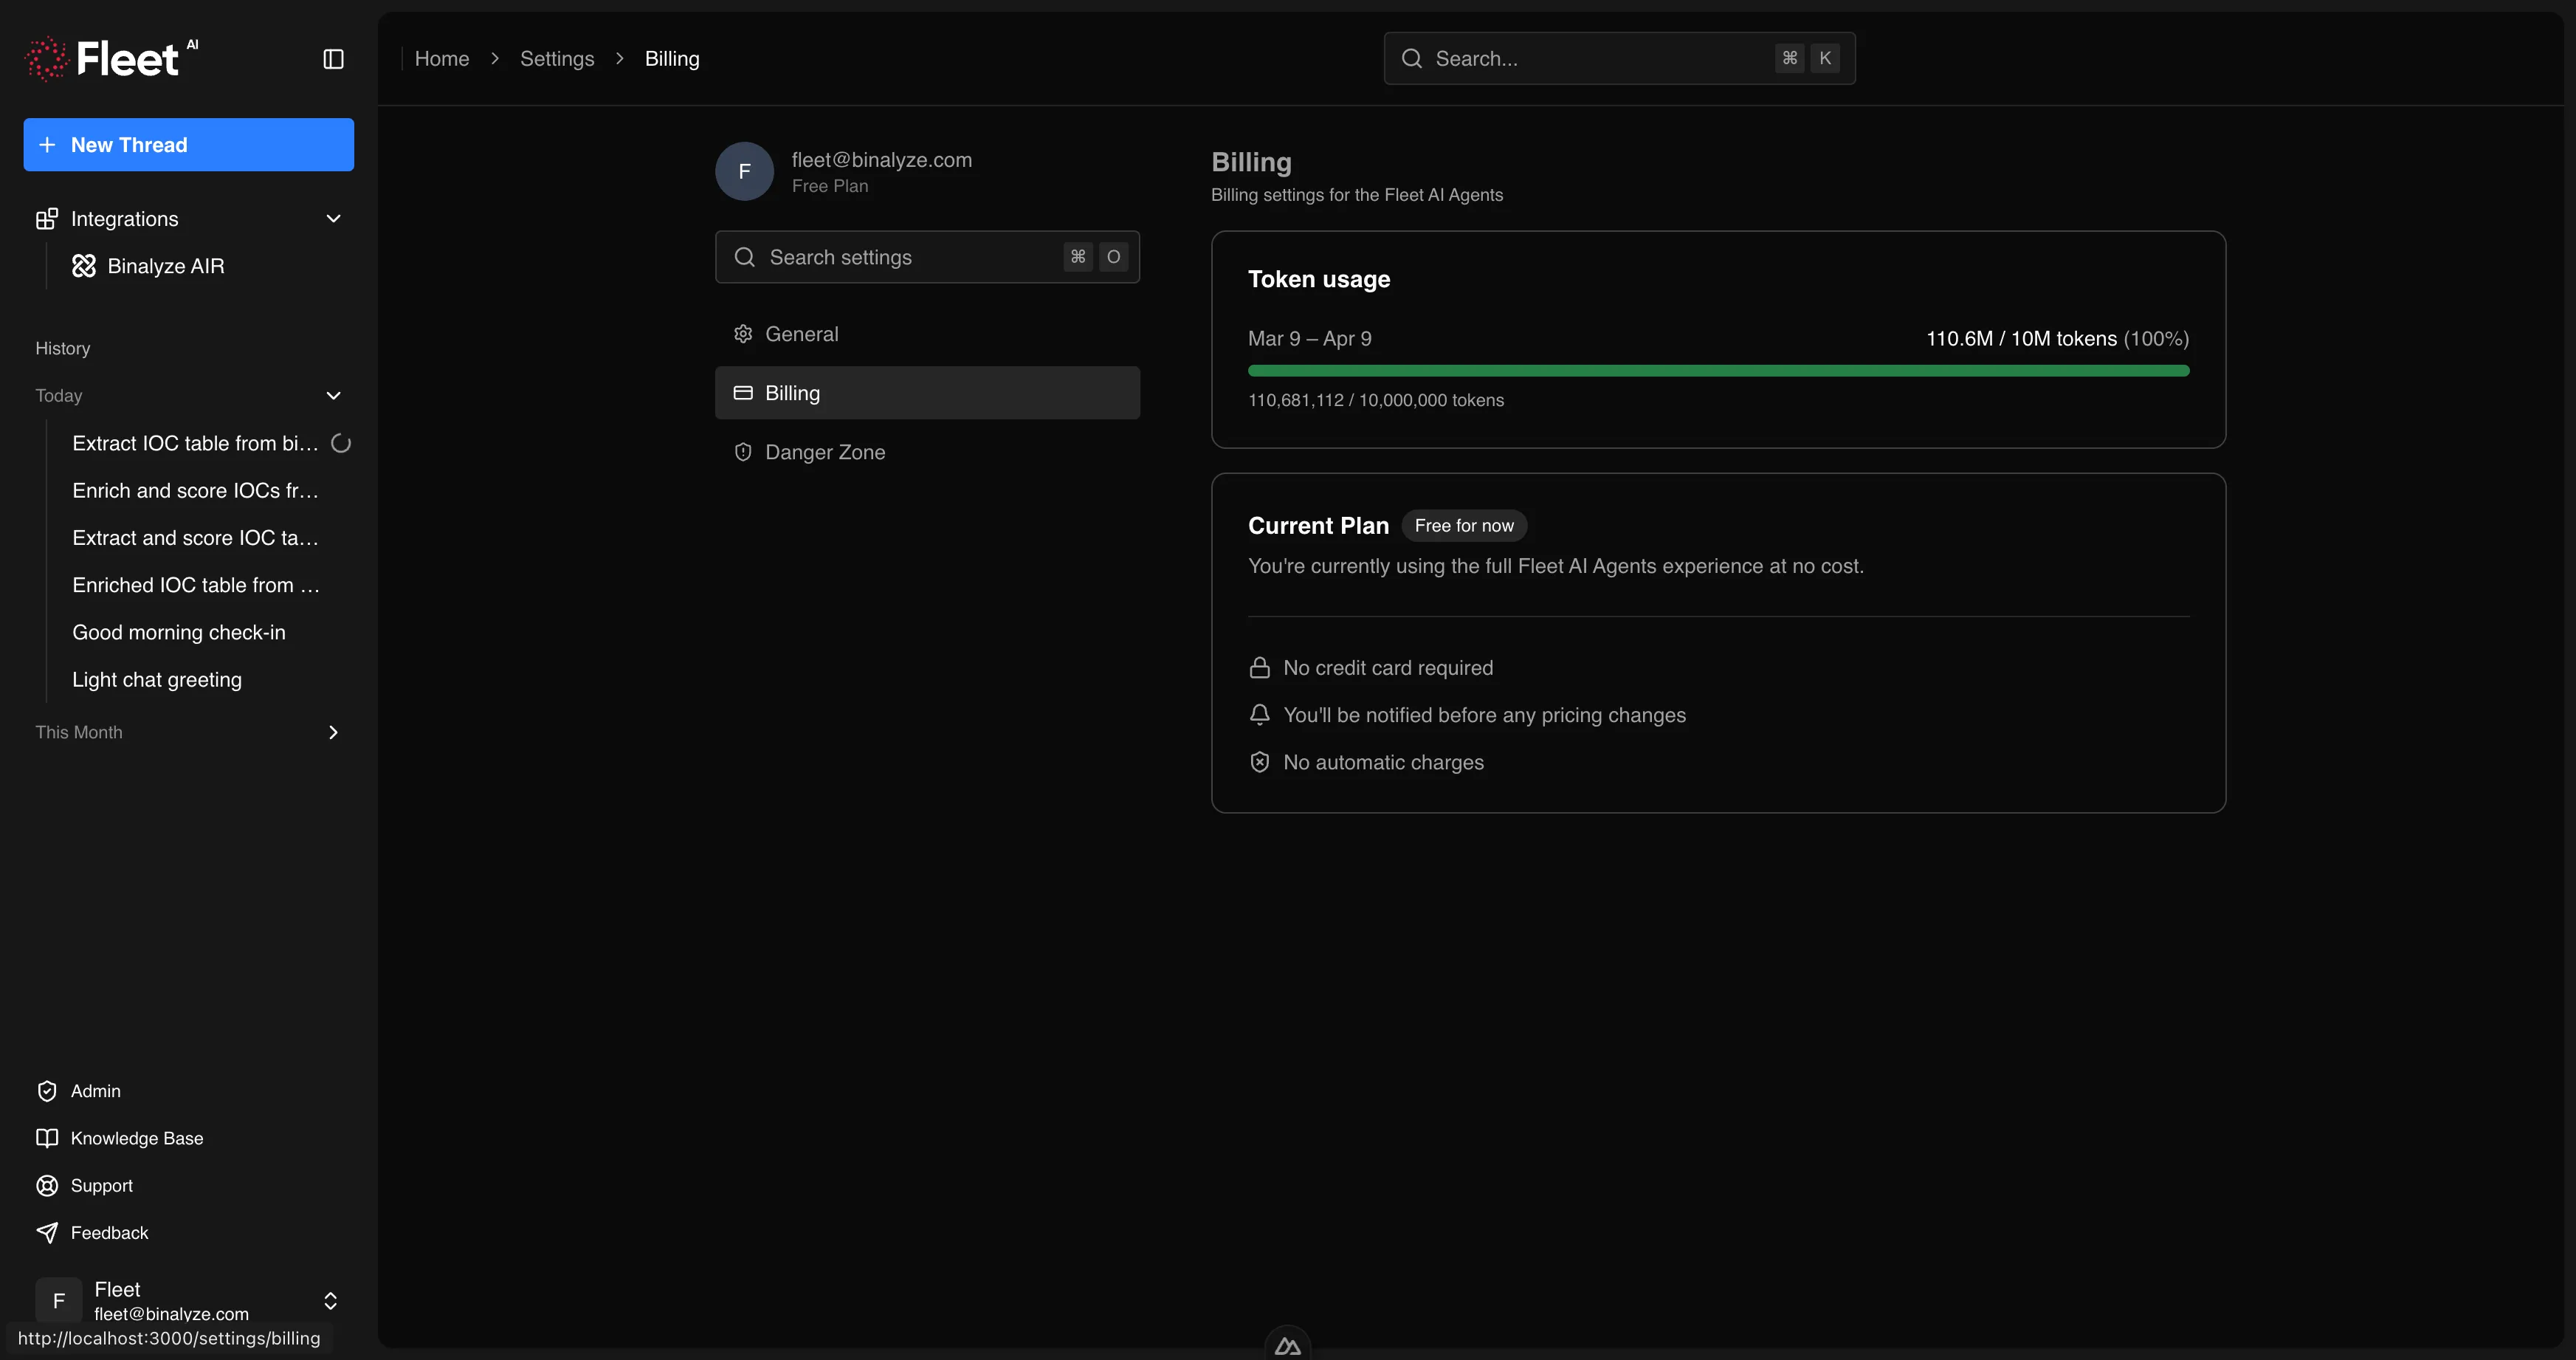
Usage and plan information:
- Monthly allowance — your organization’s token allocation for the current billing cycle
- Usage progress — how much of the allowance has been consumed
- Cycle dates — when the current billing period started and when it resets
If your usage limit is reached, a dialog appears explaining the situation, showing cycle dates, and providing an option to request an extension from your administrator.
Advanced
Section titled “Advanced”Account management:
- Delete account — permanently delete your Fleet account and all associated data (requires confirmation)
Integrations
Section titled “Integrations”The integrations hub is accessible from the sidebar. It displays cards for each available integration.
AIR Integration
Section titled “AIR Integration”The AIR integration page provides a form to configure the API connection:
- Enter your AIR API key
- Fleet validates the connection
- Once confirmed, Fleet can perform AIR operations (endpoint management, evidence acquisition, triage, interACT, investigation)
The integration can be reconfigured or removed at any time. Removing the integration disconnects Fleet from AIR but does not affect your AIR deployment.
See AIR Integration for the full list of supported operations.
Onboarding
Section titled “Onboarding”First-time users see an onboarding wizard after their initial login. The wizard walks through:
- Storage setup — configure where Fleet stores session data
- Integration setup — optionally connect to AIR (can be skipped and configured later)
- Completion — confirmation that setup is complete, with a link to start using Fleet
The onboarding wizard appears only once. All settings configured during onboarding can be changed later from the settings and integrations pages.
Dialogs and Overlays
Section titled “Dialogs and Overlays”Fleet uses several dialogs and overlays for specific interactions:
| Dialog | When It Appears |
|---|---|
| Usage limit | When your monthly token allowance is exhausted. Shows cycle dates and provides an option to request an extension. |
| Usage feedback | When usage passes a threshold. Optional rating and comment on your experience. |
| Feedback sheet | When you click “Feedback” in the sidebar footer. A side panel with a form to submit product feedback. |
| Delete confirmation | When deleting a conversation, integration, or account. Requires explicit confirmation before proceeding. |
| Message feedback | When providing feedback on a specific Fleet response (thumbs up/down with optional comment). |
| Drag-and-drop overlay | When dragging files over the chat area. A full-area highlight confirms the drop target. |
| In-thread search | When searching within a conversation. A semi-transparent overlay at the top of the message stream with match navigation. |
Keyboard Shortcuts
Section titled “Keyboard Shortcuts”Fleet provides keyboard shortcuts for common actions. Shortcut hints are displayed in the UI next to the relevant controls (sidebar buttons, search, view selector).
Key shortcuts include:
| Action | Where |
|---|---|
| New conversation | Sidebar, home screen |
| Global search / command palette | Header |
| In-thread search | Conversation view |
| Cycle view panels | Conversation view |
| Toggle sidebar | Any page |
Exact key combinations are displayed in the interface and may vary by operating system.
Fleet supports two visual themes:
- Light mode — light backgrounds with dark text
- Dark mode — dark backgrounds with light text
Toggle the theme using the button in the header. The selected theme persists across sessions and applies to all interface elements, including logos, integration images, and the login screen.
Admin Pages
Section titled “Admin Pages”Users with administrator privileges have access to additional pages via the “Admin” link in the sidebar footer.
Dashboard
Section titled “Dashboard”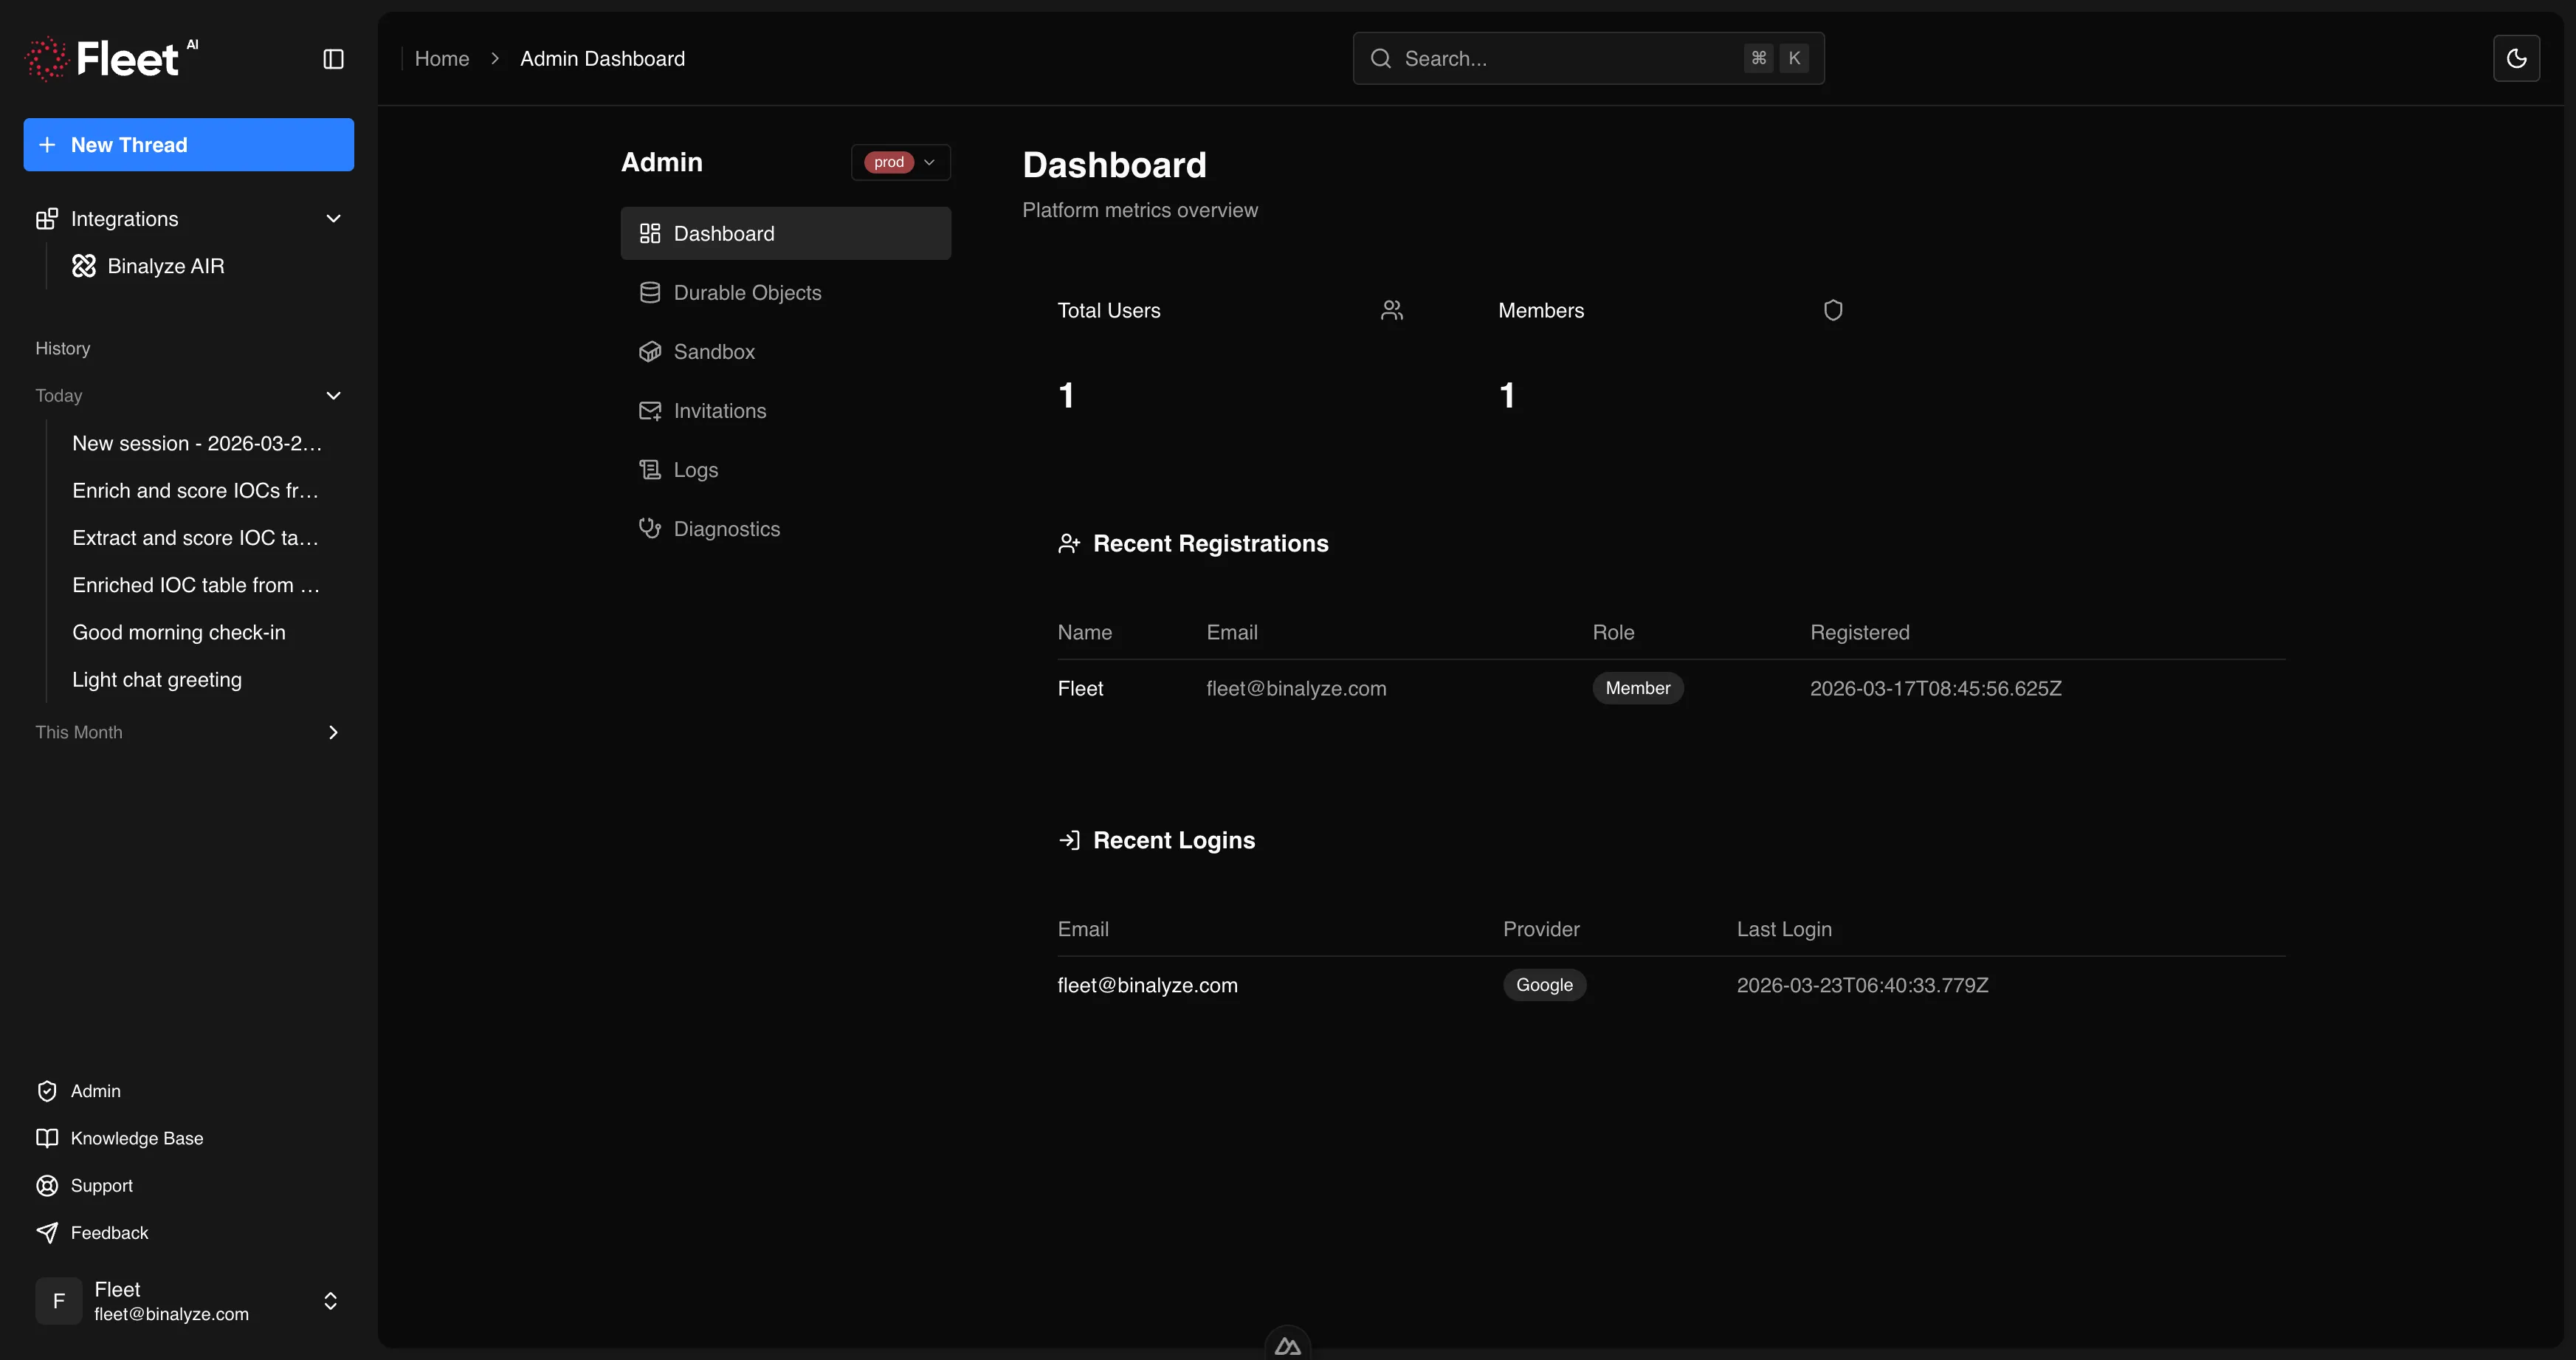
A high-level overview of the organization:
- Key metrics (active users, recent activity)
- Recent sign-ups
- Recent sign-ins
Invitations
Section titled “Invitations”Manage user invitations for the organization:
- Draft and send invitations (individual or CSV bulk upload)
- View sent invitations with status (pending, accepted, expired)
- Resend or revoke invitations
Operational log viewer for monitoring Fleet activity:
- Filter by time range
- Filter by component
- Refresh to see latest entries
Environment Management
Section titled “Environment Management”View and manage the execution environment:
- List active environments
- Restart environments when needed (with confirmation dialog)